In the last post of this series, I set up NeXTstep on an HP PA-RISC workstation. Today, I’m going to get down to business: configure networking, install system patches, outfit it with developer tools, and install some useful software!
As with the previous post, I’ve also made a YouTube video that covers roughly the same topics! If video is your speed, I’d love for you to check it out!
My goal is to end up with a capable machine that I can use like it might have been when new, and learn from the experience.
Foreshadowing networking woes
While it is possible to transfer files from SCSI drives (or even floppies!), getting a pizzabox on my home network makes loading software much easier.
I first tried out NeXTstep on this workstation a couple years ago. The OS installed OK, but I ran in to trouble with networking. I was initially optimistic that I would figure it out:
I think I'm done for the day but soon if I can fight with NFS and NetInfo (lolololol) I can get screenshots off it and software on
NARRATOR: she did not soon win the fight with NFS and NetInfo
Hang on a second: NeXTstep is a workstation-focused Unix operating system from the 80s-90s - how could it be difficult to get it on a network? The answer is a thing called NetInfo.
In a surprise to exactly no one, NeXTstep, being from a company founded by Steve Jobs, had it’s own NeXT-only ecosystem of tools that fit together amazingly well. The cornerstone of NeXTstep networking was NetInfo. If you had a collection of NeXT computers on a network, NetInfo gave you a system to:
manage user accounts that would work across all machines
configure file sharing
control permissions around access to network resources
assign IP addresses and hostnames
quickly bring new machines in to the network
serve this information in a highly-available manner
which is to say: NetInfo is a “directory services” system. That’s all well and good - in the early 1990s that space had many competitors and a “right path” hadn’t yet been established, but…I don’t want my machine to be part of a directory, **I just want it to be on my existing TCP/IP network.
Starting a “simple” network
With that in mind, I (naively) attempted to use the “SimpleNetworkStarter” application.
SimpleNetworkStarter
The SimpleNetworkStarter window has three “steps”:
Select how we’ll integrate with an existing NetInfo network (since I don’t intend to interact with one at all, I have to choose “Provide the services specified below”, a sort of catch-all)
Specify my hostname and IP address - if I were connecting to an existing NetInfo network, I might not have to do this. “Network Options” lets me set more granular IP settings like netmask and gateway; “NetInfo Options” lets me choose how to integrate with existing domains (if relevant).
Setup network services: for my setup I don’t really want any of these things, but as a standalone NeXTstep system, I do have to “Maintain the master copy of network administrative data” (aka, the NetInfo database).
Network Options
NetInfo Options
Configuration Successful
So far, this feels like a really good start, but will it let me fetch files from an NFS share?
Networking woes
I immediately tried connecting to my NAS over NFS - after all, the main point of setting up networking was making it easier to transfer files. Unfortunately, it didn’t work - I could set up the NFS mount with NFSMananger (more on how to do that later), but the mountpoint would always be empty. Here you can see me attempting to reach it by IP address:
a failing NFS mount
So I had some sort of problem. To narrow down potential issues, I ran a few tests:
attempting to ping my NAS from the workstation - this turned out to not work because NeXTstep doesn’t seem to have any ping command. There are probably ways to accomplish something equivalent with the tools it does have, but I just moved on
attempting to ping the workstation from elsewhere on my network. This worked - I was able to ping it from my laptop!
attempting to connect to my NAS with FTP - one of the few network tools NeXTstep does seem to have is FTP, so I gave it a shot. To my surprise, this works!
connecting to my NAS via FTP (successfully)
It did not work via hostname, though, which points to at least some trouble with DNS. Taking a deeper look at the “NeXTstep 3.3 Network and
System Administration Manual” section on “NEXTSTEP Computers in a Mixed Network” (which I probably should have done earlier) shows that I need to manually configure DNS. There’s no GUI options for it, you just have to write out an /etc/resolv.conf:
editing /etc/resolv.conf in vi
After rebooting, I was able to access the NAS via FTP by hostname:
connecting to my NAS via FTP (successfully) by hostname
But still couldn’t use NFS. What gives? I have network connectivity in both directions, and DNS is also now working! I believe this is as far as I got a few years ago, and man I was FRUSTRATED.
Eventually I thought to look in the system log (/usr/adm/messages) for hints:
an error from autonfsmount
and there it was:
autonfsmount: Can't get my address
Can’t get…my address? Doesn’t the computer know its own address? While I don’t know why it has to do this (googling has provided me a couple of quick asides mentioning it, but not much detail), mounting an NFS server requires working reverse DNS for your IP.
I do have a real-ish DNS server for my home network, and it populates based on DHCP leases and IP reservations. This workstation, though, was just using an IP that I habitually hardcode for pizzaboxes (192.168.1.200). I double-checked the DHCP server config, and it was indeed set up with a different host for that IP, and not set up at all for this hostname. I replaced that entry with one for hp712 at 192.168.1.200 for the MAC address of my workstation, and crossed my fingers.
It worked! I could browse my NAS from the file-browser.
browsing my NAS
Setting up an NFS mount
After all that rigamarole, the right way to configure a remote NFS mount goes through the NFSManager.app. While NFSManager lets you configure both “exports” (local directories I share with others) and “imports” (remote directories I want to mount locally).
an empty list of nfs imports
All I have to is click “Add” and fill in the details for my NAS:
adding a new nfs import
That’s it? A lot of struggle got me to this point, but finally I can transfer files.
Patch Tuesday
The first order of business is to run system updates. NeXTstep 3.3 was released in mid-1995, and it had three patch updates: the first at the end of 1995, and the second and third in late 1999. Since NeXT were acquired by Apple in 1997, this patch was made by Apple to address Y2k bugs and other longstanding issues. Thanks, Apple! Thapple.
The third patch is a cumulative update, so that should be all I need. Nextcomputers.org generously hosts the patch for download. Because I’m using an HP PA-RISC machine, I need NS33RISCUserPatch3.tar. System updates need to be installed as the root user, and if you run them as me (the default user) NeXTstep doesn’t prompt to escalate privilges, it just gives an error. Thus, I need to log in as root directly. In order to do that, I need to give the me user a password so the system will stop automatically logging in at boot (giving me a chance to log in as root). To set a password, you go to Preferences.app and navigate to the lock icon.
no password!
password set
password secure
After the next reboot, I then get the login screen (instead of automatically going to the desktop):
nextstep 3.3 login screen
By default, the root password is blank (you can of course fix this after login in the same way as setting a password for the me account). I navigated to where I had put the patch tarball on my NAS, copied it to the HP 712, and unarchived it.
copying from NAS
untarring
the patch package
Double-clicking the package brings up a familiar-feeling Installer.app
installer.app for OS update
Clicking “Install” prompts me to make sure I’m choosing the right architecture (in my case, PA-RISC), runs a program to determine compatibility, and runs the update.
choose system arch
installation in progress
installation complete
After a reboot, I’m on the most recent version of NeXTstep for PA-RISC, and ready for the year 2000!
Getting access to dev tools
What’s next for making a usable system? Developer tools! NeXTstep came on two sets of discs - “User” for the main operating system, and the optional “Developer” disc with compilers, GUI building tools, libraries, and documentation. While there were separate versions of NeXTstep User for CISC (m68k and i386) and RISC (PA-RISC and SPARC) platforms, the Developer disc is “quad-fat” - it contains binaries for all four platforms. I grabbed the Developer disc image from the Internet Archive.
Were this been an actual ISO image, I might have mounted it on my laptop and copied the files to my NAS to make the installer available to the workstation; unfortunately, it’s not. What format is it? The first few bytes of a disk image usually can help figure that out:
When trying to find “magic numbers” like this, I usually check out the NetBSD sources. Since NetBSD focuses on compatibility with the widest possible set of hardware, they often have compatibility for far-out things. As luck would have it, those bytes do show up in sys/sys/bootblock.h: 0x646c5633 is NEXT68K_LABEL_CD_V3. So, this is a non-standard format specific to NeXT. There’s some code that shows how to interact with this kind of disc label - maybe in the future I could put together some code to read the CD like I did for SGI EFS? For now, though, I’m going to try loading the disc image in to my SCSI2SD “fake” CD-ROM drive.
You might wonder why I didn’t start at that point - isn’t copying installers to a network store a bit overcomplicated? In this case, no. Copying a new disc image to the SCSI2SD requires:
opening up the workstation case to get at the SCSI2SD’s SD card
writing a dd command with the correct offset for where the CD portion of my configuration is (hope I wrote it down!)
waiting ~5 minutes for the image to write
putting it back
This time, I have no other option! So it’s time for the whole rigamarole:
opening case
removing sd card
insert sd card
dd the image
we've got a disc
So it’s time to install dev tools, right? I had thought so! While NeXT didn’t see fit to including any sort of “Readme” or “Installation” document in the root of the CD, there are some .pkg files in the /NextCD/Packages subdirectory that look promising:
DeveloperDoc.pkg
DeveloperLibs.pkg
DeveloperTools.pkg
GNUSource.pkg
Signed in as root, I started with DeveloperTools.pkg, got mid-way through, and…got an error:
an error while installing the developer tools
If using computers has taught me anything, it’s that “sometimes if you try it again things work”, so I tried this install process several times, all ending in similar errors. At first I thought that it was making it further in the install process each time, but eventually I realized that wasn’t the case. Files that had succeeded in a previous run would be the source of cat: write error: Bad address on the next. I tried to eliminate potential causes of the error:
swapping around RAM sticks (on the assumption “Bad address” means it is a RAM problem)
trying a different SD card (on the assumption it means an error writing or something)
trying a different SCSI2SD unit (on the assumption that was bad)
but none seemed to make a difference. What to do? I decided to try copying the contents of the CD to my NAS, and then running the install from there.
an error while copying the dev tools
This also had failures during the copying of a handful of files, but I was able to note down which ones and try each again - with success!
Installing the dev tools
and I also can’t seem to find any such overall thing in the NextLibrary directory (where the developer docs live) or online! “User friendliness” is something that wasn’t necessarily first on NeXTs mind when making tools for professionals. I do believe that it was packaged with such a document (on paper), but we can make do with our critical thinking skills - there are installable packages in the /NextCD/Packages subdirectory. Things are split across four packages:
DeveloperDoc.pkg
DeveloperLibs.pkg
DeveloperTools.pkg
GNUSource.pkg
Signed in as root, I started with DeveloperTools.pkg and proceeded to do all of the others. The process of installing each package was identical to the installation process of OS update I did earlier - seems reasonable, since they both use the standard Installer.app process.
Speaking of patches, there is also a patch for the developer tools available. The most recent is the NeXTstep 3.3 Developer Patch 2 (vs patch 3 for the NeXTstep User software), and once again was made by Apple in 1999 after they acquired NeXT. The nextcomputers.org website hosts a copy of the patch.
done patching!
What’s in the dev tools?
the installed developer apps, in Workspace Manager
After going through the effort to install NeXTstep Developer, what do we get? A new directory in the filesystem root, NextDeveloper containing some apps, demos, examples, various bits of GPL-required source code, headers for system libraries, and documentation. The structure is (unsurprisingly) rather similar to older versions of the OSX developer tools’ /Developer directory. The similarities don’t end there, though - several of the tools, like Interface Builder, will be rather familiar to modern Apple-ecosystem devs, like Interface Builder:
interface builder
Other notable programs include:
ProjectBuilder, a tool for managing source files and dependencies. that later grew in to an IDE and was eventually renamed XCode
HeaderViewer, for exploring what libraries were available and their documentation
ProcessMonitor, which seems to be a spiritual predecessor to the modern Activity Monitor.
ProjectBuilder
HeaderViewer
ProcessMonitor
I particularly love the demo apps - they’re pre-built and ready for running in the Demos directory, but their source is also available as examples of how to develop for NeXTstep. The Chess game has survived in to modern OSX:
Chess.app
Some demos that stood out to me were:
Sound, a sound editor program (I just love a good waveform visualization)
BoinkOut, a version of Breakout, the classic Atari arcade game that Steve Jobs had dubiously meaningful involvement with
FileMerge, a visual “diff” tool that survives today as part of Apple’s dev tools.
Sound editor
BoinkOut
FileMerge
As a developer I really appreciate the depth of documentation and tooling included here - in 1995 there wasn’t nearly the depth of reference and tutorial information available on the internet, so bundling it with the tooling was crucial. Then again, for the cost premium ($4999 for NeXTstep Developer, vs $799 for NeXTstep User, according to Computerworld) it had better have been as deep as possible! I’m excited to dive in and try to make some applications in the future to get a sense of what it was like to use at the time.
Lighthouse apps
What else do I need to make a usable machine? How about some office productivity tools? One software house who focused on that sector for NeXTstep was Lighthouse Design. Their wide range of software seems to have been popular at the time, and (mercifully) when they were acquired by Sun Microsystems in 1996, they released installers and product keys for all their NeXT software for free online. Yet again, the nextcomputers.org site maintains a mirror of all the software, so I’ve downloaded it to install on the HP 712!
Somewhat importantly, they seem to have published their software as “quad-fat” - containing code for all four platforms that NeXTstep might run on. Since the PA-RISC platform was only supported by NeXTstep version 3.3, I suspect that much software for NeXTstep was never released for it. Not Lightstep’s, though!
This collection includes classic productivity suite apps like:
OpenWrite, a word-processing program
ParaSheet, for spreadsheets (Lighthouse calls it a “traditional” spreadsheet in comparison to their more powerful Quantrix software)
Concurrence, a presentation program (according to its docs, designed for producing both on-screen presentations and printing to 35mm slides))
OpenWrite
ParaSheet
Concurrence
As well as more “media-focused” apps:
WetPaint, an image editor
OmniWeb, a web browser written by the Omni Group, published at the time by Lighthouse. Newer OSX versions are still available.
EquationBuilder, for typesetting more complex mathematical expressions. NeXTstep includes TeX with the OS, but EquationBuilder is certainly more user-friendly.
WetPaint
OmniWeb
EquationBuilder
Finally, there are some apps more appropriate for “serious business” use:
Diagram!, for making visually pleasing figures
TaskMaster, project planning (including Gant charts) for complex endeavors
VarioData / VarioBuilder, networked database-building tools (in the vein of FileMaker)
Diagram!
TaskMaster
VarioData
As you can see, it’s a quite wide range - Lighthouse’s apps fill out my NeXTstep HP 712 nicely.
What’s next?
It’s taken me a long time to get this post (and video) done, and I don’t want to make any promises that the next one in this series will be any faster. My next goal with this setup is to write an application with the developer tools. In the mean time, though, I’ll probably do some projects with other machines to inject a little variety.
As ever, I’d love to hear your stories about using these tools! Did you build apps using NeXT’s developer tools? Or maybe run a business with Lighthouse’s productivity apps? I’d love to hear about it! Feel free to email me at sophie@pizzabox.computer!
It’s been a long time since my last pizzabox post - over a year! There’s been a lot going on in my life but I’m excited that lately I’ve had a lot more free time, which means more time to explore the world of workstations and share with you!
I’m also excited announce that I’m trying out YouTube videos - not instead of these posts, but in addition to them. This post has a sibling video, so if that’s more your jam, check it out.
This post is part one of a multi-part series about running NeXTstep on the HP 712. Today I’ll dive in to installation process.
NeXTstep is a historically interesting OS (more on that in a bit) and while I do own some original NeXT hardware, it’s a difficult to actually use - one of my longer-term projects is to make adapters for the NeXTstation to use more common input devices. That doesn’t stop me from playing with NeXTstep, though, because it also runs on one of my favorite pizzaboxes, the HP 712.
A note on cAPitALIZAtion
NeXT used a variety of capitalizations of NeXTstep, including
NeXTSTEP
NEXTSTEP
NeXTStep, and
NeXTstep
Regardless of historical accuracy, I think “NeXTstep” looks the coolest, so I’m going to use that throughout
The NeXTstep in computer evolution
The OS I’m installing is NeXT, inc’s NeXTstep. NeXTstep was made up of:
Those components make it sound like “yet another boring 1980s-1990s commercial Unix”. However, the NeXT few layers (NO APOLOGIES FOR PUNS) made it quite different from other Workstation OSes. It had:
NeXT’s Objective-C runtime for building applications (an ancestor of Cocoa)
I’ll dive deeper in to what features made NeXTstep special in a future post, but suffice to say: NeXTstep was incredibly important for the future of operating systems. While NeXT themselves didn’t have much success selling their workstations (or their OS…or their toolkits…), their work directly forms the basis of MacOS X and indirectly influenced the development of other OSes.
In the mid 1990s, NeXT’s effort to replace their Motorola 68000-based workstation architecture with a RISC one fizzled out. When they stopped selling hardware, they started selling new ports of NeXTstep for other architectures: Intel’s IA-32, Sun’s SPARC, and HP’s PA-RISC. The version I’m installing is NeXTstep 3.3 - the first and final version for PA-RISC.
This pizzabox Hewlett-Packs a punch!
The hardware I’m using is the HP 9000 Model 712. I’ve written about setting it up to use its native HP-UX OS, but that’s not the only trick up its sleeve. The 32-bit first-generation PA-RISC machines in HP’s 9000 family can run NeXTstep and are much faster than NeXT’s 68000 hardware. The 712 is a later model from that generation, packaging the power of earlier models in to a less expensive and smaller package.
Important things to know about my 712 are that it has:
64MB of RAM (midway between the min of 16MB and max 128MB)
a 60 MHz processor (later models being 80 or 100 MHz)
a VRAM expansion (so it supports all relevant resolutions)
no hard disk (or at least, it didn’t ship with one, though it supports one)
also no floppy disk drive, though it also can (I’m guessing this means it was netbooted in its former life?)
IBM PC-style I/O: video comes via a VGA port, and peripherals are the PS/2 type
Besides the computer, the other ingredients I’ll need are:
a hard disk - as usual, I’ll be using a SCSI2SD, but as you’ll see in a bit, the configuration is a bit non-standard
installation CD - I got mine from the Internet Archive
a CD-ROM drive - at first I tried to use my physical drive, but it seems to be broken. I ended up using the SCSI2SD as a CD-ROM as well.
Disk configuration mis-STEPs
Approaching this naively, I’d expect the SCSI2SD’s default settings to work. Out of the box, it’s configured to have SCSI ID 0 be a 2GB hard disk - nothing fancy. I tried this, and the installation seems like it’s going to work, but when it comes time to format the disk, it runs in to problems:
disk initialization failed
Digging around on the internet a bit gave me a clue - NeXTstep is picky about drive geometry. Some fine folks on the “NeXT Computers” forum geometry settings that will work with NeXTstep on a SCSI2SD. Unfortunately, the scsi2sd-util software doesn’t have a way to set the important sectorsPerTrack and headsPerCylinder. Instead, I had to save the configuration to an XML file, open it up and edit those settings, and re-import the config in the utility. The offending default geometry settings were:
This is good enough to get all the way through the install and software installation process, but it will just hang on the first true post-installation boot:
hanging after installation
There’s a lot going on here, and it doesn’t explicitly tell you what’s going on, but there are clues. The first interesting bit is:
Checking disks
/dev/rsd0a file system clean: skipping check
mountfs: illegal remount request
mount: /dev/sd0a on /: Invalid argument
mount: giving up
In a typical Unix boot sequence, the root filesystem is first mounted read-only, checked with fsck, then re-mounted read-write. It sounds like that re-mount didn’t work! There’s more indication that the root is still read-only further down when it attempts to start syslogd:
Starting early daemons: syslogdFeb 15 23:35:26 localhost syslogd: cannot create /dev/log: Read-only file system
So, it seems like I’m having trouble with /dev/sd0a, the root partition. In a normal world, I’d expect that that corresponds to:
the first partition (the a)
on the first disk (the 0)
attached to the SCSI bus (the sd)
Given that I have my hard disk at SCSI ID 0 and CD-ROM at ID 3, you’d think that sd0a would be the hard disk. You would be wrong. If you read a little higher in this boot output, it says:
The following scsi disks have been found:
  sd0 at target 3
  sd1 at target 0
Excuse me? sd0 is SCSI ID 3? That’s…my CD-ROM drive. I guess it makes sense that it can’t be mounted read/write?! It took some digging, but I found an explanation as to why from an unlikely source - a NeXT knowledge-base article from 1997! NeXTAnswers #1684 explains:
Q: How are SCSI device numbers assigned on HP hardware?
A: Unlike NEXTSTEP on NeXT and Intel-based hardware, NEXTSTEP for PA-RISC assigns SCSI device numbers in order of decreasing SCSI ID numbers. In other words, NEXTSTEP scans down by SCSI ID, assigning device number 0 to the first device encountered, device number 1 to the second, etc.
For example, a typical HP SCSI setup consists of a hard disk at SCSI ID 6 and a CD-ROM drive at SCSI ID 2. In this example, the hard disk is assigned SCSI device number 0, while the CD-ROM drive is assigned device number 1. A second hard disk added at ID 1 would then be assigned device number 2.
Well that seems unusual! Why would NeXT number differently on PA-RISC than other platforms? It turns out…this is how HP does it. In the Owner’s Guide for the HP 712 on page C-13 it has a table to help you choose SCSI IDs, and it notes that your internal hard drive would normally be ID 6 (the “Winchester Disk”). On page 6-2 (the beginning of the section about CD-ROM drives) it notes:
The instructions in this chapter assume that your CD-ROM drive is set to the factory default address of SCSI ID 2.
The boot disk being SCSI ID 6 and an external CD-ROM being ID 2 is not what I would typically expect. On a Mac (at least!), it’s traditional to have the internal boot drive be ID 0 and a CD-ROM be ID 3. I can’t say I know why HP numbers things differently from other manufacturers, but…it seems that they do.
To bring this back around: what’s happening here is the bootloader is starting up the kernel from the drive it’s on, then telling it to proceed to mount /dev/sd0a as root. Because my IDs are set in a “typical” fashion, that results in it trying to mount the CD-ROM as root instead of the boot disk. Renumbering my SCSI drives to have the disk at a higher ID than the CD-ROM fixes the problem.
My final SCSI2SD configuration had the hard disk at ID 6, and the CD-ROM drive at ID 3.
Finally doing the install
Now that we know that:
NeXTstep is picky about disk geometry
HP workstations are picky about about SCSI ID ordering
and have the SCSI2SD set up correctly, it’s time to actually start the installation! Booting from the CD-ROM brings up the NeXTstep bootloader, a language choice screen, and the installation main menu. Once I give my consent for beginning the installation, it goes through what looks like a pretty normal Unix boot.
NeXTstep bootloader
language choice
installer main menu
Once the system is up, the installer shows which disk it thinks it should install to. If I accept that choice of target disk, the installer gives me one last change to opt-out before the point of no return.
As the main-menu warning indicates, the installer will entirely take over your hard disk. There are some notes online about it just being generally impossible to construct a disk with an HP-UX and NeXTstep partitions. I suspect that’s why NeXTstep uses a bootloader, rather than passing kernel parameters from the firmware prompt like most of its contemporary workstations - the firmware isn’t capable of reading deeply enough in to the disk.
installer unix boot
boot disk choice
point of no return
First the disk needs to be “prepared” - I’m assuming that behind the scenes it’s writing a partition table and formatting the disk. Then, files are copied from the CD-ROM. The formatting takes about 5 minutes; the copying takes about 12 minutes.
formatting the disk
copying files
copying complete
After the copying stage, it’s time to reboot from the the hard disk for software installation. This time, it’s not in text mode anymore! My HP 712 isn’t currently connected to a network, so the networking part of the boot process complains. A quick “Control-C” nudges the process alaong.
booting from disk
oh no! no ethernet!
The first graphical step is to configure hardware. Since NeXT knows exactly which components are in this workstation (since it’s a specific HP model, instead of an arbitrary PC), I can just proceed with the defaults. After configuration, I get to select software I want to install (on top of the base system). The options are:
non-English language support (Swedish, Spanish, Italian, German, and French)
documentation and on-line help (which sound an awful lot like they’re the same thing)
demo programs, the Webster English Dictionary program, and the dictionary’s supporting images
PPDs (Postscript Printer Descriptions) for various printers and imagesetters (for serious publishing)
emacs and TeX (for serious nerdery)
I’m going to install everything - the process takes about 35 minutes.
device config
which software?
all done!
After a post-installation reboot, I get a chance to select which language to use. Folks who’ve installed Mac OS X may find this screen rather familiar:
keyboard and language choice
and that’s it! I’ve successfully installed NeXTstep 3.3 on an HP PA-RISC workstation and I get my reward: the NeXTstep desktop.
first boot - clean desktop
What’s the NeXT step? (SEE WHAT I DID THERE?!?!)
This post is only the first part of my NeXTstep on PA-RISC project. I’m planning on there at least being a Part 2 on setting up networking and finding and installing useful software (like the developer tools!) and a Part 3 of reflections on the experience, its similarity to (and differences from!) the modern Mac OS. Further in the future, I’d love to do a Part 4 about developing a full application on NeXTstep.
This is the part where you come in - do you have any stories about using NeXTstep? I’d love for you to send them to me via email to sophie@pizzabox.computer! Also, please let me know if you’d be willing for me to include quotes from your stories in part 3 of this series (and how you’d like to be cited).
In this post, I’m going to go through the process of setting up Apple’s A/UX on a Quadra 610. It’s been a long time in the making - I think I had the hardware for nearly a year before I finally got A/UX running properly!
Wait, what is A/UX?
I’m not misspelling AIX, the IBM Unix that ran on the Apple Network Server range. It is a hybrid of Unix and the classic Mac OS, but it isn’t related to the Mac OS X we use today. A/UX is:
an operating system sold by Apple for their Motorola 68000 computers (while Apple was developing a version 4.0 that ran on their PowerPC computers, it was never released)
built on Unix System V
capable of running a Mac OS environment on top of the Unix base
You can log in to and use A/UX in a few modes. The main one is a Macintosh Finder interface that can run normal Mac programs and Unix programs - both console ones (in the “CommandShell” terminal emulator) and X11 ones (via “MacX”, a rootless X client).
Console
32-bit Finder
X11
The version of A/UX I’m installing here is the final one - 3.1. A/UX 3.1 is based on System 7.0.1 (for the Mac parts) and an amalgam of Unix System V R2.2 with some backported bits from System V R3, R4, and BSD (for the Unix parts).
the output of uname
The machine
While Apple made a few machines (in its Quadra line) that fit my definition of a pizzabox, they don’t all run A/UX. An FPU is required, and there are only drivers for some models (Apple’s compatibility reference).
the Quadra 605 shipped without an FPU (it uses a 68LC040 processor), and even if you replace the CPU with a full 68040, the video isn’t supported
the Quadra 610 shipped without an FPU, but if you replace the processor, it can work
the Quadra 660av has an FPU, but isn’t compatible (I believe this is because of ROM differences?)
So, a Quadra 610 it is, then!
Quadra 610 nameplate (a bit scuffed up)
I am given to understand that Apple sold some Quadra 610s with the full 68040, but mine wasn’t, so I had to hunt down a replacement CPU. Apple didn’t use ZIF sockets for their CPUs, so I just had to pry out the old one:
old CPU
old and new CPUs, side-by-side
installing the new CPU
These older designs didn’t produce enough heat to need a heat sink. Imagine running a modern higher-end computer (like an Intel Core i7) without any special cooling hardware!
After replacement, I verified that the machine would still boot to the installed System 7 (it did!) and started prepping to install A/UX.
Installation woes
I had hoped that with the CPU in order, I was in for smooth sailing. I procured an install CD, made a boot floppy, booted in to the installer, partitioned my disk, and…realized that the built-in 80 MB hard drive was far too small to realistically run A/UX. Some guides suggest that it is theoretically possible to do a stripped-down setup under such tight constraints, but I wanted to explore all that A/UX has to offer, not the lowest common denominator.
When I need to replace a broken, missing, or “inadequate” hard drive, the tool I reach for is the trusty SCSI2SD. I started with the normal “out of the box” config, restarted the install process, went to partition the disk, and…the Apple HD SC Setup tool refused to deal with a drive whose model it doesn’t recognize. Drat.
There are patched versions of HD SC Setup that allow it to format any drive, but having partitioned the Quadra 610’s internal drive, wiping its former System 7 install, I no longer had a useful Mac test-bench. I decided to try preparing an A/UX partition layout from Linux, writing it directly to the SD card I’d use in the SCSI2SD. This…wasn’t a very good idea. I may have misused the tools, but trying to boot with the hacked-up drive connected caused the Quadra to boot to a “Sad Mac” screen (I believe because it had an almost, but not totally valid partition table on the normal boot drive).
At the time, I didn’t think that bad data on a drive could cause a “Sad Mac” error, so I dove in to a bunch of fruitless fixes, including trying various termination settings (at one point, I believe I installed the termination resistors backwards, which…probably didn’t help). I tried to use third-party formatting tools from my Quadra 605, but it also wouldn’t boot with the SCSI2SD connected. I ordered internal active terminators, I tried different SCSI ID layouts, nothing seemed to work.
Installation successes
Over the course of a couple of months, I tried several times to get the install rolling (often trying the same things that hadn’t worked before, in the hope that something had “magically” changed). What finally worked was (some combination of):
starting from a blank SD card, instead of one with my failed attempt to pre-create a partition table - I “cleared” my SD card by dd-ing /dev/zero to the first few MB of the card.
not having the terminator resistor pack in backwards
got the drive to not cause a “Sad Mac” error on boot. Partitioning it was also pretty easy - it turns out that if you set the manufacturer and model strings to magical values in the SCSI2SD Utility, the stock HD SC Setup will be OK with formatting it. My config ended up being:
<SCSITargetid="0"><enabled>true</enabled><quirks>apple</quirks><deviceType>0x0</deviceType><deviceTypeModifier>0x0</deviceTypeModifier><!-- The size has to be less than 2GB total
for A/UX to boot from it --><sdSectorStart>0</sdSectorStart><scsiSectors>3984589</scsiSectors><bytesPerSector>512</bytesPerSector><sectorsPerTrack>63</sectorsPerTrack><headsPerCylinder>255</headsPerCylinder><!-- These are the magical settings: --><vendor> SEAGATE</vendor><prodId> ST225N</prodId><revision>1.0 </revision><serial>1234567812345678</serial><modePages></modePages><vpd></vpd></SCSITarget>
For the installation process itself, I basically followed the instructions from A/UX Penelope pretty closely. I wont repeat their instructions, but here’s some screenshots of my experience:
starting the installation
choosing what software to install
Apple HD SC Setup
Installing files
Installation complete
First boot - needs the Enabler
Installing the Enabler
First boot - seems to be working
Kernel has been reconfigured
Some notes from my experience:
on the Quadra 610, A/UX wont boot after install until you boot from another disk and install the “System Enabler 040” (https://support.apple.com/kb/TA28948) by dragging it in to the “MacPartition” System Folder
formatting the hard drive takes a long time - more than an hour for my ~1.9 GB disk!
some sort of SCSI error appeared on screen, but didn’t seem to actually impact the process. The error references /dev/dsk/c104d0s6, even though my actual disk is c0d0s0:
the SCSI error during install
Impressions of A/UX
An A/UX desktop
There doesn’t seem to be a ton of “special” configuration or tools on the Unix side - the Mac Control Panel only does things that apply to Mac programs, and the Unix parts can only really be configured by using unix utilities / config files. My understanding is that Apple marketed A/UX as a way to run your existing Unix software along side Mac productivity apps - it doesn’t seem like there was any focus on unique A/UX-only possibilities.
One exception to this was “Commando” - a Mac UI for launching Unix commandline tools. Commando allows you to choose options and input files using a dialog box (instead of memorizing options). Commando was also part of Apple’s IDE for developing Mac apps, the Macintosh Programmers Workshop (some docs are here). I like how Commando dialogs serve as interactive documentation - I’m not sure I’d use them every day (vs the commandline), but it’s much nicer than manpages for exploring options.
commando dialog for mount(1)
Booting A/UX is a little bit unusual - it first boots in to a normal System 7, then runs a program that switches control over to A/UX (which completely replaces the original Mac OS in memory). It reminds me a little bit of LINLOAD, a tool that let you start Linux from MS-DOS. Other pizzaboxes don’t seem to have anything comparable about their booting process:
first, because they are (mostly) running their native OSes rather than an alternate one
second, because they largely have robust ROM Monitors
The original Mac ROM was strictly tuned towards the Mac OS - it included Toolbox routines, for example. It seems like Apple more or less just kept going with a ROM similar to the original Macintosh until they moved to the OpenFirmware monitor on PowerPC macs.
What might have been
It’s impossible to use A/UX without thinking about its potential. Apple managed to release an OS that was nearly as usable as the Mac OS, but had the advantages of Unix! I’m curious how viable a version of A/UX that doesn’t have any Unix tools, just runs Mac programs in isolated Unix memory spaces and with pre-emptive multitasking, would have been. I’m not sure if the Mac programs each ran in an isolated fashion or if they all were grouped together. Throughout the 1990s, Apple experimented with a bunch of paths to “modernize” the Mac OS: Pink/Taligent, Copeland, adopting BeOS, and the eventual plan of merging the Mac OS with OpenSTEP. Would the computing world be different if they had run with a consumer OS based on A/UX?
From here
As always, if you have any stories about using A/UX, a Quadra 610, or any other pizzaboxes, I’d love to hear them! You can reach me via email at sophie@pizzabox.computer. I intend to one day work on writing some software on A/UX to have a deeper understanding of the experience. I’d also love to do some benchmarking of using A/UX as an AppleShare server vs a more standard System 7 install on the same hardware - I believe this was one of the most popular uses of A/UX.
You may now switch off your Macintosh safely
I want to thank my friend Cameron who helped me with this project - we experimented with various ways to get the install going over the course of months, and I wouldn’t have been able to get things working without them!
I haven’t been writing super frequently over the past few months, so I’ve missed introducing a couple of the newest additions to my collection. They’re all from manufacturers that I already have some boxes from, but represent different eras and technology than the boxes I already had.
a stack of pizzabox workstations
A couple of SPARCs
The middle two pizzaboxes in the picture are SPARC boxes from Sun. The more elderly one is the SPARCstation 20. The 20 is the most high-end 32-bit workstation Sun ever made - its successors were the 64-bit “Ultra” series. Unlike the single-digit SPARCstations (1, 2, 4, 5), the double-digit SPARCstations (10, 20) have swappable processor cards (called “MBus” cards) and support multiple processors. Mine has two 60MHz SuperSPARC processors! This one came to me from someone cleaning up old gear on the ClassicCmp mailing list. A kind soul who lived nearby picked up all the gear, cobbled together a few broken SS20s in to a working one, and sent it to me!
The other one is a SunBlade 150. It’s a bit of a stretch of my definition of a “pizzabox” - it’s 118mm tall, 18mm more than my arbitrary threshold. I bent the rules because (if we allow for larger boxes) this is the last Sun pizzabox ever made. It certainly sold more units than the only newer pizzabox model I’m aware of, the HP AlphaStation DS15 (the SunBlade was introduced in late 2002, the AlphaStation in late 2003). Where most of my pizzaboxes have SCSI hard disks, proprietary expansion slots, custom peripheral buses, and advanced framebuffers, the SunBlade 150 uses IDE, PCI, USB, and an ATI Rage XL - it’s practically a contemporary PC with a SPARC processor!
Another DEC architecture
The DECstation 5000 / 200 was a heck of a find - when I saw it listed on eBay along with its original external SCSI enclosure, a DEC keyboard and mouse, some drives, and lots of cables, I had to snap it up before anyone else did! There seems to be not that many of these left - it’s a generation of workstations that even DEC soon abandoned. As DECs competitors were all working on their own RISC processors, DEC hedged their bet on the CISC VAX architecture by building the DECstation series of MIPS-based computers. They typically ran Ultrix, the same Unix that DEC sold for VAXen. A few years later, DEC introduced their own RISC architecture, the Alpha, and a new Unix (OSF/1).
Motorola-powered HP 9000
The final box in this crop is the HP 9000 Model 425e - one of their final m68k-powered boxes (sold concurrently with the introduction of PA-RISC). I’m excited to be able to compare it with the Model 712. Many manufacturers switched from m68k to some sort of RISC architecture in the late 1980s/early 1990s, but the m68k boxes are often hard to find. If I get a chance, I’d love to write an app on the 425e and then port it to the 712 - I have some “porting guide” documentation lying around!
Over the past few weekends I’ve gone on a bit of an adventure with the SGI Indy. This yak-shave has everything - an OS install, lots of SCSI problems, a completely overkill golang utility, and a happy ending. Since it’s pretty long, I’m gonna dive right in.
A disk upgrade
It all started with a drive replacement - I got an order of SCS2SDs in and decided that I should allocate the faster SCSI2SDv6 I’d been saving to the Indy. At 100 MHz it’s one of the fastest pizzaboxes in my collection, so I think it’ll be better able to use the increased IO bandwidth the v6 can provide - supposedly up to 10MB/s vs 2.6 MB/s for the v5.
Installing the new drive took a few steps. First, the firmware my v6 had loaded on it seemed to have some odd bugs - the Indy wouldn’t POST with it connected! I tried a lot of variations of settings and what ended up working was…updating the firmware of the drive.
Out of the box, the SCSI2SD acts as a hard drive on SCSI ID 0 - a reasonable configuration for most systems. Unfortunately, SGI assigns ID 0 to the controller (most systems assign the controller ID 7). When the SCSI2SD is set to 0, the Indy believes that all SCSI IDs are pointing to the SCSI2SD, and basically nothing works. When I set it to ID 1, I was able to format it with fx and move on to the install.
SCSI gremlins ruin an evening
A disk replacement is a natural opportunity to install a fresh OS. The previous OS had been loaded via netboot and controlled via a serial console - I had neither a CD-ROM drive nor a suitable keyboard and mouse at the time, so this would be my first graphical install. I also took this opportunity to downgrade from IRIX 6.5 to 5.3 - while 6.5 ran OK, my Indy only has 64 MB of RAM and I’ve seen recommendations to use older versions of IRIX for best performance on lower-spec Indys.
With IRIX 5.3 burned to a CD, the hard drive formatted, and (so I thought) all the SCSI problems behind me, I booted in to the installer and watched expectantly.
if yr having scsi problems I feel bad for u son use active termination and target drives by LUN
After I’d start the install, I kept hitting a bus timeout, and it seemed to never recover. I tried swapping terminators, turning on and off termination on the internal drive, setting the “parity” jumper on the CD-ROM, reseating all the cabling, and nothing could keep it stable enough to complete a full install.
Eventually I gave up and went with plan b: the SCSI2SD can emulate multiple drives. It’s a little bit annoying to set up - you can easily set the second, etc, drive to be a CD-ROM but loading the ISO on to it requires dd-ing the ISO to the appropriate offset after your primary disk.
I try to avoid using this feature because “dd-ing over your hard disk” sounds like an even worse way to spend an evening than “using a single-speed CD-ROM drive”, but if you’re careful, it works:
Ok that also didn’t work but setting it up as another drive on the *same* SCSI2SD worked great and now it’s working and I can go to bed happy pic.twitter.com/OnTaXLUGCl
With SCSI problems behind me, the OS install finished smoothly and my Indy was running IRIX 5.3 like a champ. The base OS is pretty spartan - it includes a basic compiler but almost no tools for development. Thankfully, I had another “ISO” (just a raw dump from a CD, but not in ISO9660 format - it’s in “EFS” format) labeled “IRIS Development Option 5.3” - sounds like just what I need! I had a few options to load the software:
burn it to a CD and hope that the Indy and my SCSI CD-ROM can be friends long enough to install some software (unlikely)
load the image in to the SCSI2SD’s fake CD drive (tedious and requires opening the Indy’s case back up - ugh)
put the ISO file on my NAS and have the Indy mount it as a loopback device (unfortunately, not possible on IRIX)
get another computer running that can read the image and copy the files to my NAS where the Indy can just read them directly
while the Linux kernel does have efs support, it’s neither compiled in to the Ubuntu base nor can I find a package that includes the module. Its 2018 and apparently I refuse to compile my own kernel modules anymore.
the BSDs have support but I didn’t want to go through the hassle of setting up a VM or whatever and shuffling all the files around.
This left one final option: write a program to convert the image in to something more portable (like a tarball) that I could unpack on my NAS and make available to the Indy. Is this reasonable? Absolutely not. But it sounded like a hell of a fun project!
Following along
The code I’m referencing in this section lives at https://github.com/sophaskins/efs2tar - please take a look at how it all fits together! I’m running it against an image of “IRIS Development Option 5.3”, but I suspect it’ll work similarly for other images too - the Internet Archive has many available.
I use my golang struct definitions to illustrate what the on-disk format looks like - other implementations may name the struct members, etc, differently. Also note that EFS is big-endian, so the implementation needs to reference that at all the places where we parse bytes.
Filesystem headers
My goal was simple: efs disk image in, tarball out. I made a blank golang project, opened up the NetBSD source for a guide, and started reading raw bytes.
Since the sources helpfully point out that the superblock lives in the first (zero-indexed) 512-byte block, I wrote up some code to unpack those bytes:
What the heck? The NetBSD sources also claim that block 0 is unused, but if we look at those, there’s definitely some non-zero bytes. The first 8 bytes are:
0b e5 a9 41 00 00 00 00
Filesystems (like many formats) often use “magic numbers” - an arbitrary bunch of bytes that occur at a known location so they can be quickly identified by type. Maybe this string is a magic number? I grepped for be5a941 in the NetBSD codebase and got a hit in sys/sys/bootblock.h - it is indeed a magic number, SGI_BOOT_BLOCK_MAGIC. That section of the file defines the layout of the boot block of SGI partitions. A deeper dive in to that code and the IRIX manpage for vh (volume header) explain what’s going on.
It turns out, these “ISO” files aren’t just raw EFS filesystems, they’re SGI-formatted volumes with an EFS partition on them. There’s a whole volume header that has the partition table and some additional info:
// from sgi/vh.go
typeVolumeHeaderstruct {
MagicNumberuint32Rootint16Swapint16Bootfile [16]byteBootDeviceParamsDeviceParametersVolumeDirectory [15]FileHeaderPartitions [16]PartitionChecksumint32Paddingint32}
The VolumeDirectory field is pretty neat - its an array of pointers to files that exist outside of any filesystem, directly in the volume header. Its apparently usually used for the bootloader and the SGI partitioning program, fx (this is apparently why partitioning happens outside of the OS install process).
The Partitions field contains what block offset each partition starts at, how long it is, and its filesystem type. It was a surprise to me that the partitions can (and do!) overlap! Apparently it’s typical for one of the partitions to represent the whole disk, another this header section, and another for the actual partition (the partitioning SunOS uses also has overlaps like this). The EFS partition for my image was number 7.
Crawling inodes
Starting at the offset of the partition, I found the expected data in the Superblock (including the correct filesystem magic number, a plausible filesystem size, etc):
// from efs/filesystem.go
typeSuperBlockstruct {
Sizeint32// filesystem size (in BasicBlocks)
FirstCGint32// BasicBlock offset of the first CG
CGSizeint32// CylinderGroup size (in BasicBlocks)
CGInodeSizeint16// Number of BBs per CG that are Inodes
Sectorsint16// sectors per track
Headsint16// heads per cylinder
CGCountint16// CylinderGroups in the filesystem
Dirtyint16// whether an fsck is required
_int16// padding
CTimeint32// last SuperBlock updated time
Magicint32// filesystem magic number
FSName [6]byte// name of the filesystem
FSPack [6]byte// fs "pack" name
BMSizeint32// size in bytes of bitmap
FreeBlocksint32// count of free blocks
FreeInodesint32// count of free inodes
BMBlockint32// offset of the bitmap
ReplicatedSBint32// offset of the replicated superblock
LastInodeint32// last unallocated inode
_ [20]int8// padding
Checksumint32}
Most of this data is irrelevant to my purposes - since I’m not adding new data, I don’t really care about the bitmap, where the next free inode is, etc. The offset of the first CylinderGroup is important, though. The filesystem is divided in to “cylinder groups” - contiguous groups of blocks where the first CGInodeSize blocks of the cylinder group contain inodes, and the rest is data. The NetBSD sources note that the root inode is at inode index 2, so probably at index 2 in the inode portion of the first cylinder group.
Each inode includes a bunch of data about the object it represents:
// from efs/inode.go
typeInodestruct {
Modeuint16NumLinksint16UIDuint16GIDuint16Sizeint32ATimeuint32MTimeuint32CTimeuint32Generationint32NumExtentsint16Versionuint8Spareuint8// Payload is a union struct - sometimes it contains extents, but
// it also can contain other stuff (like link targets and device
// descriptors, which are not implemented here)
Payload [96]byte}
If we write up a quick program to dump this data, it looks something like:
This is really promising - those timestamps (784844972) are in 1994 (1994-11-14T20:29:32+00:00) which seems appropriate given that the disk image I’m working on is “the developer tools that came with IRIX 5.3”. The Mode field indicates that this inode represents a directory - seems reasonable, given that I’d expect the root inode to be /.
To find out what’s in the directory listing, we need to unpack the Payload field. In this context, it contains extents - an array of the block ranges that make up the body. This approach to allocating blocks to files gave the filesystem its name, EFS (the Extent File System). Reading extents is somewhat more complicated than just parsing that Payload field, but we’ll get to that later. The extents stored in the root inode look like:
> go run .\cmd\root-inode-extents\main.go
([]efs.Extent) (len=1 cap=1) {
 (efs.Extent) {
  Magic: (uint8) 0,               // side note, yes - the magic number
  StartBlock: (uint32) 224,       // for extents is...zero. Not
  Length: (uint8) 1,              // exactly unique, heh.
  NumIndirectExtents: (uint32) 0
 }
}
which seems plausible for the root directory listing - it’s short (only one block long), and early in the disk (block 224). Fetching that block is pretty easy, and if you dump it it does appear to have some filenames on it, but reading its format correctly takes a little care. The format of a data block belonging to a directory listing is:
// from efs/directory.go
typeDirectorystruct {
Magicuint16FirstUseduint8Slotsuint8Data [508]byte}
At the “bottom” of Data (the low indexes) there are some pointers (Slots many of them) to directory entry offsets (offsets from the base of the struct). The entries live at the “top” of Data (the high indexes) and are of variable lenth (because they include filename strings!), so are made up of:
the index of inode for the entry
how many bytes its name is
the name
It’s a somewhat wacky scheme - why isn’t it just a list of entries starting at Data[0]? This indirect approach allows adding and removing entries without having to rewrite the entire block, which…I guess is nice if you’re dealing with late 1980s / early 1990s disk performance (SGI replaced EFS with XFS for hard disks around 1993, but kept using EFS for CD-ROMs). At any rate, if we follow it, we can read the entries at the root inode, which look pretty rad to me:
This seems extremely plausible to me as the root of the CD-ROM. The . and .. entries even point (correctly) to the same inode (number 2) as the one we’re displaying! The system works! From here, it wasn’t too implausible to walk the whole filesystem and output filenames. Since it’s a tree, we start at the root inode, visit each entry, and if it’s a directory, recursively walk starting there. We have a complete list of all files
File contents
For the inode of a “regular” file, the extents just point to where the body of the file is. You can literally concatenate the bytes from the extent blocks and get the file, at least for unfragmented files.
An inode’s Payload field can fit up to 12 extents - each extent is 8 bytes, and the Payload field is 96 bytes. If a file is made up of more than 12 discontinuous ranges of blocks, its extent descriptors wont fit inside the inode. In this case, EFS switches from “direct” extents (the inode data contains the extents) to “indirect” extents (the extents in the inode point to blocks that contain nothing but extents, which are the actual extents of the file). This took me a few tries to implement correctly, but ends up being a fairly simple algorithm:
// from efs/filesystem.go
func (fs*Filesystem) extents(inInode) []Extent {
payloadExtents:=in.PayloadExtents()
ifin.usesDirectExtents() {
// if all of the extents fit inside of Payload (aka "direct")
// we have a much simpler time reading the extents
returnpayloadExtents }
// if we have more than will fit in Payload, then the extents
// in Payload (aka "indirect extents") point to ranges that
// themselves contain the actual extents.
extents:= make([]Extent, in.NumExtents)
extentsFetched:=0for_, indirectExtent:=rangepayloadExtents {
for_, extentBB:=rangefs.ExtentToBlocks(indirectExtent) {
// copy respecting the length of extents saves us from
// accidentally including the garbage extents at the end
// of the last block (beyond NumExtents)
copy(extents[extentsFetched:], extentBB.ToExtents())
extentsFetched+=extentsPerBlock }
}
returnextents}
With this in place, I was able to get the contents of files, large and small! Mixed with the golang archive/tar library, I was able to get the tarball I had hoped for.
Harvesting the fruits of my labor
I copied the (hopefully correct) tarball to my NAS and unpacked it. Despite the 25 years between the birth of my Indy and my NAS they both speak computing’s lingua franca, unauthenticated NFS. The IRIX Software Manager doesn’t care about where the software lives - it just wants a directory:
ok so I got my last-weekend project of "a tool that converts SGI EFS volumes in to tar files"...working!?!?! and here I am pointing the install tool to an extracted tarball!?!?!?! pic.twitter.com/IGXTTVbaet
The installation suceeded with no issues - I now have developer tools on my Indy! Entertainingly, one of the features this installed was kernel headers - including ones that describe (in more depth than the manpages) how EFS works.
Parting thoughts
I had an enourmous amount of fun completely over-engineering this problem. I was able to dig in to Unix filesystems for the first time in a practical context, had fun writing golang, and got some dev tools out of it to boot!
Have you ever written code to deal with raw filesystems? Or perhaps written software for IRIX? I’d love to hear your stories! Send them to me via email: sophie@pizzabox.computer!
My VAXstation 4000 VLC seems to have lived a hard life - when I got it, the plastic was filthy and every groove in the case was caked with black grime. I wouldn’t be surprised if it once lived in some sort of industrial setting - wherever it lived must have been hot because it came with a decidedly non-standard cooling system:
That picture is from after a quick cleaning - I saved a deeper rejuvination until last night. I disassembled the whole thing and tried to scour every last bit of dust, dirt, or gunk. Before putting it together this evening, I figured I’d take a few pictures of the components to share.
the components of the vaxstation
Clockwise from top-right, the components in the above picture are:
the RAM sticks - I love the “Digital” logo silkscreen on the third one
the motherboard
the “graphics module” - it’s not any particular bus, though, and it includes the mouse, keyboard, and sound circuitry as well, so I think it’s more of just “another layer of motherboard”
the SCSI cable - it serves both internal drives and as the external port
screws and fasteners - the plastic pop-rivets are, shall we say, Not My Favorite (the manual simply tells you to “remove the five rivets” when removing the motherboard - the shape my knuckles are in suggests that’s easier said than done)
the power cable for a hard disk
a SCSI2SD acting as the hard disk - the original disk that came with the machine makes terrifying griding noises
(in the center) the included SCSI terminator that needs to go on the back of the computer at all times
power supply
case bottom
case top
Once I fastened all the parts back in place, I hooked it up to see if things were still working:
Not too bad for a few evenings’ work! One day I’ll have to try out Retrobriting the case since the plastic has yellowed quite a bit, but at least now it’s not hiding tons of dirt.
There’s just something about that densely lined grille - it’s clear that a lot of effort went in to its construction. Contemporaneous PCs looked like a pile of parts, different shades of plastic clashing, chosen based on what was cheapest at the time. The 9000, on the other hand, had a whole system of peripherals that had similar ergonomics and design available from HP. The dense lines from 1985’s 310 were clearly still part of the design DNA in 1999’s C360.
hp712 badge
My HP 9000 Model 712 is from the early PA-RISC years. It’s quite slim (70mm), extremely solid (the plastic has aged very well), and thoughtfully designed. That thoughtfulness shows in its clearly labeled rear:
ports on the back of the hp712
and even in the beautiful POST screen (even modern PCs don’t look this good!):
hp712 power-on self test
These subtle touches are part of what sets a workstation apart from a powerful PC. It was built to last and given attention in design that wouldn’t be worthwhile for commodity electronics.
Installation requirements
To get started using my HP 9000 Model 712, I needed:
a hard disk - my 712 came without a disk (and judging by how clean the bracket was, I think it never had one). Anything SCSI2 should probably work.
a CD-ROM drive - not only does my 712 not have a hard disk, but it also doesn’t have a floppy disk drive. Theoretically I could netboot the installer, but I’m pretty sure doing that without another working HP-UX computer is…non-trivial.
a copy of HP-UX - HP doesn’t make HP-UX available for download without a support contract (which both requires money I don’t have and isn’t possible for 32-bit PA-RISC anymore). This seems kind of silly to me: you can only run HP-UX on HP hardware anyway (or maybe the small minority of PA-RISC and Itanium boxes that weren’t made by HP). HP-UX isn’t exactly the hottest ISO to seed on The Pirate Bay either.
a keyboard - the serial console on the 712 is disabled by default - to enable it you need to have a PS/2 keyboard (at least temporarily).
While I didn’t have all the tools when my 712 first arrived from eBay, I eventually filled them (respectively) with:
a SCSI2SD v5 (from from codesrc) with an 8GB microSD card. I’m very pleased to be able to avoid scrounging for 20-year-old SCSI hard drives that haven’t failed yet.
a Sun-branded external SCSI CD-ROM drive. Some of my other pizzaboxes have had trouble with it - I think this is because I’ve been using a passive terminator. Thankfully, the 712 seems to have a tolerant SCSI bus and it worked perfectly.
a copy of HP-UX 10.20 for 700 series machines. This was tricky to find! A friendly computer historian was willing to send me an ISO, but I’m not aware of one that’s publicly downloadable. Dear HP: please just post these.
an IBM Space Saver Keyboard - I finally caved and picked up a PS/2 keyboard. I still intend to work on a USB-to-PS2 adapter (the “modern peripherals” part of the dream), but I really wanted to give the 712 a go.
Install process
Install the SCSI2SD: the default settings on the SCSI2SD seemed to work pretty well for the 712 - I only popped in a microSD card and updated the firmware. Because the 712’s disk mounting brackets are just pieces of foam, I didn’t need to worry about keeping the board away from conductive surfaces like I did for the SGI Indy. It just sits inside the foam clamshell.
So first off my HP 712 didn’t come with a disk, so the SCSI2SD is up to bat This pizzabox has a clever / bizarre styrofoam disk bracket? So I don’t need to do weird shit w command strips like I did for the Indy pic.twitter.com/n4OkX2oLZX
Boot from the install CD: when presented with the unformatted SCSI2SD and an external SCSI CD drive, the 712 automatically picked to boot from CD.
Installation prep: Before the full installer, I was shown a dire warning message to not install a particular package (I guess that was easier than removing the package from the CD?) and presented with a simple menu to set up partitioning.
HP-UX uses VxFS and logical volume groups - pretty advanced for an OS from 1996! Once I selected a layout, a bunch of scripts ran (it looked like shell scripts run with set -x) to perform the partitioning and set up the actual installer
Package selection: The package selection UI is…intense. With hindsight, it looks like a text-mode version of SAM (the HP-UX management tool). As a beginner, it took a bit to figure out how to inspect packages:
Because it is. It took me a sec to figure out the flow for figuring out what is IN a package: pic.twitter.com/sk2C1Dwf5U
Copying files: with packages selected, the installer analyzed my choices and began to copy files…very slowly. The pizzaboxes have reminded me of how far software installation has come - these days if setting up an OS takes more than 10 minutes I look to see if something is wrong! For the 712, the process took several hours.
Post-install setup: after install, the computer reboots and eventually comes up in to an X Windows UI to choose timezone and root password.
First login: I thought at this point I was home free - time to dive in to HP-UX! Unfortunately, when I’d log in, CDE would appear to initialize, die, and I’d be kicked back out to the login screen.
HP-UX login screen
Remember to set DNS: after a bunch of fruitless debugging, the problem turned out to be that I had configured the 712 to believe that it had a real resolvable domain name. On my home network, those are configured by making a MAC address reservation in my router, which I hadn’t done yet. Adding the reservation and registering the name got the ball rolling again, and I was able to log in. Success!
First impressions
I mentioned the surprisingly classy POST screen in the introduction, but the text-mode niceties don’t stop there: the 712 displays some “soft buttons” whenever you’re at a console.
hp712 booting HP-UX 10.20 - going through the init process
This seems to be an HP-ism (I’ve seen it on their block terminals as well) and while I can’t see myself changing any of the settings while using HP-UX, it still seems pretty cool.
By the time HP-UX 10.20 was released, the Unix wars had cooled down a bit and commercial Unixes had mostly settled on the same CDE desktop tools.
HP-UX 10.20 default CDE desktop
The only HP-UX specific tool of note that comes by default is SAM: the System Administration Manager. It’s like a control panel, but with much deeper hooks in to the system than is typical. The configuration pages themselves seem to be made with a common toolkit, and the interface is quite similar to the text-mode package chooser I ran in to in the installer. My money is on them being related.
HP-UX SAM splash screen
HP-UX SAM main menu
HP-UX SAM volume groups configuration
I was able to (with no configuration!) access files on my NAS via NFS by just browsing to /net/the.fqdn.of.the.nas/share.name/, so I grabbed an HP-UX package of Netscape Navigator 4.0. Unfortunately (like with all of the pizzaboxes), its TLS ciphers are too old to load nearly anything on the 2018 internet.
Where to go from here
This is definitely only the beginning! As with all the pizzaboxes, I want to develop a GUI application for the 712 and also do a project using software that folks typically ran on HP-UX boxes. Have you ever used an HP-UX computer? Do you have memories or leads on where I could find software you think is important? I’d love to hear about it via email: sophie@pizzabox.computer.
Since the install chronicled in this post, I’ve also experimented with running NeXTstep on the 712! Keep an eye out for a post about that in the future.
The Multia feels to me like Digital’s take on a high-end “legacy-free” (at introduction in late 1994) desktop. Its spec sheet includes features unheard of in its contemporaries:
a 64-bit RISC processor
ECC memory
Ethernet networking
SCSI2 hard drive
high-resolution (1280x1024) monitor support
PCMCIA expansion slots
A RISC processor, powerful networking, and PCMCIA slots nearly sounds like a description of a Network Computer, but the Multia pre-dates the NC by more than a year. It was also ahead of its time in terms of its original OS: the fully 32-bit Windows NT 3.5. There wouldn’t be a 32-bit capable consumer Windows for another year (Windows 95 came out in late 1995).
Having an advanced-but-unfamiliar OS, expensive ECC memory and SCSI2 disks, and a non-Intel architecture didn’t lead to consumer success. Its low-end Alpha processor was starved of on-chip cache, so it wasn’t particularly attractive as a technical workstation. The Multia sold so poorly that later in its life Digital discounted the price heavily and sold it without an OS, targeting the nacent Linux desktop market.
A little Alpha
My Multia is the lowest-end model: a VX40 with a non-upgradable 166 MHz CPU. When it first arrived, I didn’t have a PS/2 keyboard and mouse to test with, so I was only able to verify that it came with Windows NT 4.0 Workstation pre-installed:
More motivation to get off my butt and write keyboard code: the Multia boots! pic.twitter.com/8aoYFLZ05P
It’s mostly in good physical shape - the sliding floppy drive door isn’t broken off, the case hasn’t been roughed up, and nothing seems missing. The back panel is a bit corroded:
corrosion on the case
I’ve seen similar corrosion on several Multias for sale on eBay - perhaps it’s a design flaw rather than the result of living a hard life. The Multia has more than its fair share of design flaws - chief among them is its utterly inadequate cooling. Most guides strongly recommend running the Multia standing vertically (rather than pizzabox traditional horizontal) to expose more surface area to airflow - the NetBSD FAQ has a lot more detail.
First login
A few months later (once I had aquired peripherals) I was ready to log in. Since it’s running Windows NT, I was expecting to have to use rainbow tables to hack the Administrator password - the seller didn’t note it down for me. My understanding of this procedure is that I would mount the hard drive on another computer and match the Administrator password hash to a known password. First, though, I looked to see if there was a default post-install password.
To my surprise, the default is to have no password, and that was how my Multia was configured! I was presented with a stock standard Windows NT 4.0 desktop - the previous owner must have done a fresh install before selling it to me.
default windows nt 4.0 desktop
If you’ve never used Windows NT 4.0 Workstation before, it’s a lot like Windows 95. Most of the pre-installed applications are the same, the GUI is the same, even the desktop background is the same. There are certainly some differences (actually caring at all about user accounts, bits for integration with AD domains, and NTFS), but in terms of “what is it like to use”, it’s nothing surprising.
Connecting to my network
Another telltale sign that the previous owner did a fresh re-install before selling it is that it was at a pretty old patchlevel: SP1. I downloaded the final Service Pack (SP6), put it on my NAS’s “public” directory, and connected the Multia to my network. Some things don’t change much - thankfully for my vintage pizzaboxes, among them are:
10Base-T Ethernet
DHCP
unauthenticated SMB & NFS
Running the upgrade from a NAS more than 20 years newer than the Multia went smoothly. Once updated, the version of Internet Explorer is still elderly:
internet explorer splash page
I tried to load up my favorite classic web site, the Space Jam marketing page. Unfortunately, though the page’s contents haven’t changed since 1996, it now is served via Cloudflare and doesn’t work over plain HTTP (HTTPS would fail b/c of cipher mismatches, as well as no SNI support):
space jam website wont load
From here
Setting up the Multia was anticlimactic - it Just Worked™ out of the box and its OS feels rather pedestrian. Finding software written for Win32/Alpha, though, is likely to be a challenge. Most software I have heard of is linked to DEC’s (dead) website. My hope is to find an IDE, some database software, and maybe a solid Telnet client or X server so I can experience the ways folks actually used them at the time.
Did you use a Multia back in the 1990s? Or maybe have a lead on some Alpha software? Send me an email at sophie@pizzabox.computer!
There’s been a lot of great stuff happening on my Pizza Box projects the past few weeks - not a ton that’s complete enough to share yet, but stay tuned. This evening, though, I ran in to something surprising that I couldn’t wait to tell y’all - here goes!
PowerMac video woes
When I first got my PowerMac 6100, I realized I didn’t have the right adapter to hook it up to a monitor. I did order one, but didn’t immediately test it. About a week ago, I decided to see try it out.
I attached the HDI-45 to DA-15 adapter, turned on the PowerMac, and…nothing. No video appeared on the monitor. My DA-15 to VGA adapter (which has worked with my Quadras) has some DIP switches for pretending to be various kinds of monitors, so I tried a ton of configurations to no avail. I assumed the HDI-45 adapter was bad, and ordered another one. It came in today, I tried it out too, and nothing. Something must be wrong with the computer!
Since I’m basically a professional “Google to see if other people have similar problems” person, I used my skills and found a very promising lead: apparently older Macs can refuse to show video when their PRAM battery is dead. Dead batteries are par for the course with two-decade-old computers (I already have replaced one in my SPARCstation). I also saw reference on a few forums to a “flick trick” - where if your PRAM is dead, you can trick the computer in to booting anyway by rapidly cycling the power when you boot it up.
First boot
I tried the “flick trick”, and the results were awesome:
mac os 9.1 boot screen
I have to admit - my first thoughts on seeing MacOS 9.1 booting up were that someone had pushed the little machine farther than made sense - it would be wicked slow and I’d have to downgrade to something nice like System 7.5. The next screen is what threw me for a loop, though:
mac os boot...with an accelerator?
“MAXpower G3”…this machine doesn’t have a G3 accelerator card…does it? I had opened up the case when I first got it, and I feel like that’s the kind of thing I’d notice. Most processor upgrade cards loudly announce their presence with big logos and out-of-place heatsinks. I cracked open the case anyway, though - might as well double check.
the inside of the 6100
Looks pretty standard to me! Where would an upgrade card even go? I guess they’d plug in to the PDS slot (which lives on a riser card)? And my PDS slot is empty! Now that you mention it, though, the riser board itself has a heatsink on it…
what is this? an accelerator?
I pulled out the riser and sure enough, it’s a G3 upgrade card!
front of accelerator
back of accelerator
It’s a NewerTechnology MAXpowr MXP6100 - designed specifically for this PowerMac. The riser board it replaced holds a PDS slot, and so because the upgrade card also passes through that slot (acting as the riser), I didn’t notice it before! The eBay listing definitely didn’t list this rad extra!
I still can’t explore what’s on it, or the stats, etc, because I don’t yet have an ADB input solution. Stay tuned, though - my work on adapting different kinds of input peripherals is starting to bear fruit!
The SPARCstation was the first pizzabox I was able to connect a serial cable to and turn on. As its self-tests scrolled by (first try!), I had high hopes…
…that were quickly dashed - neither of its two internal SCSI hard disks seemed to be able to boot. The SPARCstation went to the back burner for a while as I focused on booting the Indy. Getting further meant booting from some other source - requiring tools I didn’t have at hand:
an ethernet connection and a way to netboot (the SPARCstation has an AUI connector, not 10Base-T, and I didn’t have a transceiver)
a bootable floppy disk - seems to require an existing SPARC system
an external SCSI CD drive to boot from an install disc
A few weeks later I acquired an AUI -> 10Base-T transceiver, so I dug in to netbooting. Solaris 7 (the most recent OS supporting the sun4c family) has instructions and scripts for setting up a netboot server, but they encode a lot of assumptions about running on Solaris. I tried running from a Solaris 10 virtual machine, but the scripts (written to target Solaris 7) were incredibly incompatible.
Progress on booting stalled again…
A wild CD-ROM appears!
…until I procured a CD drive!
In the continuing saga of “oh no what have I done”, I bring you: a CD ROM drive pic.twitter.com/VihjmIy0O0
Finding the right CD drive was quite a task - SCSI CD-ROM drives aren’t exactly prevalent in 2017, nor are external enclosures that can provide a SCSI device with power and the right connectors. The pickings for original external CD drives on eBay were quite slim (including many that needed power adapters that weren’t included 😢). In a stroke of luck, I eventually found one that wasn’t an outrageous price, and a Sun-branded one to boot!
When I bought it I didn’t realize just how lucky this was: it turns out that older Sun computers (like mine) use an unusual CD-ROM block size of 512 bytes (typical sizes range from 2048 to 2352 bytes). Despite severalpeoplementioning to me that the one I had bought likely supported the 512 size, and a quite detailed guide available to explain why ending up with a Sun model was a good thing, I still managed to only get this one by chance. A happy accident!
Naturally, the first thing I did with my new drive was try to boot the SPARCstation. Though it’s not quite USB, setting up a SCSI drive is reasonably simple:
plug in external power - the enclosure was large enough to have an internal power supply and use a standard computer power cable
connect a SCSI cable to the drive and the SPARCstation
make sure the drive is set to a “reasonable” non-conflicting SCSI address (apparently 6 is a common choice)
attach a terminator to one of the drive’s SCSI ports:
The first order of business was to boot from the OS install disk to a shell and see if the already installed OS was salvageable. The installation docs say that at the ok prompt you should be able to do
ok boot cdrom
to get to the installer, and
ok boot cdrom -s
to boot from the CD in to a single-user mode root shell. My SPARCstation 1+ is old enough that its firmware doesn’t have a concept of cdrom as a valid boot target. A footnote thankfully informed me:
For systems with older EEPROMs, replace cdrom with sd(0,6,2) to boot from the system’s CD-ROM.
That worked! The first thing I tried was mounting the internal drives, which immediately failed and asked me to run fsck. Of the partitions, fsck found plenty of errors and only managed to make a few of them mountable. None of it was interesting or useable stuff (I think I got like, a / partition? but no /boot or /usr), so I made the call to wipe it and re-install:
sparcstation# format
Searching for disks...done

AVAILABLE DISK SELECTIONS:
       0. c0t3d0 <SUN0424 cyl 1151 alt 2 hd 9 sec 80>
          /sbus@1,f8000000/esp@0,800000/sd@3,0
Specify disk (enter its number): 0
selecting c0t3d0
[disk formatted]


FORMAT MENU:
        disk       - select a disk
        type       - select (define) a disk type
        partition  - select (define) a partition table
        current    - describe the current disk
        format     - format and analyze the disk
        repair     - repair a defective sector
        label      - write label to the disk
        analyze    - surface analysis
        defect     - defect list management
        backup     - search for backup labels
        verify     - read and display labels
        save       - save new disk/partition definitions
        inquiry    - show vendor, product and revision
        volname    - set 8-character volume name
        !<cmd>     - execute <cmd>, then return
        quit
format> format
Ready to format. Formatting cannot be interrupted
and takes 16 minutes (estimated). Continue? y
Beginning format. The current time is Tue Oct 17 16:21:55 2017

Formatting...done
Warning: no backup labels

Verifying media...
        pass 0 - pattern = 0xc6dec6de
   1150/8/62

        pass 1 - pattern = 0x6db6db6d
   1150/8/62

Warning: no backup labels
Total of 0 defective blocks repaired.
format>
time to reboot and do a real install!
Installation
The Solaris install process starts with a few questions about your language, locale, and terminal type. It then launches a curses-style install program to get details about your networking situation and time-zone settings. Finally, it informs you:
System identification is completed.
…and hangs for about 20 minutes without any more output. The first few times this happened I was convinced I had done something wrong - maybe the installer was angry about me not using the framebuffer for install, or a RAM chip was bad, or something. It turns out it was just…thinking about stuff. After the long wait, the curses-style installer comes back:
- Solaris Interactive Installation ---------------------------------

  You'll be using the initial option for installing Solaris software
  on the system. The initial option overwrites the system disks when
  the new Solaris software is installed.

  On the following screens, you can accept the defaults or you can
  customize how Solaris software will be installed by:

- Allocating space for diskless clients or AutoClient systems
- Selecting the type of Solaris software to install
- Selecting disks to hold software you've selected
- Specifying how file systems are laid out on the disks

  After completing these tasks, a summary of your selections (called
  a profile) will be displayed.

--------------------------------------------------------------------
     F2_Continue    F5_Exit    F6_Help
I went with the default partitioning and the basic set of packages that would fit on the small hard drive. The install proper took around two hours - a big reminder that this tech isn’t from 2017! At completion, the installer installed a handful of patches and rebooted the machine.
First boot
Post-install, things came up pretty smoothly (except for a bunch of network errors - I didn’t have the ethernet cable plugged in)
SPARCstation 1+, No keyboard.
ROM Rev. 1.3, 64 MB memory installed, Serial #12648430.
Ethernet address 8:0:20:c0:ff:ee, Host ID: 53c0ffee.

Testing
Booting from: sd(0,0,0)vmunix
SunOS Release 5.7 Version Generic_106541-08 [UNIX(R) System V Release 4.0]
Copyright (c) 1983-1999, Sun Microsystems, Inc.
configuring network interfaces:le0: No carrier - transceiver cable problem?
 le0.
Hostname: sparcstation
Warning: failed to open /dev/dump (No such file or directory):
run dumpadm(1M) to verify dump configuration
Configuring /dev and /devices
Configuring the /dev directory (compatibility devices)
The system is coming up. Please wait.
Configuring network interface addresses: le0.
RPC: Timed out
starting routing daemon.
starting rpc services: rpcbindkeyserv: failed to generate host's netname when establishing root's key.
 keyserv done.
This being the first boot, I was prompted to make a root password:
On this screen you can create a root password.

A root password can contain any number of characters, but only the
first eight characters in the password are significant. (For
example, if you create `a1b2c3d4e5f6' as your root password, you
can use `a1b2c3d4' to gain root access.)

You wil be prompted to type the root password twice; for security,
the password will not be displayed on the screen as you type it.

> If you do not want a root password, press RETURN twice.

Root password: _


Press Return to continue.
Finally, I made it to a shell!
System identification is completed.
Setting netmask of le0 to 255.255.255.0
Setting default interface for multicast: add net 224.0.0.0: gateway SPARCstation
syslog service starting.
Print services started.
volume management starting.
The system is ready.

sparcstation console login: root
Password:
Sun Microsystems Inc.   SunOS 5.7        Generic October 1998
# hostname
sparcstation
#
From shell to desktop
From here, setting up X and connecting a remote X session was pretty simple (in no small part because of the helpful manual):
I enabled the login manager to start at boot time with /usr/dt/bin/dtconfig -e
enabled the font server to start at boot time with fsadmin -e
rebooted to let those take effect (and to clear any gremlins from first boot, because I’m superstitious)
point my remote X session at the SPARCstation!
solaris login manager
Logging in as root gave me a pretty rad splash screen:
solaris cde splash screen
and eventually a pretty standard CDE desktop:
solaris cde desktop
I haven’t dug too deeply in to what sorts of things are installed by default, but one notable application was the Sun Hot Java web browser:
solaris hot java browser
A pretty satisfying reward for the effort of installing! Since I did this install (about a month ago!), I’ve re-installed an older version of Solaris (it was quite bogged down running 7 - I’m now trying out 2.4) and started using both hard disks installed (so I don’t have to skimp on installed packages). I’m hopeful to get a development setup working soon!
The collection has grown again! My inability to ignore eBay has resulted in three new additions.
IBM RS/6000 Model 250
The IBM RS/6000 lines is one of the few RISC computer lines to survive well in to the 21st century - IBM’s POWER Systems are still available and still the biggest beneficiary of IBM’s chip research. The Model 250 is the last of the 200 series pizzaboxes - it has a 66 MHz PowerPC 601 processor (similar to the Power Macintosh 6100).
I’ve seen very few of the 200 series available for sale online - this one isn’t even technically (by my standards) a workstation - it came with no frame buffer! IBM sold most of the RS/6000 line as a POWERstation or POWERserver in marketing materials depending on whether it had a frame buffer pre-installed (the designation doesn’t appear to show up anywhere on the case or in model numbers). I found on of the optional upgrade framebuffers on eBay to make this one in to a proper pizzabox.
Digital Multia
The Multia was an attempt by Digital to make a lower-cost Alpha workstation for running Windows NT. There were Alpha and Intel Pentium models, and they use a lot of off-the-shelf PC components rather than custom Digital ones (hence its later name, the “Universal Desktop Box”). It’s quite tiny - so much so that it has laptop PCMCIA slots for expansion!
The Multia is my first workstation to run Windows (though it keeps with the “no x86” rule). It came with NT 4.0 installed - I might have to break out some Rainbow Tables to get the administrator password (since it wasn’t included in the box).
Digital 3000 AXP 300X
The third pizzabox in this batch is another Alpha - this time a more typical Digital 3000 AXP pizzabox. At 175 MHz (and with 256 MB of RAM) it’s definitely the most powerful workstation I have. It seems like Digital didn’t make too many machines in this form factor - the Alphastation (successor to the 3000 AXP) was much thicker, and there are several gigantic tower models as well.
My 3000 AXP 300X came without a hard drive, so I expect I’ll be setting up Digital OSF/1 (the original name of of Digital Unix and Compaq Tru64) on a SCSI2SD some time in the future.
My SPARCstation 1+ was manufactured in 1989. Over a nearly 30 year lifetime, any number of components could have gone bad: capacitors burst, hard disk motors fail, sometimes the wrong voltage gets attached, etc. A problem that notoriously affects older Sun workstations (including mine!) is NVRAM failure.
The NVRAM chips in Sun workstations contain:
a clock, to keep time when the computer is off
memory to store boot device order, serial console modes, etc (in a PC you’d call that the BIOS settings)
details about the machine itself: its “hostid”, what model it is, an Ethernet MAC address. Sun calls this IDPROM.
a battery - the “non-volatile” part of NVRAM is managed here by having a battery keep an SRAM alive
Over the years, that battery dies. Unfortunately, because it is packaged as one chip, you can’t pop in a new button-cell - you have to replace the whole chip. This doesn’t just mean your computer will lose the ability to tell time - (entertainingly) the machine will lose it’s IDPROM data - it no longer knows what model it is or what its MAC address is supposed to be.
When worked on the SPARCstation, I’ve set dummy values for the MAC address and such to get around the dead battery - there’s thankfully a quite detailed guide from comp.sys.sun.hardware on how to set them. I’ve since given in and ordered a new chip (the STMicroelectronics M48T02-200PC1).
old nvram chip
replacement chip
To replace it, I had to open up the case and find the darn thing! Pizzaboxes have fairly compact interiors, sometimes layering what you want to get at below something unrelated. In this case, I had to remove the two frame buffer cards.
The NVRAM was under the SBus cards!
I pried it out of the socket (with my fingers), and inserted the new one (using the corner “dot” as a guide for its orientation):
old nvram in place
empty socket
replacement done
After putting the framebuffer back in and closing up the case, it was time to set the IDPROM values for the last time! Based on the guide, I set a machine type of 53 (SPARCstation 1+) and a MAC address of 08:00:20:c0:ff:ee (08:00:20 is the Sun range, and the guide’s example already referenced my favorite drink!). After booting to the ok prompt, I set those by doing:
ok
ok 1 0 mkp
ok 53 1 mkp
ok 8 2 mkp
ok 0 3 mkp
ok 20 4 mkp
ok c0 5 mkp
ok ff 6 mkp
ok ee 7 mkp
ok 0 8 mkp
ok 0 9 mkp
ok 0 a mkp
ok 0 b mkp
ok c0 c mkp
ok ff d mkp
ok ee e mkp
ok 0 f 0 do i idprom@ xor loop f mkp
ok setenv diag-switch? false
The final diag-switch? false brings the machine out of “diagnostic mode”, which means I don’t spend 10 minutes painstakingly verifying the 64MB of memory on every boot, and also don’t try (fruitlessly) to LAN boot.
With a working NVRAM chip, my SPARCstation now keeps the time and, more importantly, can be booted without futzing with configuration!
My last post about the Indy was a bit of a downer - I may have learned a lot, but I didn’t get much closer to a usable IRIX desktop. In contrast, this post does end happily. I hope that the screenshots at the end make up for how incredibly long it is.
Replacing the hard disk with a microSD card
The working disk in my Indy has an OS installed, but I’ve had trouble logging in. Rather than erase and re-install IRIX onto that disk (and lose whatever applications it might have!), I wanted to save it and use a new disk. While used SCSI hard disks are available (and from my reading, some new Ultra320 SCSI drives are capable of running in SCSI 2 mode), I’ve decided to avoid spinning-rust disks in favor of the SCSI2SD.
The SCSI2SD uses a microcontroller to emulate a SCSI device in software and stores data on a microSD card. It’s not quite plug-and-play - to get it ready for use, I had to:
Insert a microSD card: I’m using a pretty cheap 8GB SanDisk - I figure 8GB was a pretty large disk at the time, given the two that came with my Indy were 1GB and 500 MB
Download software: both the SCSI2SD firmware and scsi2sd-util - there are different versions for the SCSI2SD v5 and SCSI2SD v6 hardware revisions
Flash the firmware: This step threw me a bit - I had to open scsi2sd-util, go to the “Upgrade Firmware” window, and then plug the SCSI2SD in with USB. I spent a little time wondering why when I plugged mine in, scsi2sd-util didn’t recognize it - the reason is you have to flash it before it works.
Upload settings: I grabbed settings from the Nekochan wiki. The most important ones for the Indy are parity and SCSI2 Mode.
Remove the terminators: The SCSI2SD has built-in terminators, but so does the Indy’s SCSI cable. The SCSI2SD terminators are in removable SIP packages, so I just pulled them out.
With the SCSI2SD drive ready to go, it needed to be installed in the Indy. The SCSI2SD docs recommend not letting it rest directly on “conductive material” (like the metal floor of the case), so I had find a way to attach it to the drive mounting bracket. I didn’t have any spacers to safely screw it on directly, so instead I got creative with Command Strips (something quite plentiful in my household):
In “Booting the Indy”, I used the DINA VM image for a netboot server. Since then, I’ve had some trouble getting DINA running again, so I decided to give another tool a try: irixboot. The project’s README has most of the instructions I needed. My install discs were:
from the images hosted on the Internet Archive. Since I was running from Linux instead of Windows (what the irixboot author tested), the bridgenic param was just the name of my server’s ethernet interface (eno1). From there, all I needed was a vagrant up and I was ready!
Partitioning the disk
In most modern OS installers, partitioning the disk is part of the install process. Not so on IRIX! The IRIX installer seems to use the disk to store temporary files during installation, so you have to have valid partitions set up separately. To do that, you must boot to the Command Monitor:
System Maintenance Menu

1) Start System
2) Install System Software
3) Run Diagnostics
4) Recover System
5) Enter Command Monitor

Option? 5
Command Monitor.  Type "exit" to return to the menu.
>>
and boot in to the fx partitioner from the “Installation Tools” disk
>> bootp():/inst/stand/fx.ARCS
Setting $netaddr to 192.168.1.242 (from server )
Obtaining /inst/stand/fx.ARCS from server
93664+25632+7056+2804464+48784d+5808+8832 entry: 0x8bd4b0f0
Currently in safe read-only mode.
In the command I entered.
bootp(): says “use whatever server BOOTP tells you to”
/inst the path to the Installation Tools disc in irixboot
stand/fx.ARCS is the path to the fx partitioning tool on that disc.
I found Future Technology’s guide valuable in figuring out how to set things up - I accepted the defaults at each prompt until I got to the menu:
----- please choose one (? for help, .. to quit this menu)-----
[exi]t               [d]ebug/             [l]abel/
[b]adblock/          [exe]rcise/          [r]epartition/
fx>
chose “repartition” on the “rootdrive”, with the XFS filesystem:
fx> r

----- partitions-----
part  type        blocks            Megabytes   (base+size)
  0: xfs      266240 + 15201280     130 + 7422
  1: raw        4096 + 262144         2 + 128
  8: volhdr        0 + 4096           0 + 2
 10: volume        0 + 15467520       0 + 7552

capacity is 15467520 blocks

----- please choose one (? for help, .. to quit this menu)-----
[ro]otdrive        [u]srrootdrive     [o]ptiondrive      [re]size
fx/repartition> ro

fx/repartition/rootdrive: type of data partition = (xfs)
Warning: you will need to re-install all software and restore user data
from backups after changing the partition layout.  Changing partitions
will cause all data on the drive to be lost.  Be sure you have the drive
backed up if it contains any user data.  Continue? yes
The Future Technology guide says you need to add a “label”, but that didn’t seem to be an option for me, so I just proceeded to /exit.
Netbooting the IRIX installer
That took me back to the “System Maintenance Menu” - this time choosing to “Install System Software”:
                         Installing System Software...

                       Press <Esc> to return to the menu.


1) Remote Tape  2) Remote Directory  X) Local CD-ROM  X) Local Tape

Enter 1-4 to select source type, <esc> to quit,
or <enter> to start:
I used 2 for “Remote Directory”, entered in the IP address of my irixboot server and the path to the install tools disc:
Enter the name of the remote host: 192.168.1.10
Enter the remote directory: /inst/dist
This kicks you back to the “Installing System Software” menu - you press enter to use your chosen settings to kick off an install:
Setting $netaddr to 192.168.1.242 (from server )
Copying installation program to disk.
Setting $netaddr to 192.168.1.242 (from server )
......... 10% ......... 20% ......... 30% ......... 40% ......... 50%
......... 60% ......... 70% ......... 80% ......... 90% ......... 100%

Copy complete
Setting $netaddr to 192.168.1.242 (from server )
Setting $netaddr to 192.168.1.242 (from server )
IRIX Release 6.5 IP22 Version 05190108 System V
Copyright 1987-1998 Silicon Graphics, Inc.
All Rights Reserved.

gfe1: missing
gfe0: missing
xpi0: missing from slot 1
xpi0: missing from slot 0
root on /hw/node/io/gio/hpc/scsi_ctlr/0/target/1/lun/0/disk/partition/1/block ; boot swap file on /dev/swap swplo 57000
Creating miniroot devices, please wait...
/hw/node/io/gio/hpc/scsi_ctlr/0/target/1/lun/0/disk/volume/char: [Alert] Illegal request: Illegal field in CDB (asc=0x24, asq=0x0), Block #0

Current system date is Mon Dec 15 12:14:34 PST 2014
(the clock in my machine is stuck in the past!).
Since I just repartitioned the disk in fx, the installer needs to make a file system on it:
Mounting file systems:

/dev/dsk/dks0d1s0: Invalid argument
/hw/node/io/gio/hpc/scsi_ctlr/0/target/1/lun/0/disk/volume/char: [Alert] Illegal request: Illegal field in CDB (asc=0x24, asq=0x0), Block #40601
No valid file system found on: /dev/dsk/dks0d1s0
This is your system disk: without it we have nothing
on which to install software.
Make new file system on /dev/dsk/dks0d1s0 [yes/no/sh/help]: yes

About to remake (mkfs) file system on: /dev/dsk/dks0d1s0
This will destroy all data on disk partition: /dev/dsk/dks0d1s0.

        Are you sure? [y/n] (n): y

        Block size of filesystem 512 or 4096 bytes? 4096

Doing: mkfs -b size=4096 /dev/dsk/dks0d1s0
meta-data=/dev/rdsk/dks0d1s0     isize=256    agcount=8, agsize=237520 blks
data     =                       bsize=4096   blocks=1900160, imaxpct=25
         =                       sunit=0      swidth=0 blks
log      =internal log           bsize=4096   blocks=1000
realtime =none                   extsz=65536  blocks=0, rtextents=0
unwritten flagging is enabled

Trying again to mount /dev/dsk/dks0d1s0 on /root.

/hw/node/io/gio/hpc/scsi_ctlr/0/target/1/lun/0/disk/volume/char: [Alert] Illegal request: Illegal field in CDB (asc=0x24, asq=0x0), Block #0
UX:make: INFO: `scsi' is up to date.
    /dev/miniroot            on  /
    /dev/dsk/dks0d1s0        on  /root
Installing IRIX
Now it’s time for the real installing to begin.
Invoking software installation.

What is the hostname (system name) of your machine? indy
What is the network address of indy? 192.168.1.242
What is the netmask for 192.168.1.242?
Press Enter for the IP class default [0xffffff00]:
Starting network with hostname: indy, at ip address: 192.168.1.242
Man, it’s asking again for an IP address - the Indy is from an time where ubiquitous reliable DHCP was not a thing. That final obstacle was all gated the main menu of the IRIX install tool (creatively named inst):
Default distribution to install from: 192.168.1.10:/inst/dist

For help on inst commands, type "help overview".


Inst 3.3 Main Menu

 1. from [source ...]            Specify location of software to be installed
 2. open [source ...]            Specify additional software locations
 3. close [source ...]           Close a software distribution location
 4. list [keywords] [names]      Display information about software subsystems
 5. go                           Perform software installation and removal now
 6. install [keywords] [names]   Select subsystems to be installed
 7. remove [keywords] [names]    Select subsystems to be removed
 8. keep [keywords] [names]      Do not install or remove these subsystems
 9. step [keywords] [names]      Interactive mode for install/remove/keep
10. conflicts [choice ...]       List or resolve installation conflicts
11. help [topic]                 Get help in general or on a specific word
12. view ...                     Go to the View Commands Menu
13. admin ...                    Go to the Administrative Commands Menu
14. quit                         Terminate software installation

Inst>
The “default distribution” is a reminder that inst knows about the “Installation Tools” disc it booted from, but needs to be told about the other four CDs:
Inst> open irixboot:foundation/dist
What is the network address of irixboot? 192.168.1.10
Reading product descriptions .. 100% Done.

Inst> open irixboot:apps/dist

...
there was a long readme about Netscape here
...

Inst> open irixboot:nfs/dist
Relocating distribution location irixboot:nfs/dist to irixboot:nfs/dist/dist6.5
.
Reading product descriptions .. 100% Done.

Inst>
I went with the package sets Future Technology recommended, and started the installation:
Inst> keep *

Inst> install standard

Inst> install prereqs
No matches for "prereqs" were found

Inst> go
This takes a very long time (the Future Technology Guide even has a table of how different workstations perform differently - apparently CPU has a lot to do with it). Mine took 130 minutes, from go to reboot:
Ready to restart the system.  Restart? { (y)es, (n)o, (sh)ell, (h)elp }:
Preparing to restart system ...

The system is being restarted.
Postinstall
After install, the machine came up nicely:
IRIX Release 6.5 IP22 Version 05190003 System V
Copyright 1987-1998 Silicon Graphics, Inc.
All Rights Reserved.

dksc0d1: [Alert] Illegal request: Illegal field in CDB (asc=0x24, asq=0x0), Block #0
The system is coming up.
Warning: Internet Gateway web server running as root.
Use "chkconfig webface off" if you wish to disable.
startup: listening to port 80 as nobody


indy console login: root
IRIX Release 6.5 IP22 indy
Copyright 1987-1998 Silicon Graphics, Inc. All Rights Reserved.
Last login: Mon Dec 15 14:46:00 PST 2014 on ttyd1
TERM = (vt100)
indy 1#
Since I was still using a serial console, my first steps from here were to set up remote X sessions. Mine needed:
a default route to be entered in /etc/config/static-route.options:
$ROUTE $QUIET add net default 192.168.1.1
an X11 font server enabled (where would we be without fonts!):
indy # chkconfig fontserver on
Since I had just changed a bunch of network connections (and this machine was made in 1993) a reboot seemed in order. After it came back up, I connected a remote X session. In this case, I was using Xming on Windows (for some reason XQuartz just crashes when I try to connect). The effective Xnest command my options translates to is: Xnest -query indy.taketimetobesafe.biz -screen 0 1024x768@1 -fp tcp/indy.taketimetobesafe.biz:7100. This gave me a login window!
A desktop
My understanding is that on a new IRIX box, you’re expected to log in as the EZsetup user, which launches a configuration wizard. For whatever reason, this doesn’t seem to work at all over a remote session (it logs in, and just goes to a totally empty 4dwm session). No matter, though - I can log in as root:
There you have it! I’m rather pleased to get the first GUI desktop from one of my pizzaboxes. Though I haven’t yet made input adapters to use it directly, a remote X session is still a heck of a lot of fun.
The pizza delivery folks have been stopping by my house a lot lately, and not just with pineapple and ham!
Do Macs really belong here?
In “What is a Workstation?”, I declared that “a workstation is a computer system designed to be used by a professional”. In the classic Mac era, Apple targeted three markets: home users, education, and “creatives” - desktop publishing, image processing, video editing, and sound recording. The final category certainly fit in to my definition of “professional”, even if the first two don’t.
Apple helpfully separates Macintoshes into different brands:
Performa / iMac for home users
LC / eMac for education customers
Mac II and Quadra (m68k), Power Macintosh (PPC), Mac Pro (Intel) for creatives
They’re not perfectly aligned: home and education computers were also sold as PowerMacs, some Mac II models were more “home” than “workstation”, and the Centris line doesn’t really fit. While they all ran the same software, used the same chips, and were sold by the same company, the clear market positioning makes it easy for me to declare that yes, some Macs were sold and used as workstations.
A busted-up Quadra
The first of the two macs (both in production date, and in joining my collection) is a Quadra 605. While it’s one of the lowest-spec Quadras, it is decidedly the most pizza-box-y. The “LC” form-factor Macs (named for the first such Mac) are probably the first machines I ever heard called a “pizza box”, so they occupy a special place in my heart. The Quadra 605 is sadly unable to run A/UX, Apple’s Unix-combined-with-System-7 offering - it wasn’t available with an FPU, and even if you replace its CPU with one that does have an FPU, Apple never made A/UX enablers for it. Thus, a Quadra 610 is still on my “to acquire” list.
This particular specimen arrived in pretty poor condition. It was shipped to me in a battered old NewEgg box, lightly wrapped in bubble wrap, sitting in a pile of packing peanuts. Unfortunately, there was nothing to hold the bubble-wrapped pizzabox in place in box, so it looks like it bounced around inside a ton.
blerg just got a quadra 605 in from ebay and the case is basically shattered like it almost looks right, but
The sides of the case were cracked, the back plate broken clean off, and inside the case, all of the obnoxious tiny pieces of plastic that held the motherboard and drives in place without screws had sheared off. Everything inside was free-floating around the case.
I’m not really sure what I can do about this - I’m keeping my eye out for spare cases (not holding my breath, though) and folks selling 605s for parts. Perhaps one day I’ll do a detour in to plastic case manufacturing (could it be 3D printed?) and looking for the original case schematics, but it’s back-burner for now.
An intact PowerMac
I had better luck with a Power Macintosh 6100 - it was properly secured in shipping, and so the only bits snapped off are ones that I did opening up the case (oops). Things seem to be in order - it plays the original PowerMac startup chime:
I haven’t been able to test this one out further than that, though. The original PowerMac models (6100/7100/8100) had an unusual video jack - the HDI-45. It’s…a frankly unusual square-ish connector that also holds keyboard, mouse, and audio (reminds me of the NeXTstation’s DB19!). Despite having an 8100/80av a decade ago, I forgot this detail, so verifying that its video works is blocked on me getting an adapter.
The HP that’s over exactly 9000!
The HP 9000 line was one of the longest surviving - HP made HP 9000 computers until 2008, after SGI had become a Supermicro reseller, Sun was swallowed by Oracle, DEC only a memory, and NeXT long-since transformed into Apple. The one I picked up is a model 712 - a lower-cost pizza box from the end of the first generation of PA-RISC HP 9000 workstations:
I believe this is the first workstation I’ve bought that didn’t come with a hard drive (several of the models I have could have been configured without one). It also doesn’t have a floppy drive, so moving forward is gonna mean I need to figure out how to netboot old versions of HP-UX. I love a challenge!
Once the power supply was in order, my next focus was booting it to a usable state. I ran into quite a few stumbling blocks along the way - this post doesn’t end with a 4Dwm desktop (though a future one will!).
Broken hard drive
The first issue was the scraping and grinding sound coming from one of the hard drives! On boot, it sounded like one of the disks was trying to spin up, encountering some…resistance…spinning down, and trying again. My Indy has two disks in it, so I figured out which one by process of elimination and disconnected it.
Working from a console
Since I don’t have a PS/2 keyboard and mouse, hooking the Indy up to a monitor and directly using it is not an option. Some researching on the Nekochan wiki confirmed that a DB25 to mini-DIN 8 cable would do the trick - I grabbed one from Monoprice. These are fairly common thanks to Apple using the same connector (mini-DIN 8) for their serial ports in the pre-USB era.
By chance, I seem to have gotten the right one: they sell a very similar cable that sounds like it tries to account for a different signaling standard (Mac serial ports were RS-422, whereas the Indy’s is RS-232). The one I got also seems to be a null-modem cable (though the listing doesn’t say this) - that means I can more or less directly connect it to the Indy and to my USB Serial adapter and be all set.
With the wires plugged in, I used minicom on my laptop (set to 9600bps, no parity, one stop bit, 8 bits per character, and software flow control), and turned on the Indy. To get a Unix tty on the serial port, you have to enable it in the PROM monitor. At the prompt, I pressed <Esc> to enter maintenance:
To perform system maintenance instead, press <Esc>

System Maintenance Menu

1) Start System
2) Install System Software
3) Run Diagnostics
4) Recover System
5) Enter Command Monitor

Option?
picked option 5 (the PROM monitor), and disabled the local graphics console:
Command Monitor.  Type "exit" to return to the menu.
>> setenv console d
After rebooting, an OS came up!
Getting root
Incredibly, the remaining hard drive had a functioning OS on it! The
IRIX Release 6.5 IP22 Version 05190003 System V
Copyright 1987-1998 Silicon Graphics, Inc
All Rights Reserved.
banner was encouraging. The login prompt, however, was not. The internet pointed towards some typically wide-open IRIX user accounts (EZsetup, lp, and guest) but this machine had them locked down. On some operating systems (macOS and most Linuxes, in particular), there is a “single-user mode” that automatically logs you in as root. This sounds like a huge security hole (and kind of is), but is in keeping with the reality that if you have physical access to a computer, you can get root anyway. IRIX’s single-user mode requires you to know the root password, so I had to do it the hard way.
The goal is to mount the Indy’s filesystem and clear out root’s password from /etc/shadow, letting me log in with no password. My Indy doesn’t have a floppy drive, and I don’t have an external SCSI CD drive, so the only remaining option to get an OS running where I can mount the local disk is to netboot.
A netbooting detour
SGI machines support netbooting using a familiar collection of protocols:
rsh for the boot loader to fetch further parts of a root file system
The first two might be familiar in a netbooting context - bootp evolved into dhcp, which along with tftp, are used in modern PXE netbooting of x86 computers. rsh is interesting though - where nowadays, a PXE bootloader usually grabs an OS image via HTTP, the Indy seems to use ssh’s completely insecure predecessor. I’m not completely sure what it ends up running over rsh (perhaps the topic of a future blog post!), but my research indicates that whatever it does, it strongly expects the user it logs in as (guest, with no password) to use the Korn shell (some discussion here).
My router handles bootp fine, and I can run tftpd easily on one of my home servers, but rsh felt like it crossed a bit of a line into “what am I even doing”. Thankfully, the SGI enthusiast community produced a virtual machine that is already set up - DINA (deBug’s IRIX Netboot Appliance). I followed along with the guide on the Nekochan wiki, bringing IRIX 6.5 install CD images that I got from the Internet Archive.
Getting root, take 2
Netbooted into the IRIX installer, I launched a shell and took stock. My Indy’s root partition had been mounted for me (entertainingly at /root, since IRIX seems to make / the root user’s home directory). Remember, my goal is to clear the root user’s password by editing /etc/shadow.
So, all I need to do is a quick
# vi /root/etc/shadow
right? Well, it turns out the IRIX install image doesn’t have vi installed. What does it have? The standard editor, ed. I had never actually useded - it’s mostly the butt of a running joke from 1991. With the help of the (aptly named) Actually Using Ed, I managed to clear root’s password.
Moment of truth
Was this enough to get in? My first attempt (straight up booting and trying to log in) failed - this time, with a message that root wasn’t allowed to log in on this console. Though I later learned where that is configured (and so could have gone back to the netbooted installer environment and hacked it), in the moment, I tried single-user mode again:
Success! Time to give poor root a password again, and make myself a normal user account (soph instead of my more typical sophaskins, because of IRIX’s 8 character limit on usernames).
Frustration
Unfortunately, I never was able to log in as soph. My logins didn’t fail (there was no message like when I used an incorrect password), it just…didn’t happen. I’d just get sent immediately back to a login prompt. Attempts to find logs indicating what happened, obvious permissions problems, or really any indication of what happened were fruitless.
At the same time, I still couldn’t log in as root in multi-user mode! After unlock root logins at any console, I’d be faced with a segfault (!?!?!) when trying to log in. By this time, I was feeling pretty bummed out and decided that perhaps it was time to try a fresh install. That story (and the graphical desktop it resulted in) will be in a future post!
when connected to a monitor, it gave output! (complaining about the lack of keyboard)
the light on the front of the case would cycle between red and green, before stabilizing on green
A few weeks later, I got the right serial cable to attach a console, and…it no longer worked:
no jingle played - the speaker sometimes crackled or gave off a faint whimper
something smelled funny (maybe the magic smoke was escaping!)
the light cycled between red and green somewhat erratically
on my attached serial console, it appeared to be looping through startup - at that point, I might have considered a “full” startup to be text like:
Data path test                             *FAILED*
RTC path test                              *FAILED*

Running power-on diagnostics...
Starting up the system...

To perform system maintenance instead, press <Esc>
but it wouldn’t always make it to the <Esc> prompt - sometimes it just kept repeating the first two tests.
That’s pretty broken! I stoped trying to boot it (in case I was somehow damaging the electronics), and looked online for ideas. Apparently, a common problem with old Indys is the power supply failing. My Indy had the brand of power supply that was affected (Nidec) - it seemed like a plausible explanation. To dig a little further, I broke out the multimeter and checked the voltage on the Molex connector that normally goes to the hard disks - when I turned on the juice, the voltage was jumping all over the place.
I looked on eBay for replacement power supplies (a lot of old computers get parted out if something breaks), and found a Sony one - the brand that was supposed to be OK. Replacing the power supply once it arrived was super easy - there’s only one screw holding it in place:
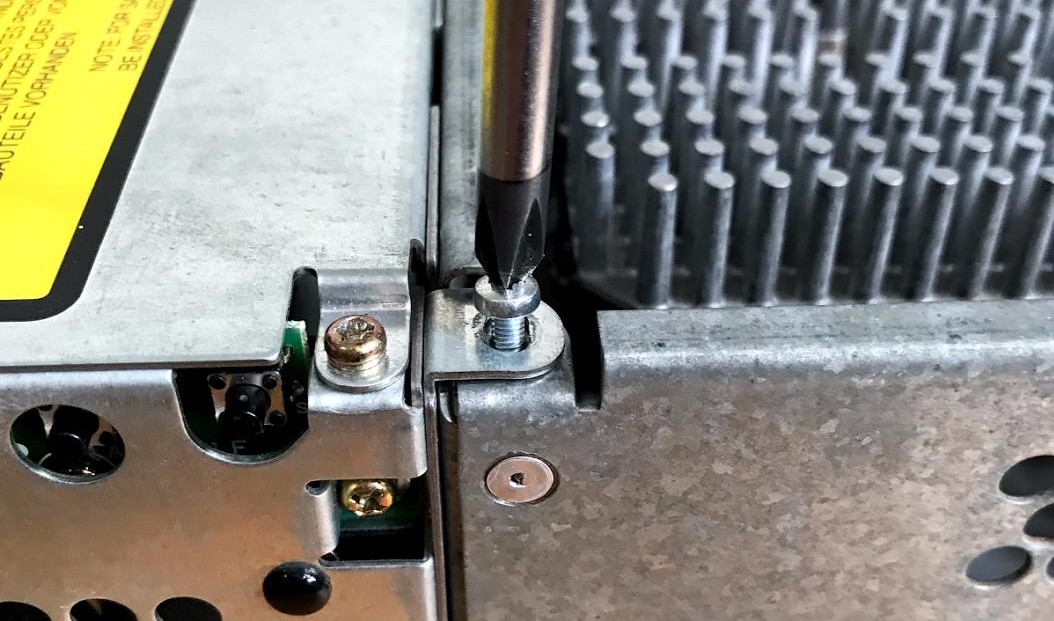
With that removed, you can slide the power supply apart from the rest of the chassis - it doesn’t sit inside the chassis, it sits next to it:
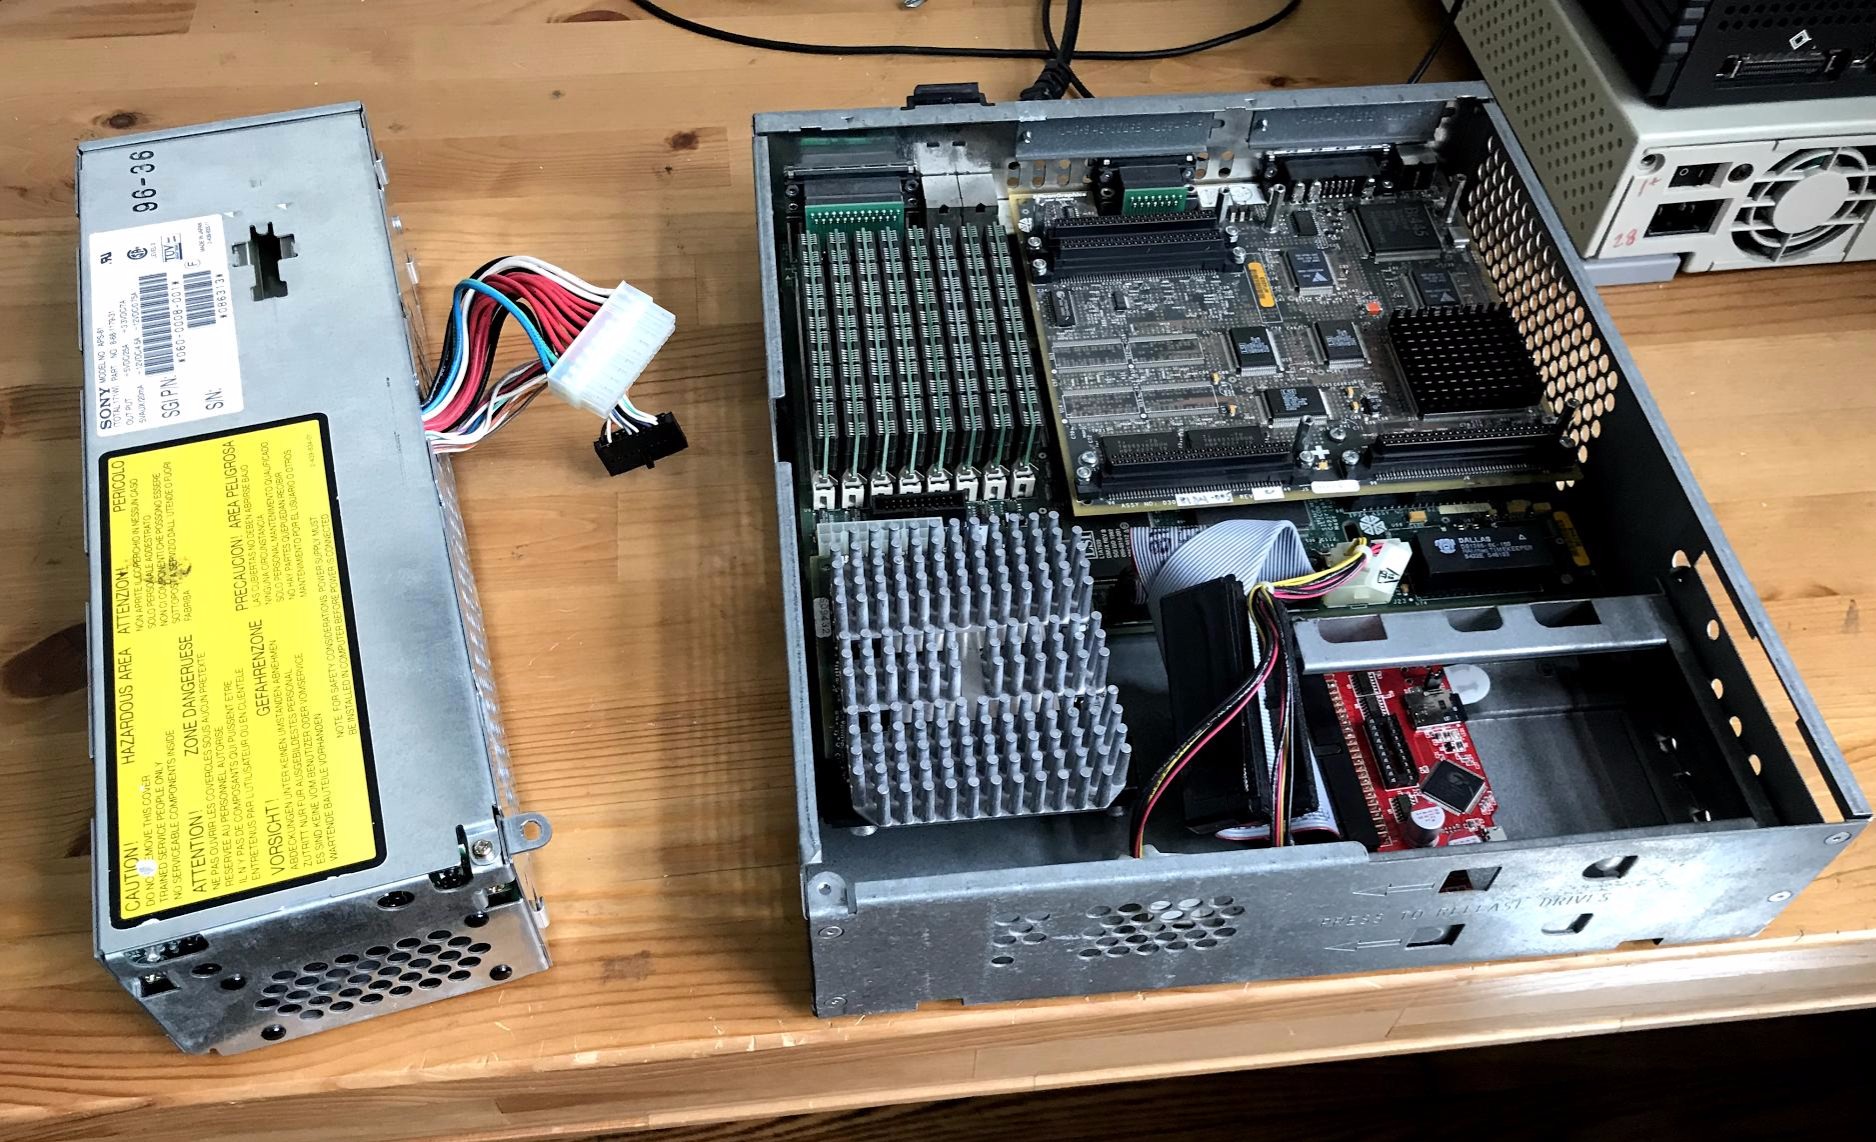
In real life, I just popped the new power supply in and immediately tried it out, but in writing this post I checked out the voltages both power supplies put out. One thing that stood out to me was that the 12V rail (yellow wire) on the busted power supply…wasn’t reading 12V! On the broken one, it was at about 6V:
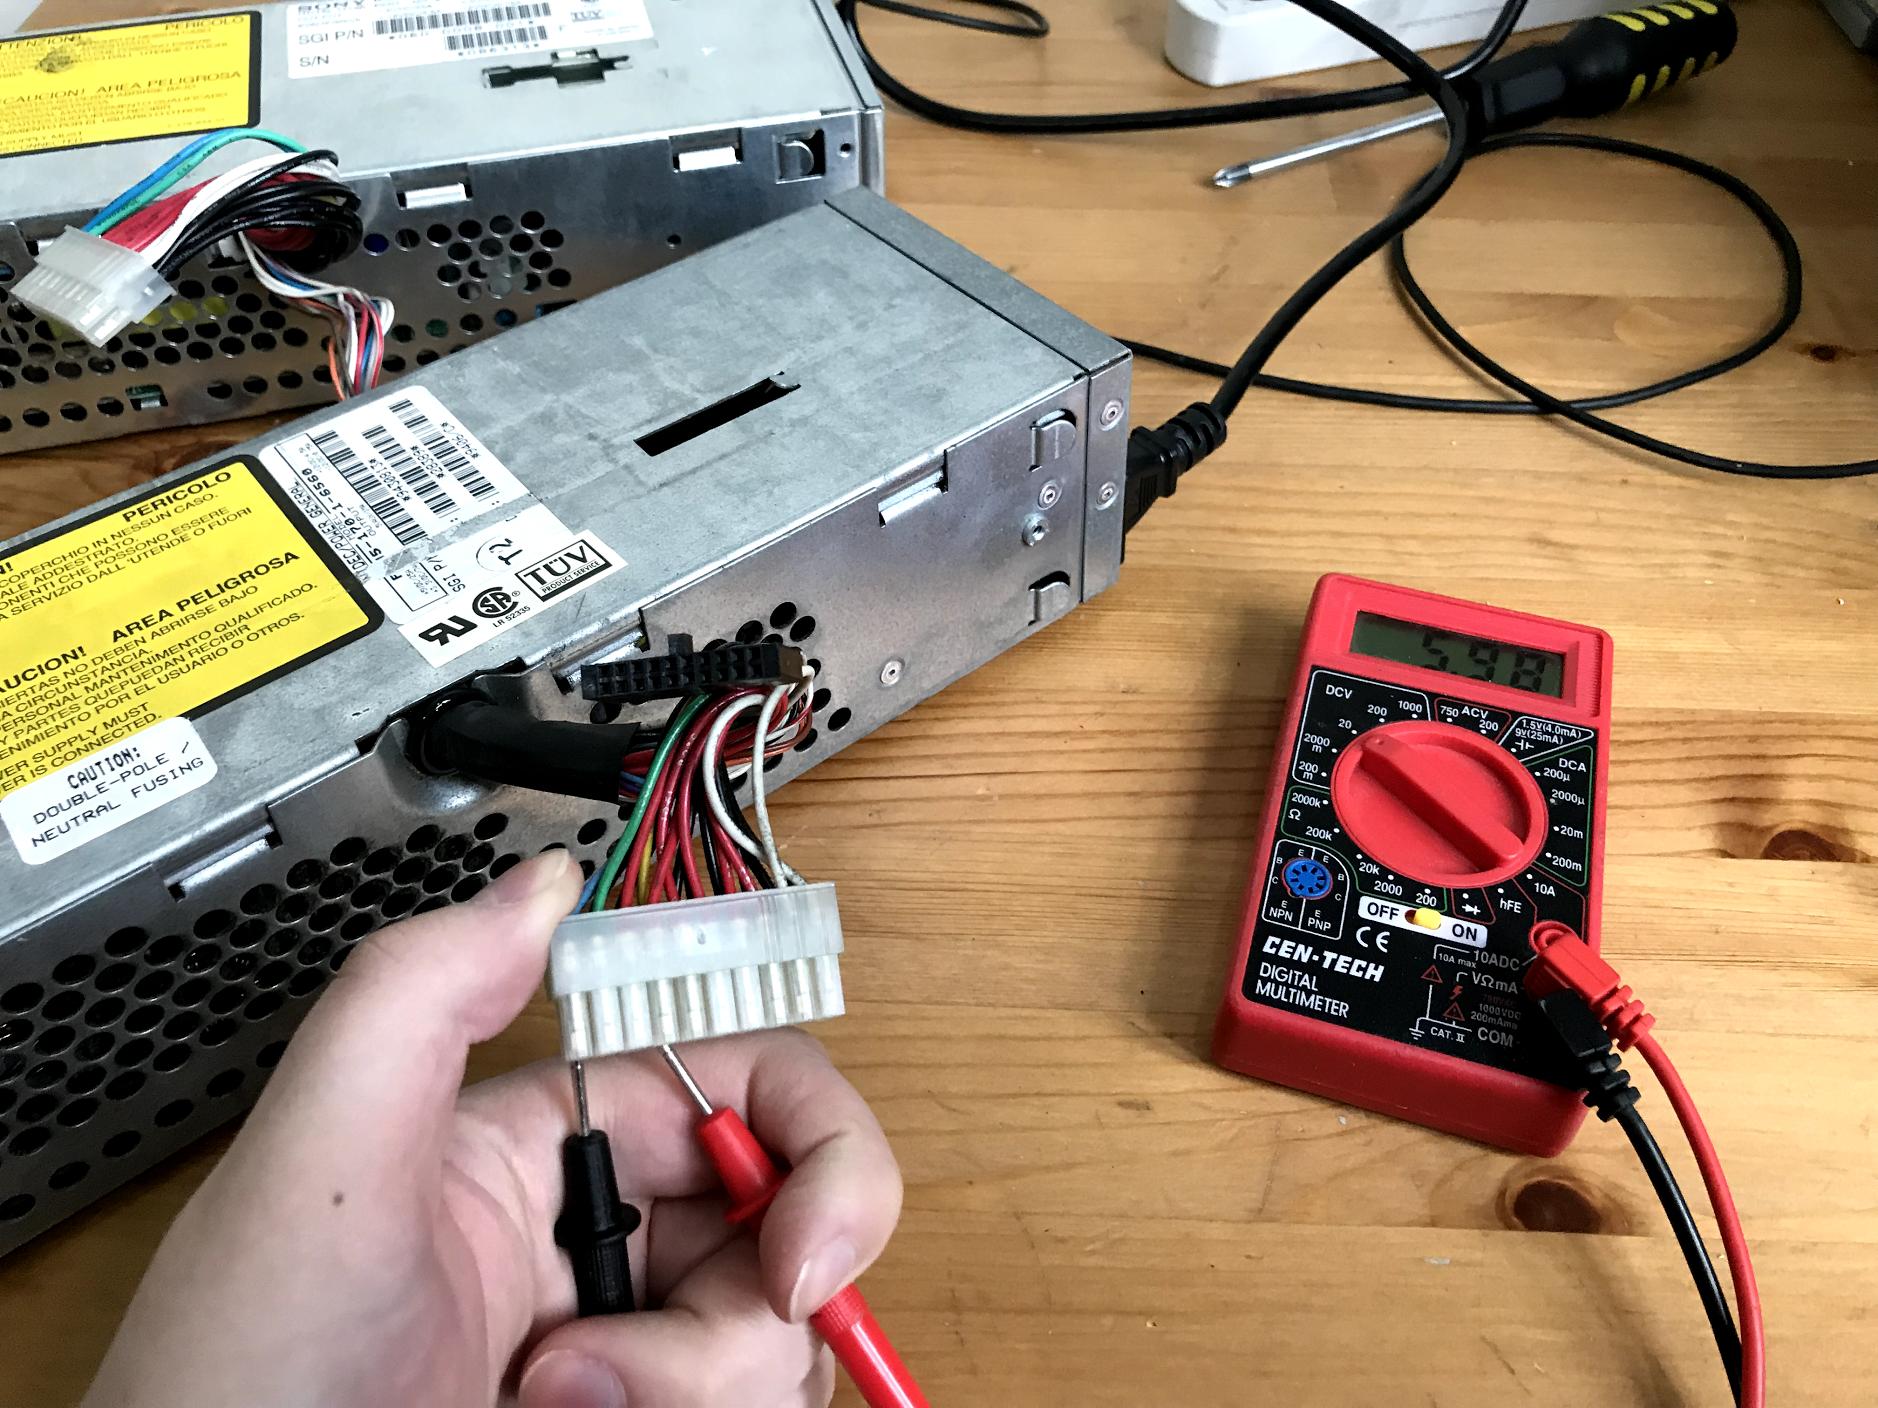
On the good one, it read a much healthier 12V:
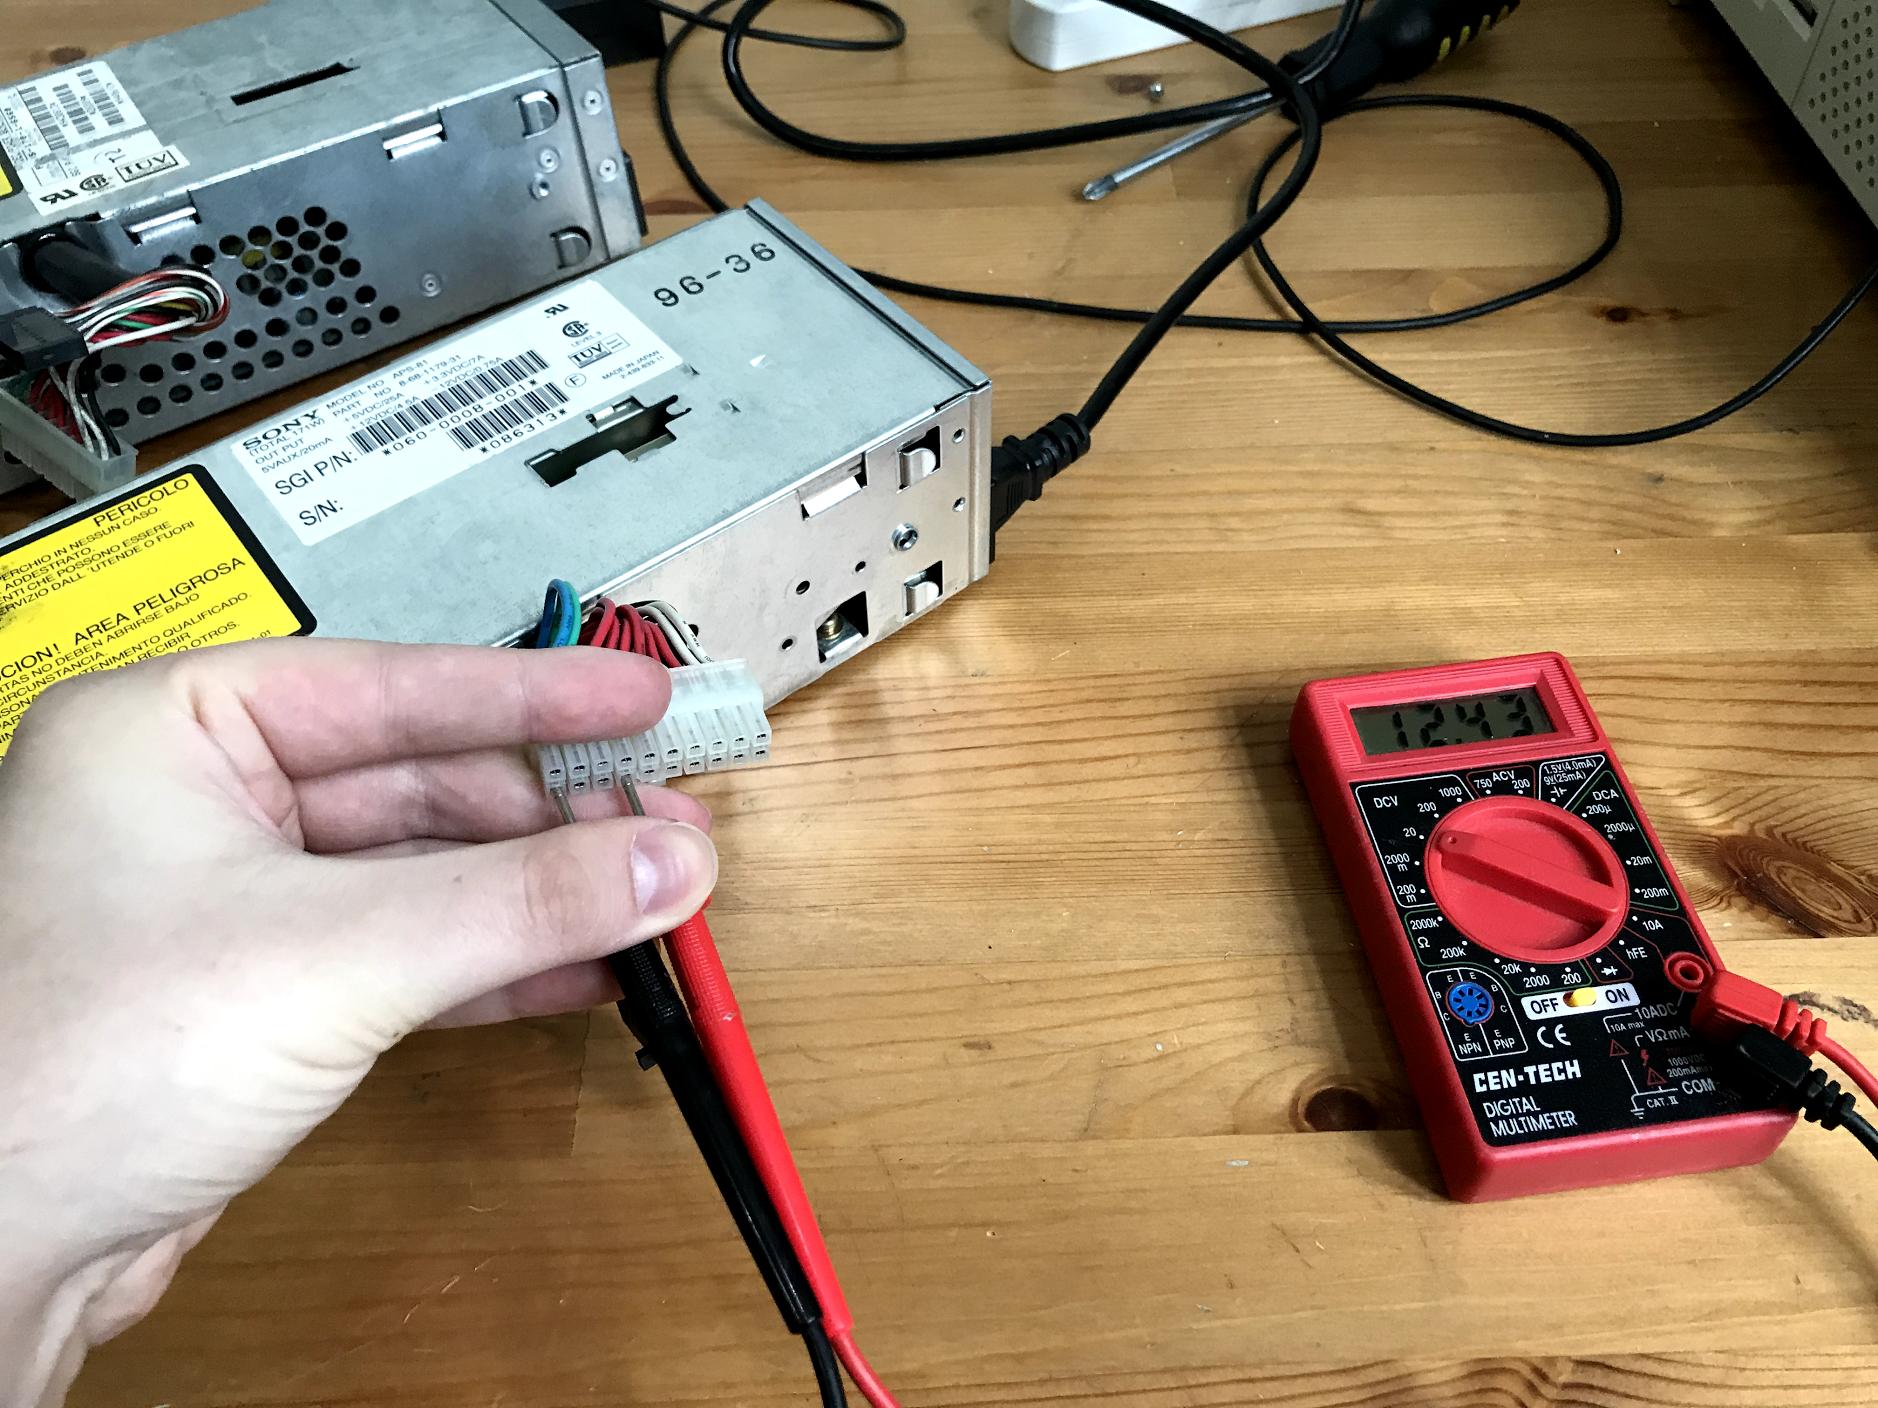
The new power supply brought back the jingle and let me move on to the next thing: getting the OS booting! But what specifically was wrong with the power supply? I often see folks mention capacitors bursting as the cause of power supply failure. Though I’d love to crack open the bad power supply and see what I can see (and maybe re-cap it!), I’m not going to for now:
its metal case seems to be riveted together, which is beyond my small-apartment tool collection
POWER ELECTRONICS (A/C) CAN BE VERY DANGEROUS. Power supplies in particular shouldn’t be opened until the capacitors inside have fully drained. I don’t feel qualified to judge when things are safe, so I’m gonna save that for another day.
I’m…perhaps not known for having incredibly good self control, so some eBay browsing later, I’d found a NeXTstation on eBay that seemed like a good starting point.
NeXTstation
I grew up in a Mac family (my parents are both teachers) - being “something of a nerd”, I loved Apple trivia. The internet was all too willing to oblige. NeXT’s workstations were, then, probably the first I ever heard about - an obscure offshoot of Macintosh lore, the matte-black NeXTcube and its funky Mach-based operating system. I’d lusted over one, but their prices were far more than my high-school job wages could justify.
It was a no-brainer for a NeXTstation to be my first pizzabox. The eBay seller I bought it from was the same person who ran the store I gawked at way back when (Black Hole Inc)
My NeXTstation (a non-turbo mono) seems to be in good working order (I recently got video cables to confirm that it boots!) but is probably going to be one of the most tricky to make usable. NeXT used an extremely-hard-to-find monitor plug (DB-19), which not only carried video signals, but also:
power for the monitor
digital signals that were decoded in to keyboard, mouse, and sound by the monitor (or by a “Soundbox”)
briefly shorting two pins is actually the only way to turn the whole thing on
Soundboxes compatible with my model (non-ADB soundboxes) are rare and expensive, so I’m setting out to make my own equivalent - a microcontroller-based converter box that:
takes a DB-19 cable as input
has USB ports for a modern keyboard and mouse
outputs video as HDMI (go big or go home, amirite?)
converts signals between all these
This motivated the idea of building similar converters for all of my workstations.
SPARCstation 1+
Not long after the NeXTstation arrived, a friend offered a SPARCstation he had lying around! Sun made perhaps the most recognizable pizzaboxes - they might have even been the first! (the Sun 3/50 was 1986). A perfect addition to my collection. I felt pretty badass taking it home on the subway:
if a transsexual sweating on NYC subway, hair freshly rainbowed, carrying a unix workstation during a despotic presidency isn't cyberpunk...
Using a serial console, I’ve verified that it boots to the PROM monitor, but doesn’t seem to like either of the hard drives inside. The framebuffer works, but because I don’t have a keyboard connected, it only informs me that all output is on the serial console. In addition to the converter box, this one might need a disk replacement, and potentially to have an OS installed. If it needs an OS, I’d hope to netboot it rather than hunt down a SCSI CD-ROM drive.
SGI Indy
The Indy is quite a contrast with the SR-71 Blackbird-esque NeXTstation and the business-like SPARCstation - it’s bright blue, asymmetrical, and loaded with multimedia features. I made eBay alerts for pizzaboxes I was interested in once I started collecting - don’t want to miss a deal! Some Indys were listed for exorbitant prices (> $700…sorry dude), but this one came along at a price I was happy with.
It turns out this particular one used to live at my alma mater (judging by the CMU asset tag and return postal address in Pittsburgh). When I first got it, I had to turn it on (even without video or serial cables) because it has a ridiculous boot sound:
Since then, I’ve gotten the right cabling to verify that its framebuffer is still working, and later that its PROM monitor works. Sadly, by then I started having trouble with its power supply - the jingle no longer graces my living room, the hard drives seem to have trouble spinning up, and there’s that unmistakable smell of the Magic Smoke escaping some components. I’ve decided to hold on booting it again until I can get a fresh power supply. I might later look into whether all it needs is re-capping, but “messing with power electronics” probably isn’t a great first project.
VAXstation
This one is quite a bit different from the others. The VAXstation 4000 VLC has a CISC chip (but not the common m68k) and I intend to use it to run OpenVMS, not a Unix. I’m pretty psyched about it because it is so different from the others - it stays closer to its PDP/11 heritage than the rest (who only inherited Unix from the venerable minicomputer). Like the Indy, most of the ones I could find for sale were exhorbitantly priced (more than $1000 in this case!). I suspect that the VLC is sought after because:
it’s a legit VAX, so can replace an elderly failing larger VAX without needing to change software
it’s tiny
The one I got was listed at very fair price after retiring from being an industrial controller, so I snapped it up. DEC’s connectors are even more unusual than the other boxes - it uses a DA3W3 (not a DB13W3) monitor port, special MMJ serial port, a telephone handset port for the keyboard, and an unusual mini-DIN 7 for the mouse. It’ll probably take a bit longer to get the right connectors to get it up and running!
Today
This catches us up more or less to where I’m at today: with a pile of workstations, none of which are “done”. With this post, I’ve also started keeping a page for each workstation - you can see them in the sidebar. I’ll update those with more details as I research them, and with the current state of each box.
I know I’ve been stringing you all along for a bit - I’ve acquired a handful of workstations, some electronic components, some adapter cables, and I’m excited to get my hands dirty and show y’all the restoration process. Before we get to that, I want to explain one of my goals from the welcome post a bit more in depth.
Restoration
Most of the machine’s I’ve got my eye on are nearly 30 years old, and might not have been earnestly used for 20 years. I would like to get each one in my collection booting with its contemporary operating system, running software it would have been bought for.
In getting hardware bootable, I’d prefer to keep as many original spec components as possible (that is, components in keeping with the original spirit of the machine). I do expect to have to replace many parts past their prime. Power supplies, hard drives, and clock batteries in particular seem to have shorter lives than CPUs, motherboards, frame-buffers, and RAM chips. I will not end up hollowing out the guts, putting a microITX motherboard inside, and just emulating the original OS.
Software-wise, I expect to have…an entertaining time looking for original OS install media / downloading it from the corners of the Internet. Specialized application software might no longer exist (/me pours one out for bytes gone-bye). I’m not going to settle for just running NetBSD on everything, though. I’m not interested in porting Firefox, or using the GCC toolchain. This project is about being able to recreate the experience of the workstations being new and top-of-the-line, warts and all.
Aesthetically, some of the computers may be in…somewhat “well-loved” condition. At some point, paint will probably have to be researched, yellowed plastic will need to be cleaned, and dust blown out.
Modern Peripherals
One part of the original experience I don’t want to recreate is peripherals. Part of this is practical - I live in an NYC apartment, and don’t have space for tons of proprietary keyboards, let alone a wide variety of CRT monitors. I also just…don’t think they’re a super important part of the experience.
Instead, a big part of this project will be building software and hardware that take modern USB keyboards and mice, and translate their signals in to the format needed by the workstations (kind of like a reverse TMK Keyboard project). I also want to adapt the original video signals to something easier to display.
There’s plenty of $PROPRIETARY-to-VGA adapter cables out there, but my goal is to take this a step further and digitize the signals. There are VGA-to-HDMI adapter boxes out there, and I intend to use similar chips to adapt the various analog signals to HDMI.
The Dream
With all this, then, the dream is to have workstations that look like new, run like they did when new, and use period-appropriate software, connected up to converter boxes that let me use USB keyboards & mice and HDMI monitors.
Thanks for bearing with me in all these early walls-of-text! I promise that now I’m gonna get down to business and start making posts with pictures, stories, and frustrations.
If this project is about restoring pizzabox workstations, I have some defining of terms to do. A workstation sometimes means the desk where you work; a pizzabox normally contains a delicious tomato, crust, and cheese combination. For my project, though:
A workstation is a computer system designed to be used by a professional. It runs specialized software for purposes like CAD/CAM, video editing, desktop publishing, 3D modeling, scientific simulation, manufacturing control, or software engineering. A workstation’s hardware integrates tightly with its operating system, which is usually written by the workstation’s manufacturer (and typically a flavor of Unix).
This sounds a lot like a PC! Compared to contemporaneous PCs, a workstation has a significantly faster processor, better floating-point calculation speed, advanced graphical ability, faster storage, more memory, or more flexible networking. Workstations run an OS with more security features, better multitasking support, and more reliability than PCs.
Unlike minicomputers and mainframes, a workstation is normally used by one person at a time, in-person. By being used in-person, its graphics are low-latency and capable of playing video (difficult on an X Terminal!) or rendering 3D graphics in real-time.
A pizzabox is a slim desktop form-factor of low-cost workstation models. There are a handful of distinctive workstation form-factors: PC-like desktops and towers, cube-like desk-standing pedestals, giant floor-standing pedestals, and pizzaboxes. Pizzaboxes tended to be lower-spec models sold for lower prices. Their small size works well with my tiny apartment, and the distinctive style seems to have hardly been adopted by PC manufacturers.
From these definitions, I have some more specific opinions. I don’t have a lot of good reasons for these, so take them with plenty of salt:
the height limit for a pizzabox is 100mm
having an x86 or amd64 processor disqualifies a computer as a workstation
having an m68k processor is acceptable
some manufacturers that made workstations also made similar computers that are not - Apple’s Quadra line are workstations, their Performa line (for home users) is not. The Sun SPARCclassic is a workstation, the Sun SPARCclassic X (with no disk, sold as an X Terminal) is not.
rack-mounted and VMEBus workstations are interesting, but not going to be focused on here
Windows NT, up through version 4, is acceptable (on non-Intel platforms)
From these arbitrary rules, qualifying pizzabox workstations were made from the mid 1980s to the late 1990s. They started out using CISC chips (like the m68k) but mostly moved to RISC by the early 1990s. So far, I’ve identified pizzaboxes from the following workstation families:
Apple Quadra (m68k)
Apple PowerMacintosh (PPC)
Data General Aviion (m88k)
DEC AlphaStation (Alpha)
DEC DECstation (MIPS)
DEC VAXstation (VAX)
HP 9000 (m68k, then PA-RISC)
IBM RS/6000 (PPC/Power)
NeXT NeXTstation (m68k)
SGI Indy (MIPS)
Sun 3 (m68k)
Sun SPARCstation (SPARC)
and I expect to find more as I pour over more old spec sheets!
Well hello! This is the pizzabox.computer project - my project to restore “pizzabox” workstations. My goals are to:
collect pizzabox workstations from a variety of manufacturers - if possible, from both before and after the move from Motorola 68000 series CPUs to RISC CPUs
restore those workstations to be usable with modern peripherals (I don’t have the closet space for a dozen CRTs!)
archive manuals, specifications, and sales data for workstations from the late 1980s to the mid 1990s
write essays about workstation history and what we can learn from it in the present day
I’m looking forward to see where this project can go! I hope you’ll join me.
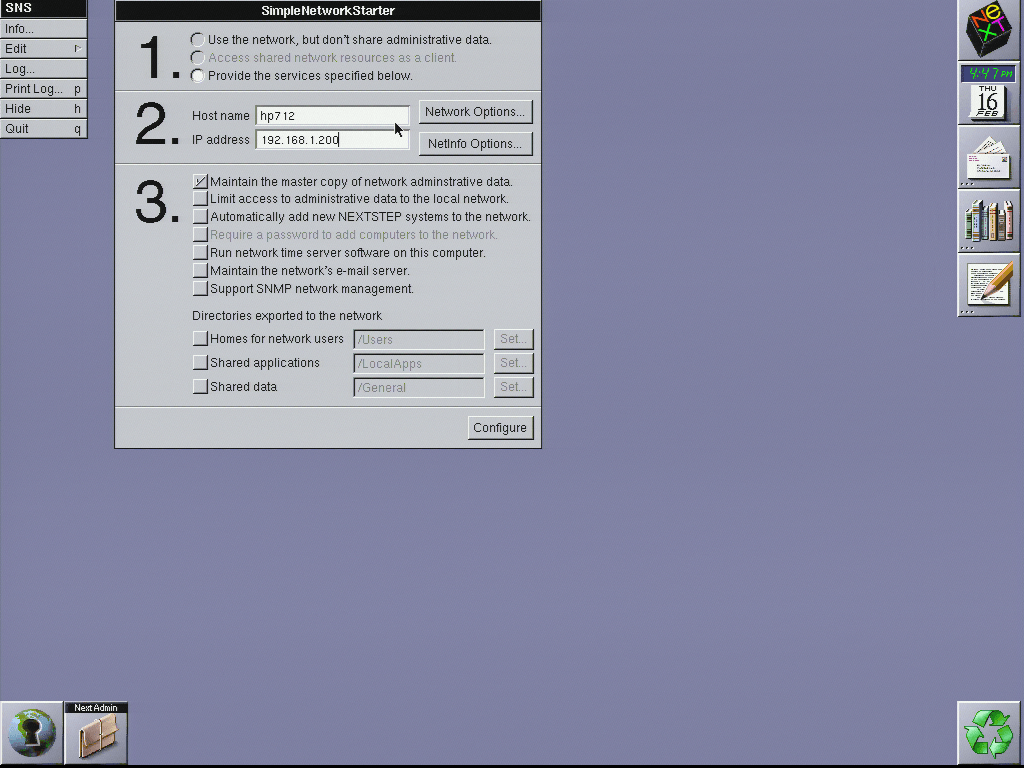
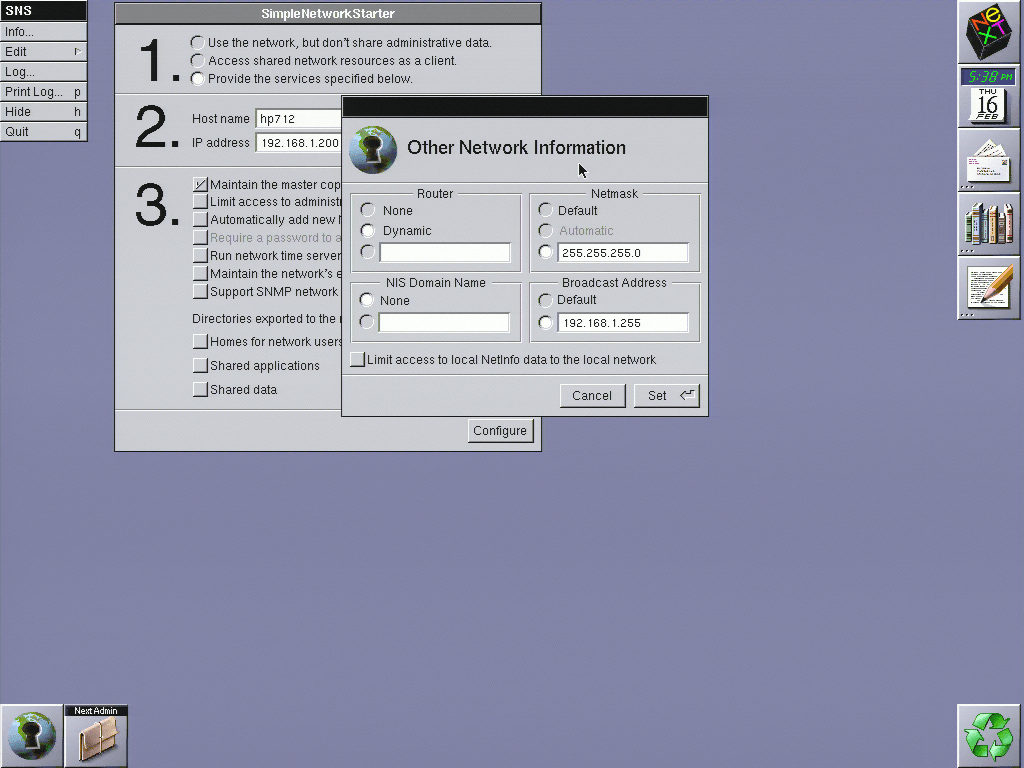
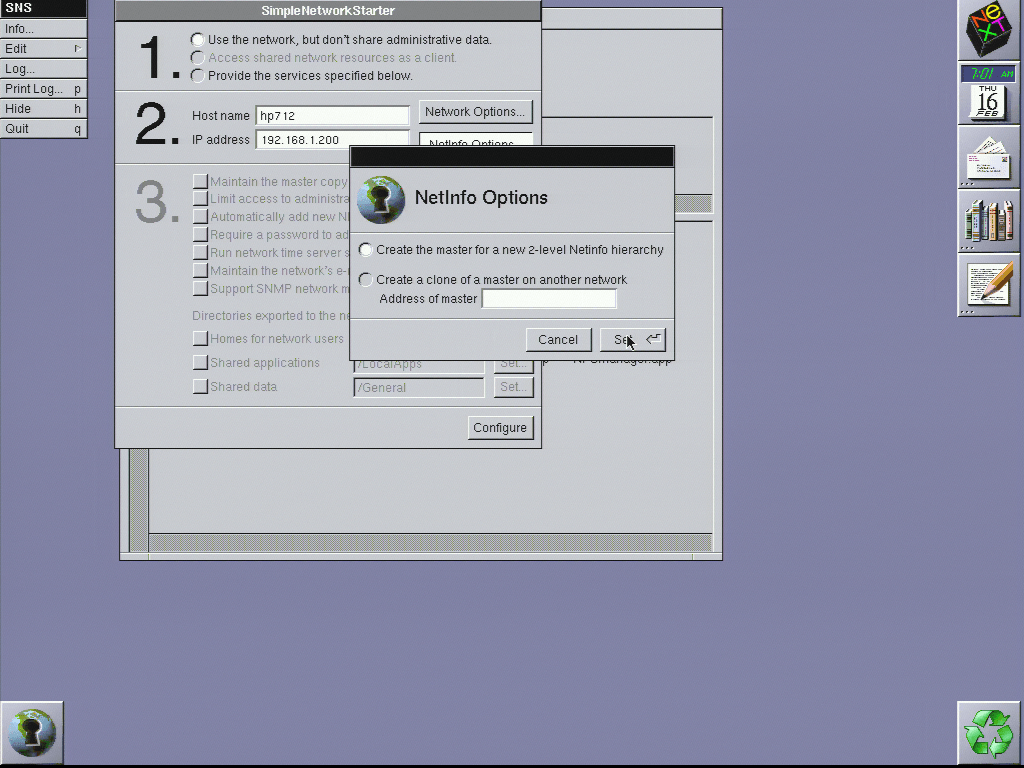
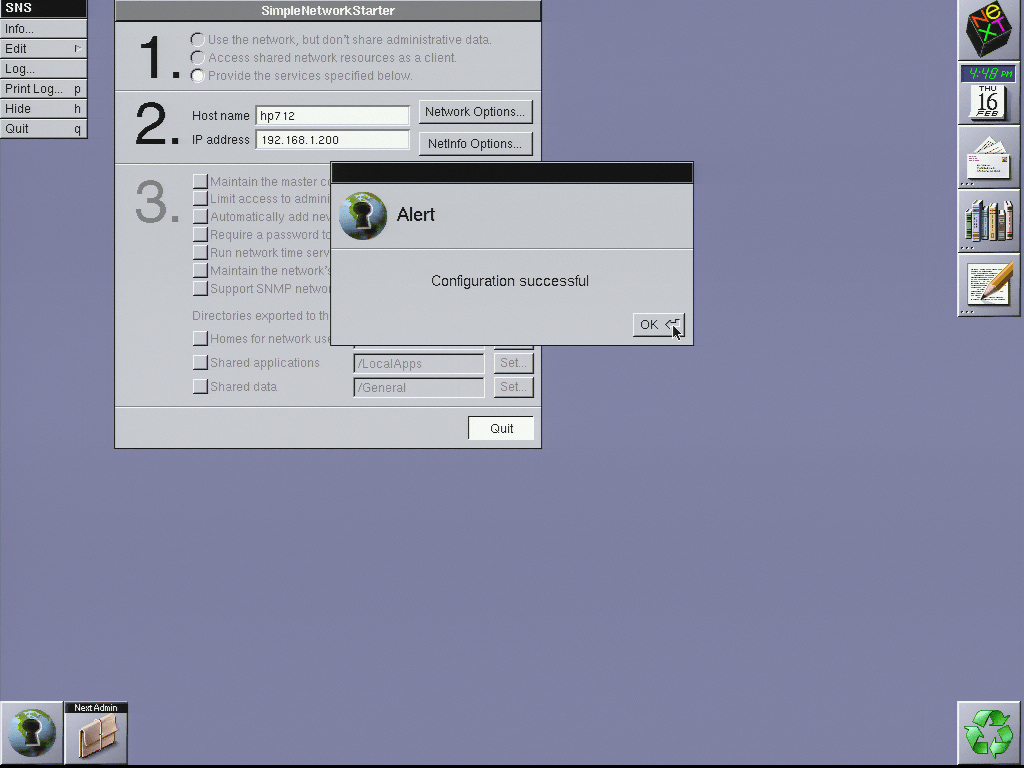
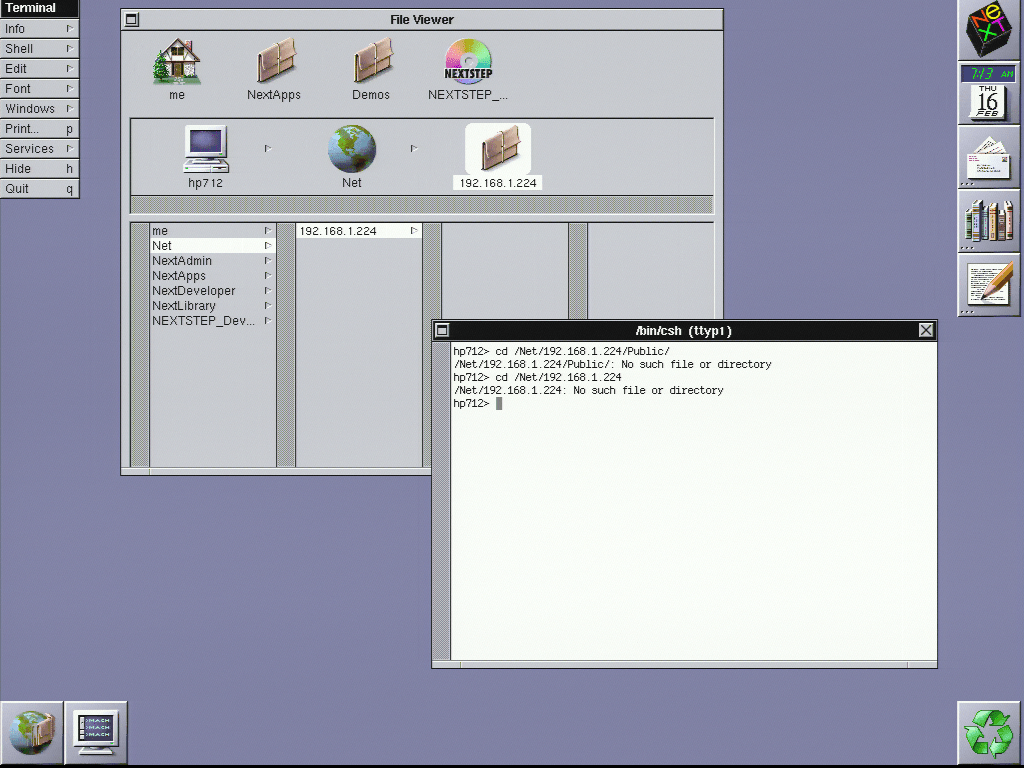
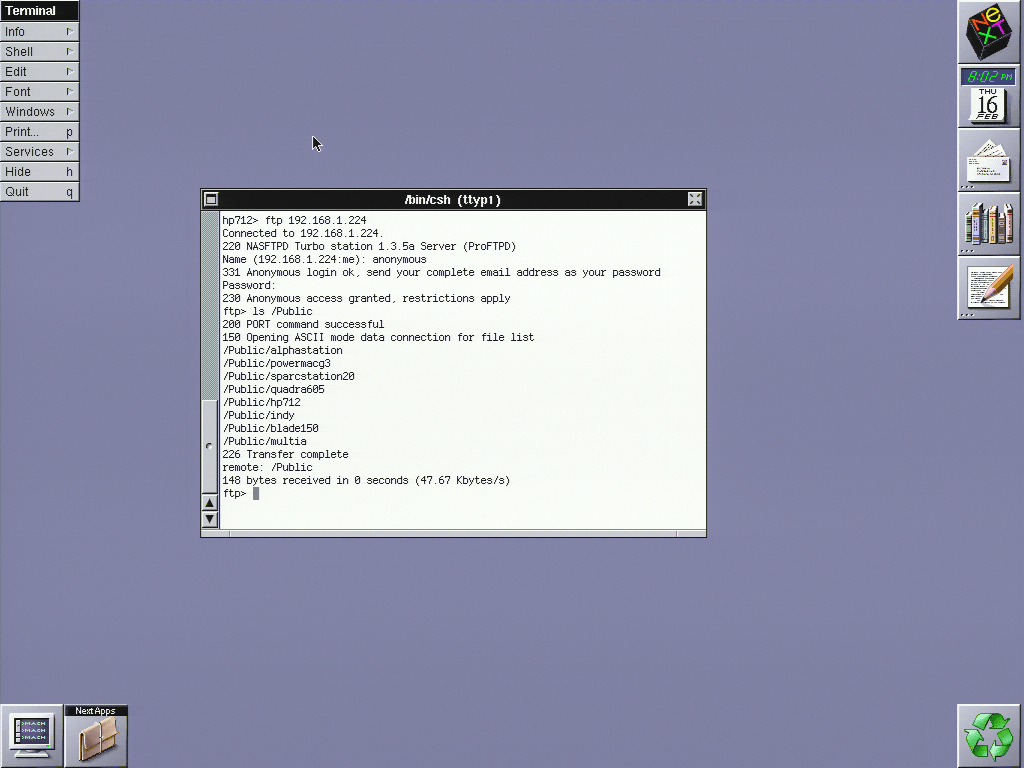
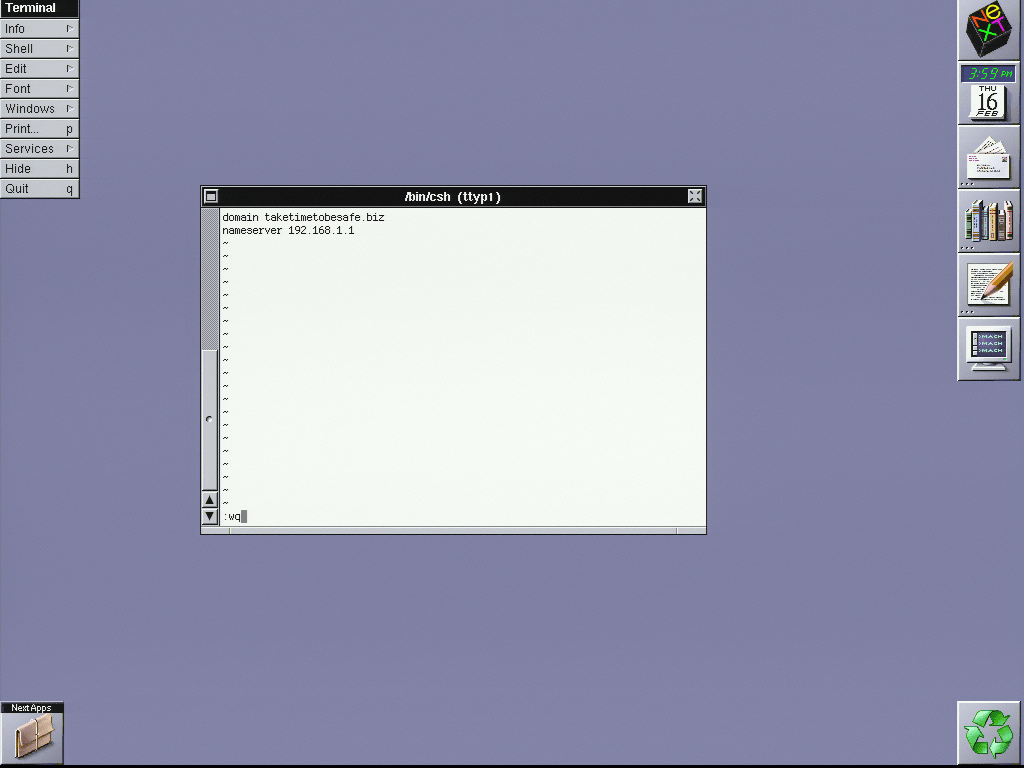
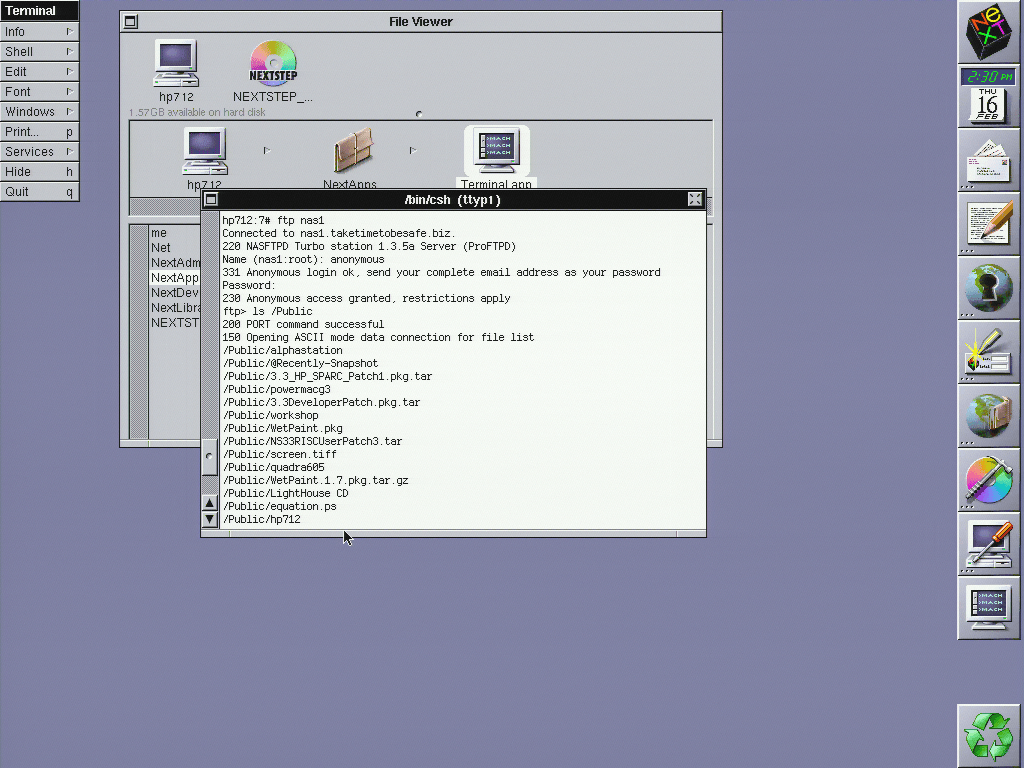
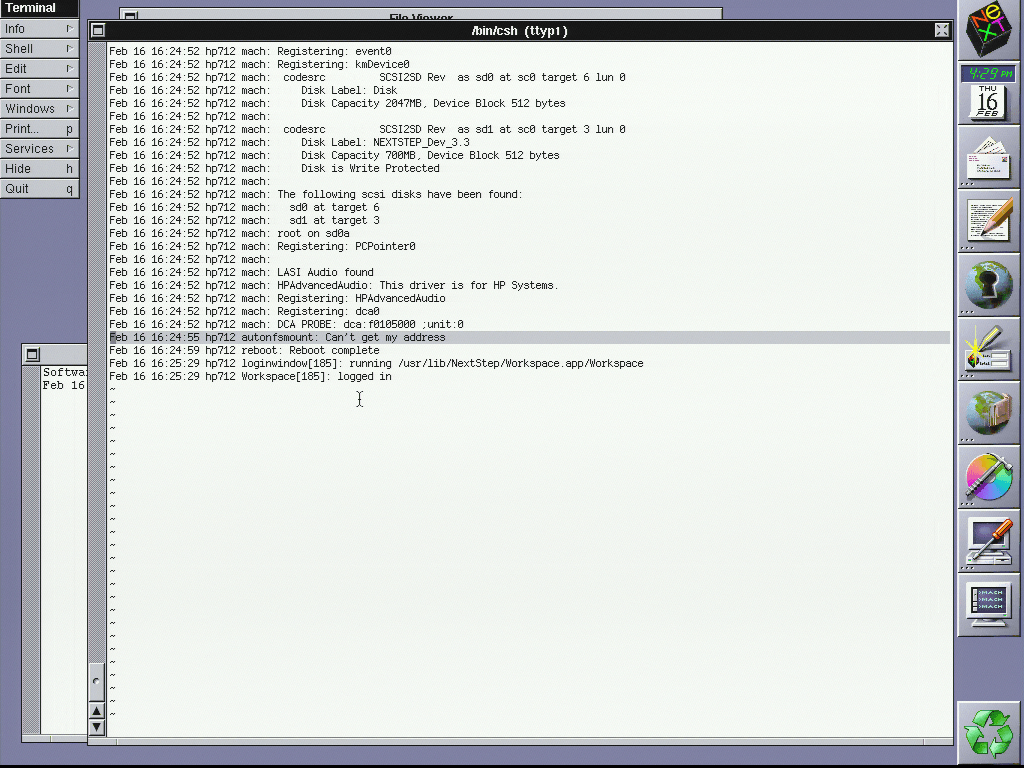

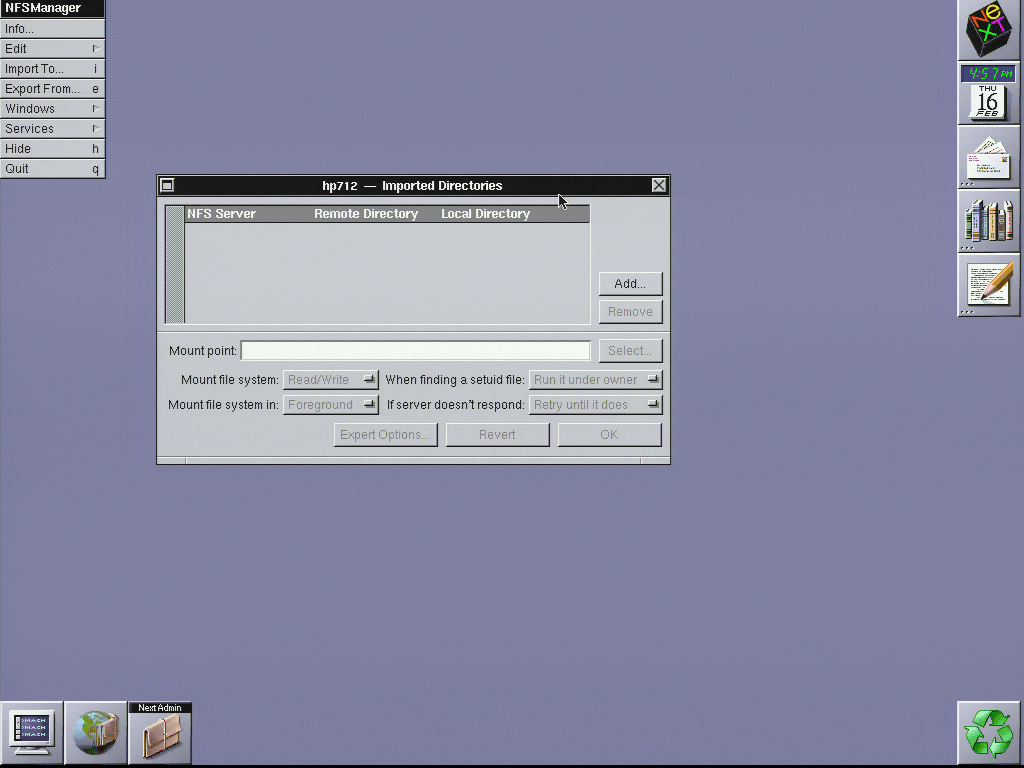
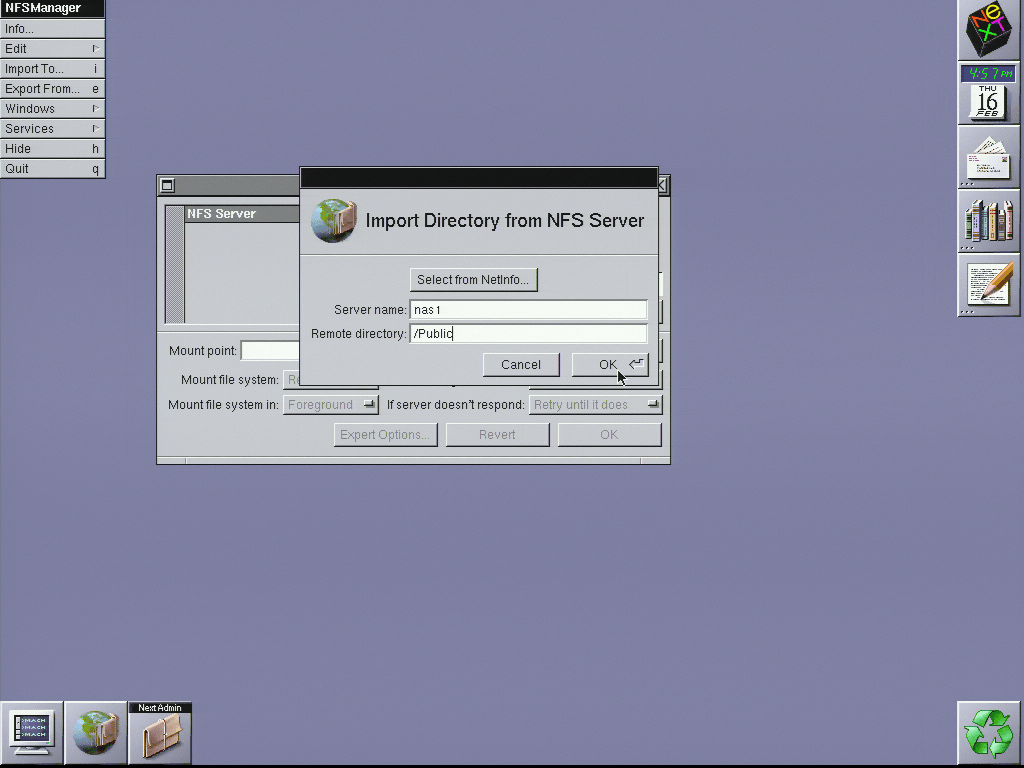
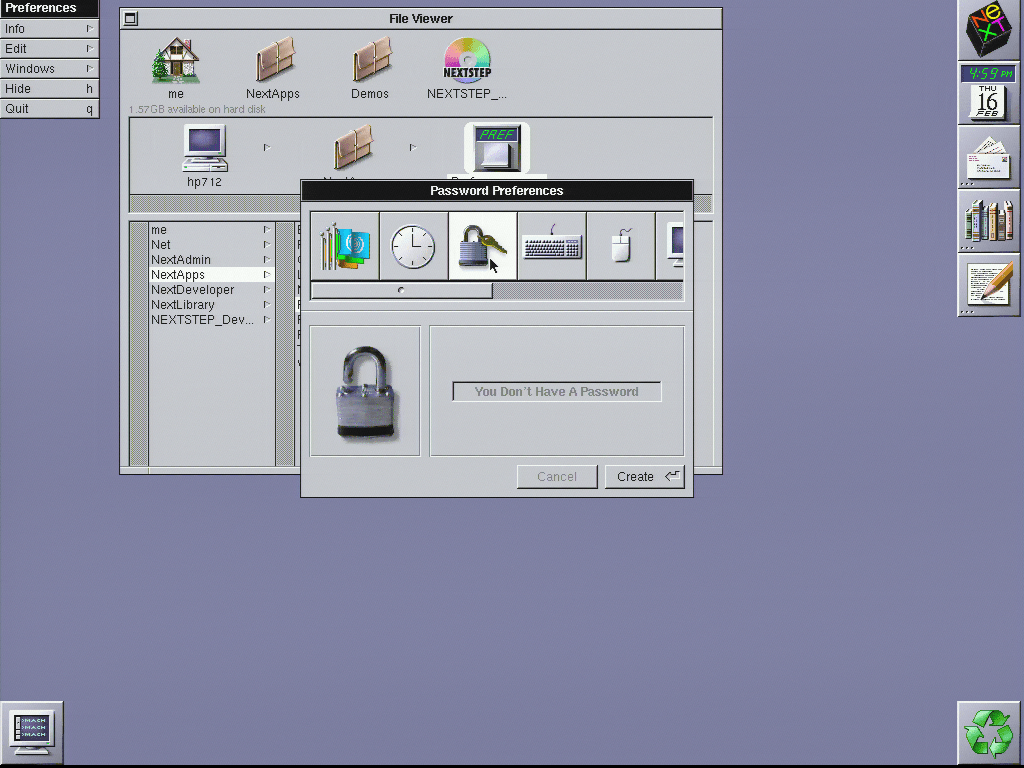
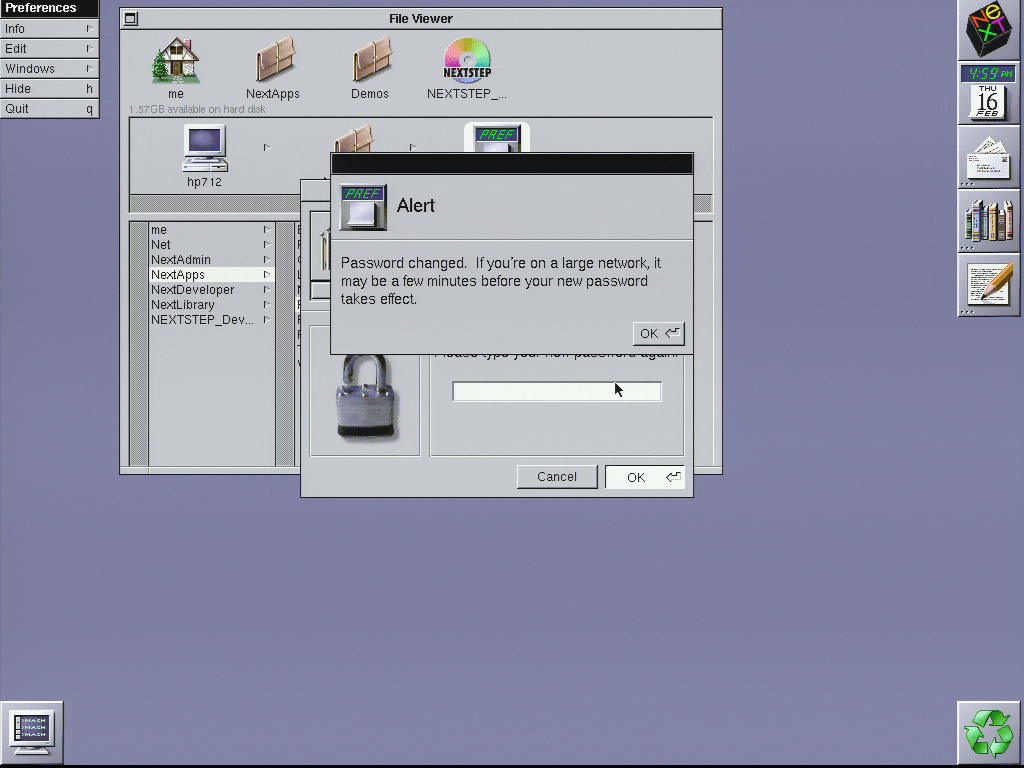
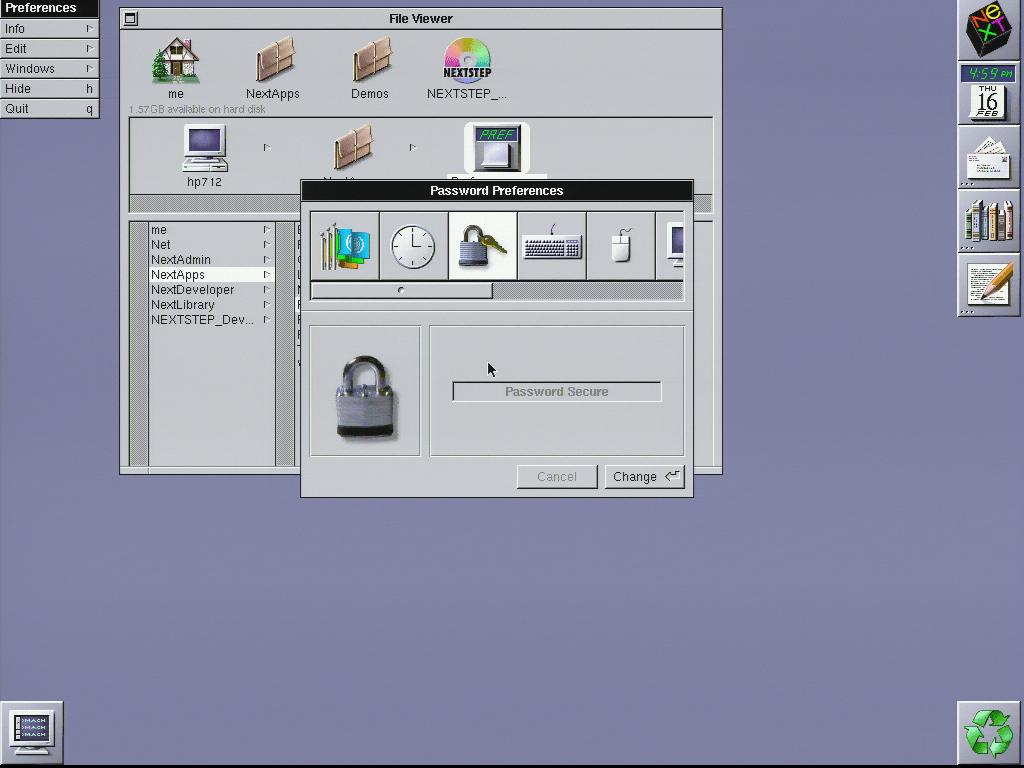
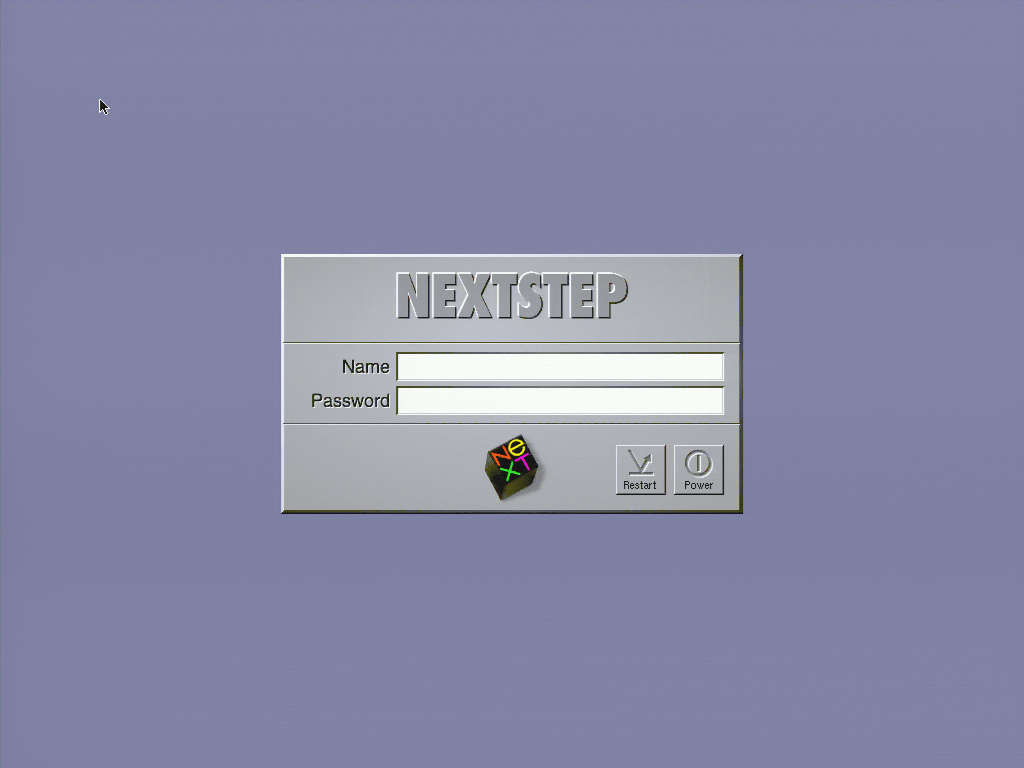
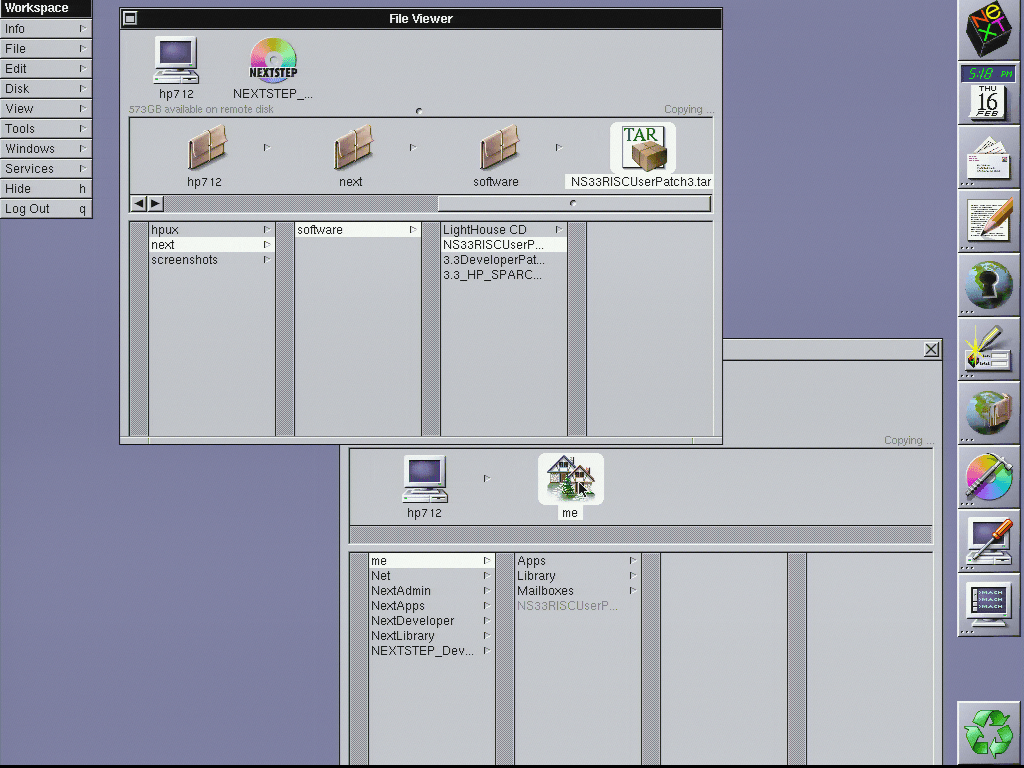
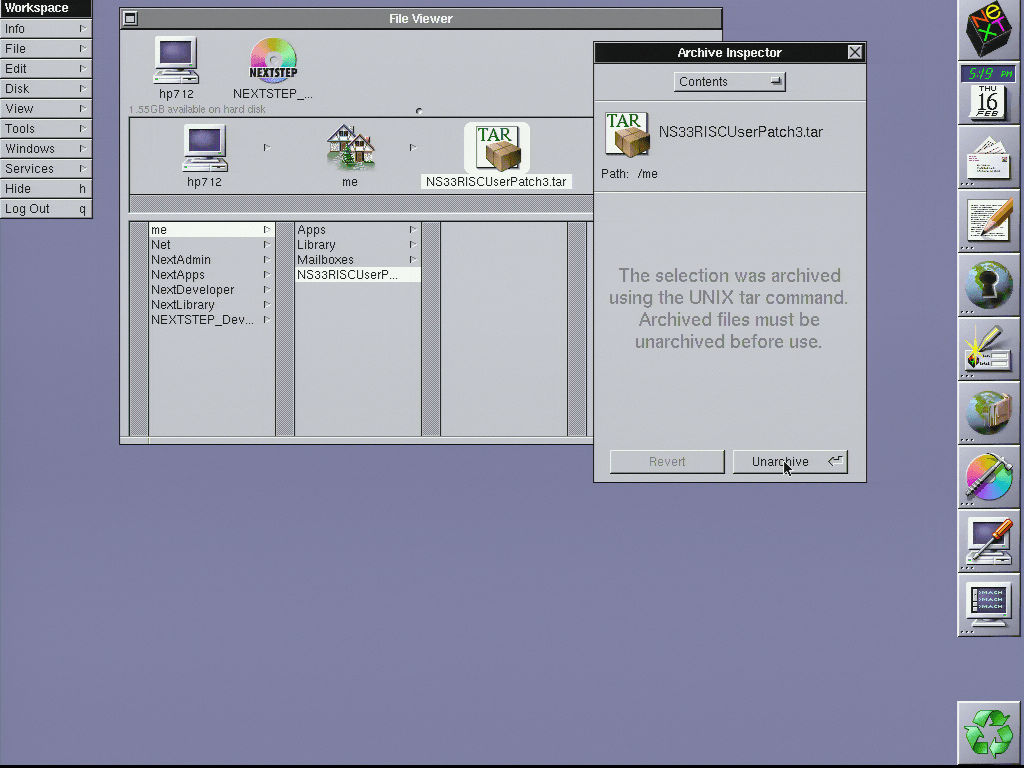
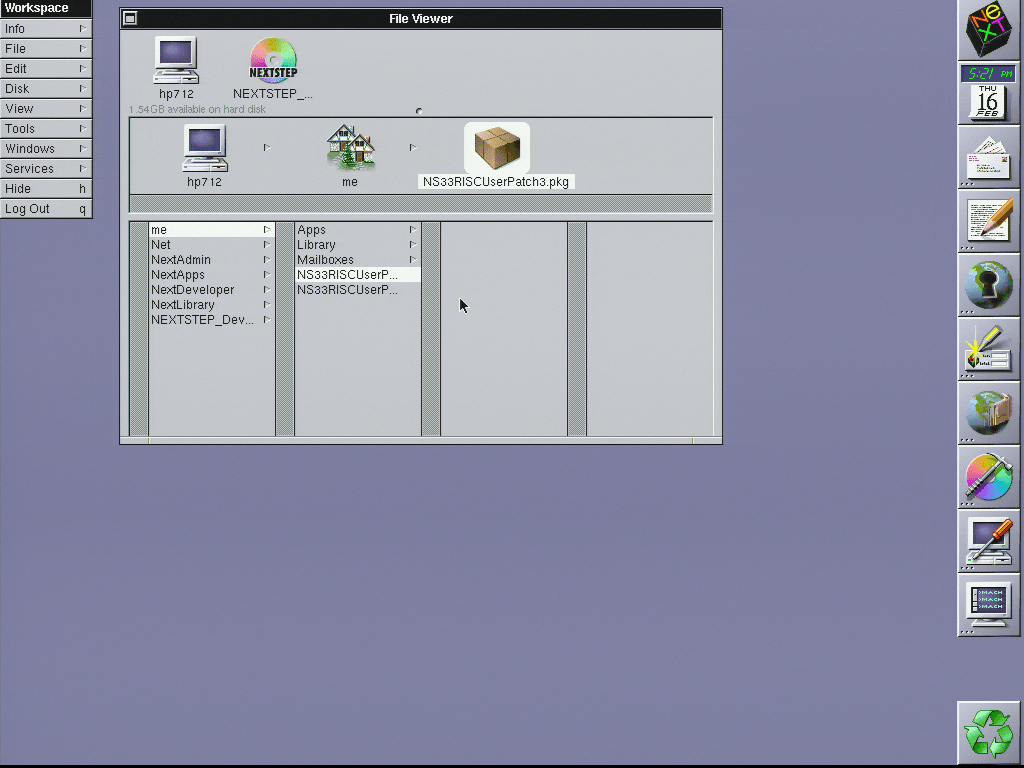

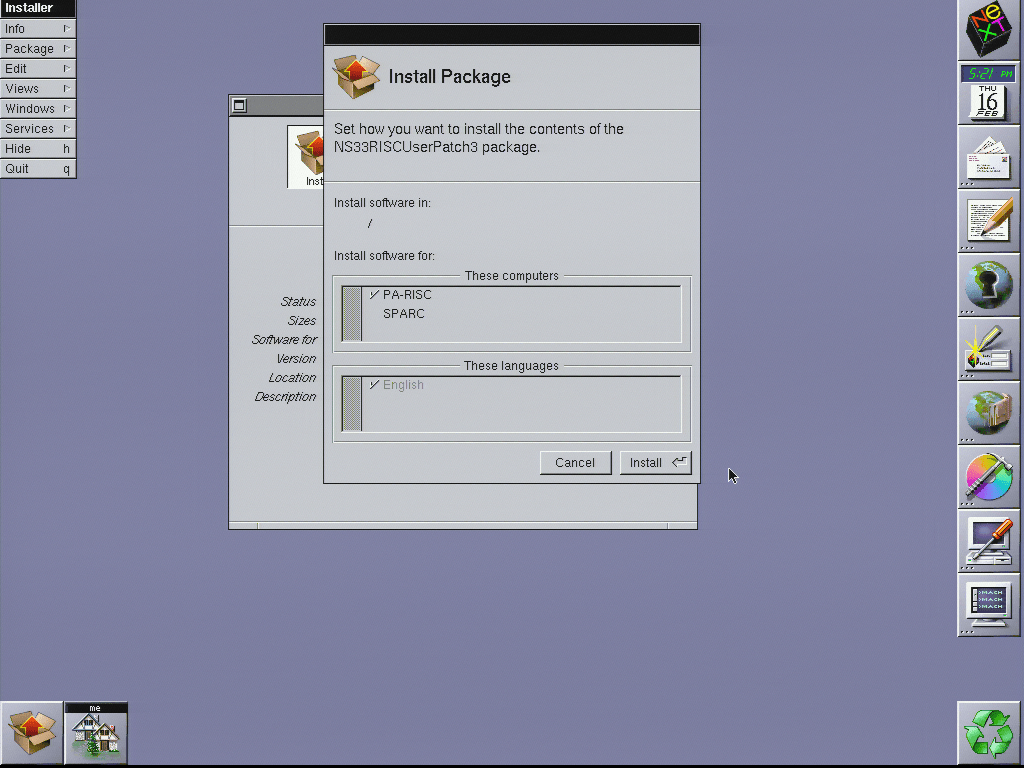

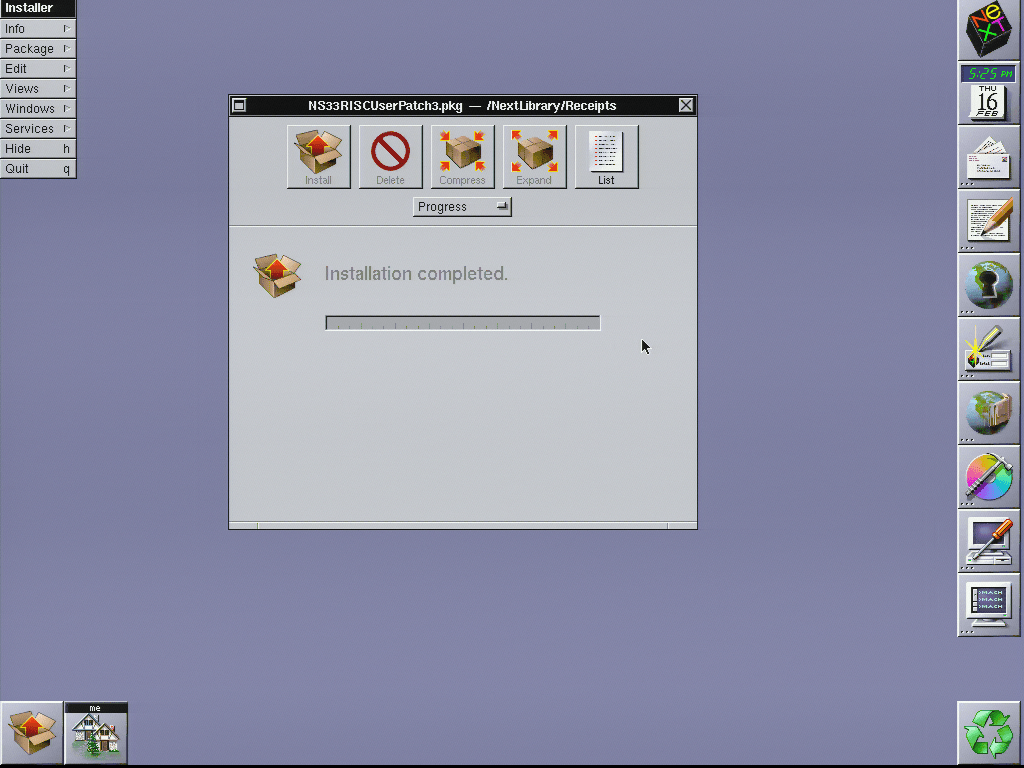
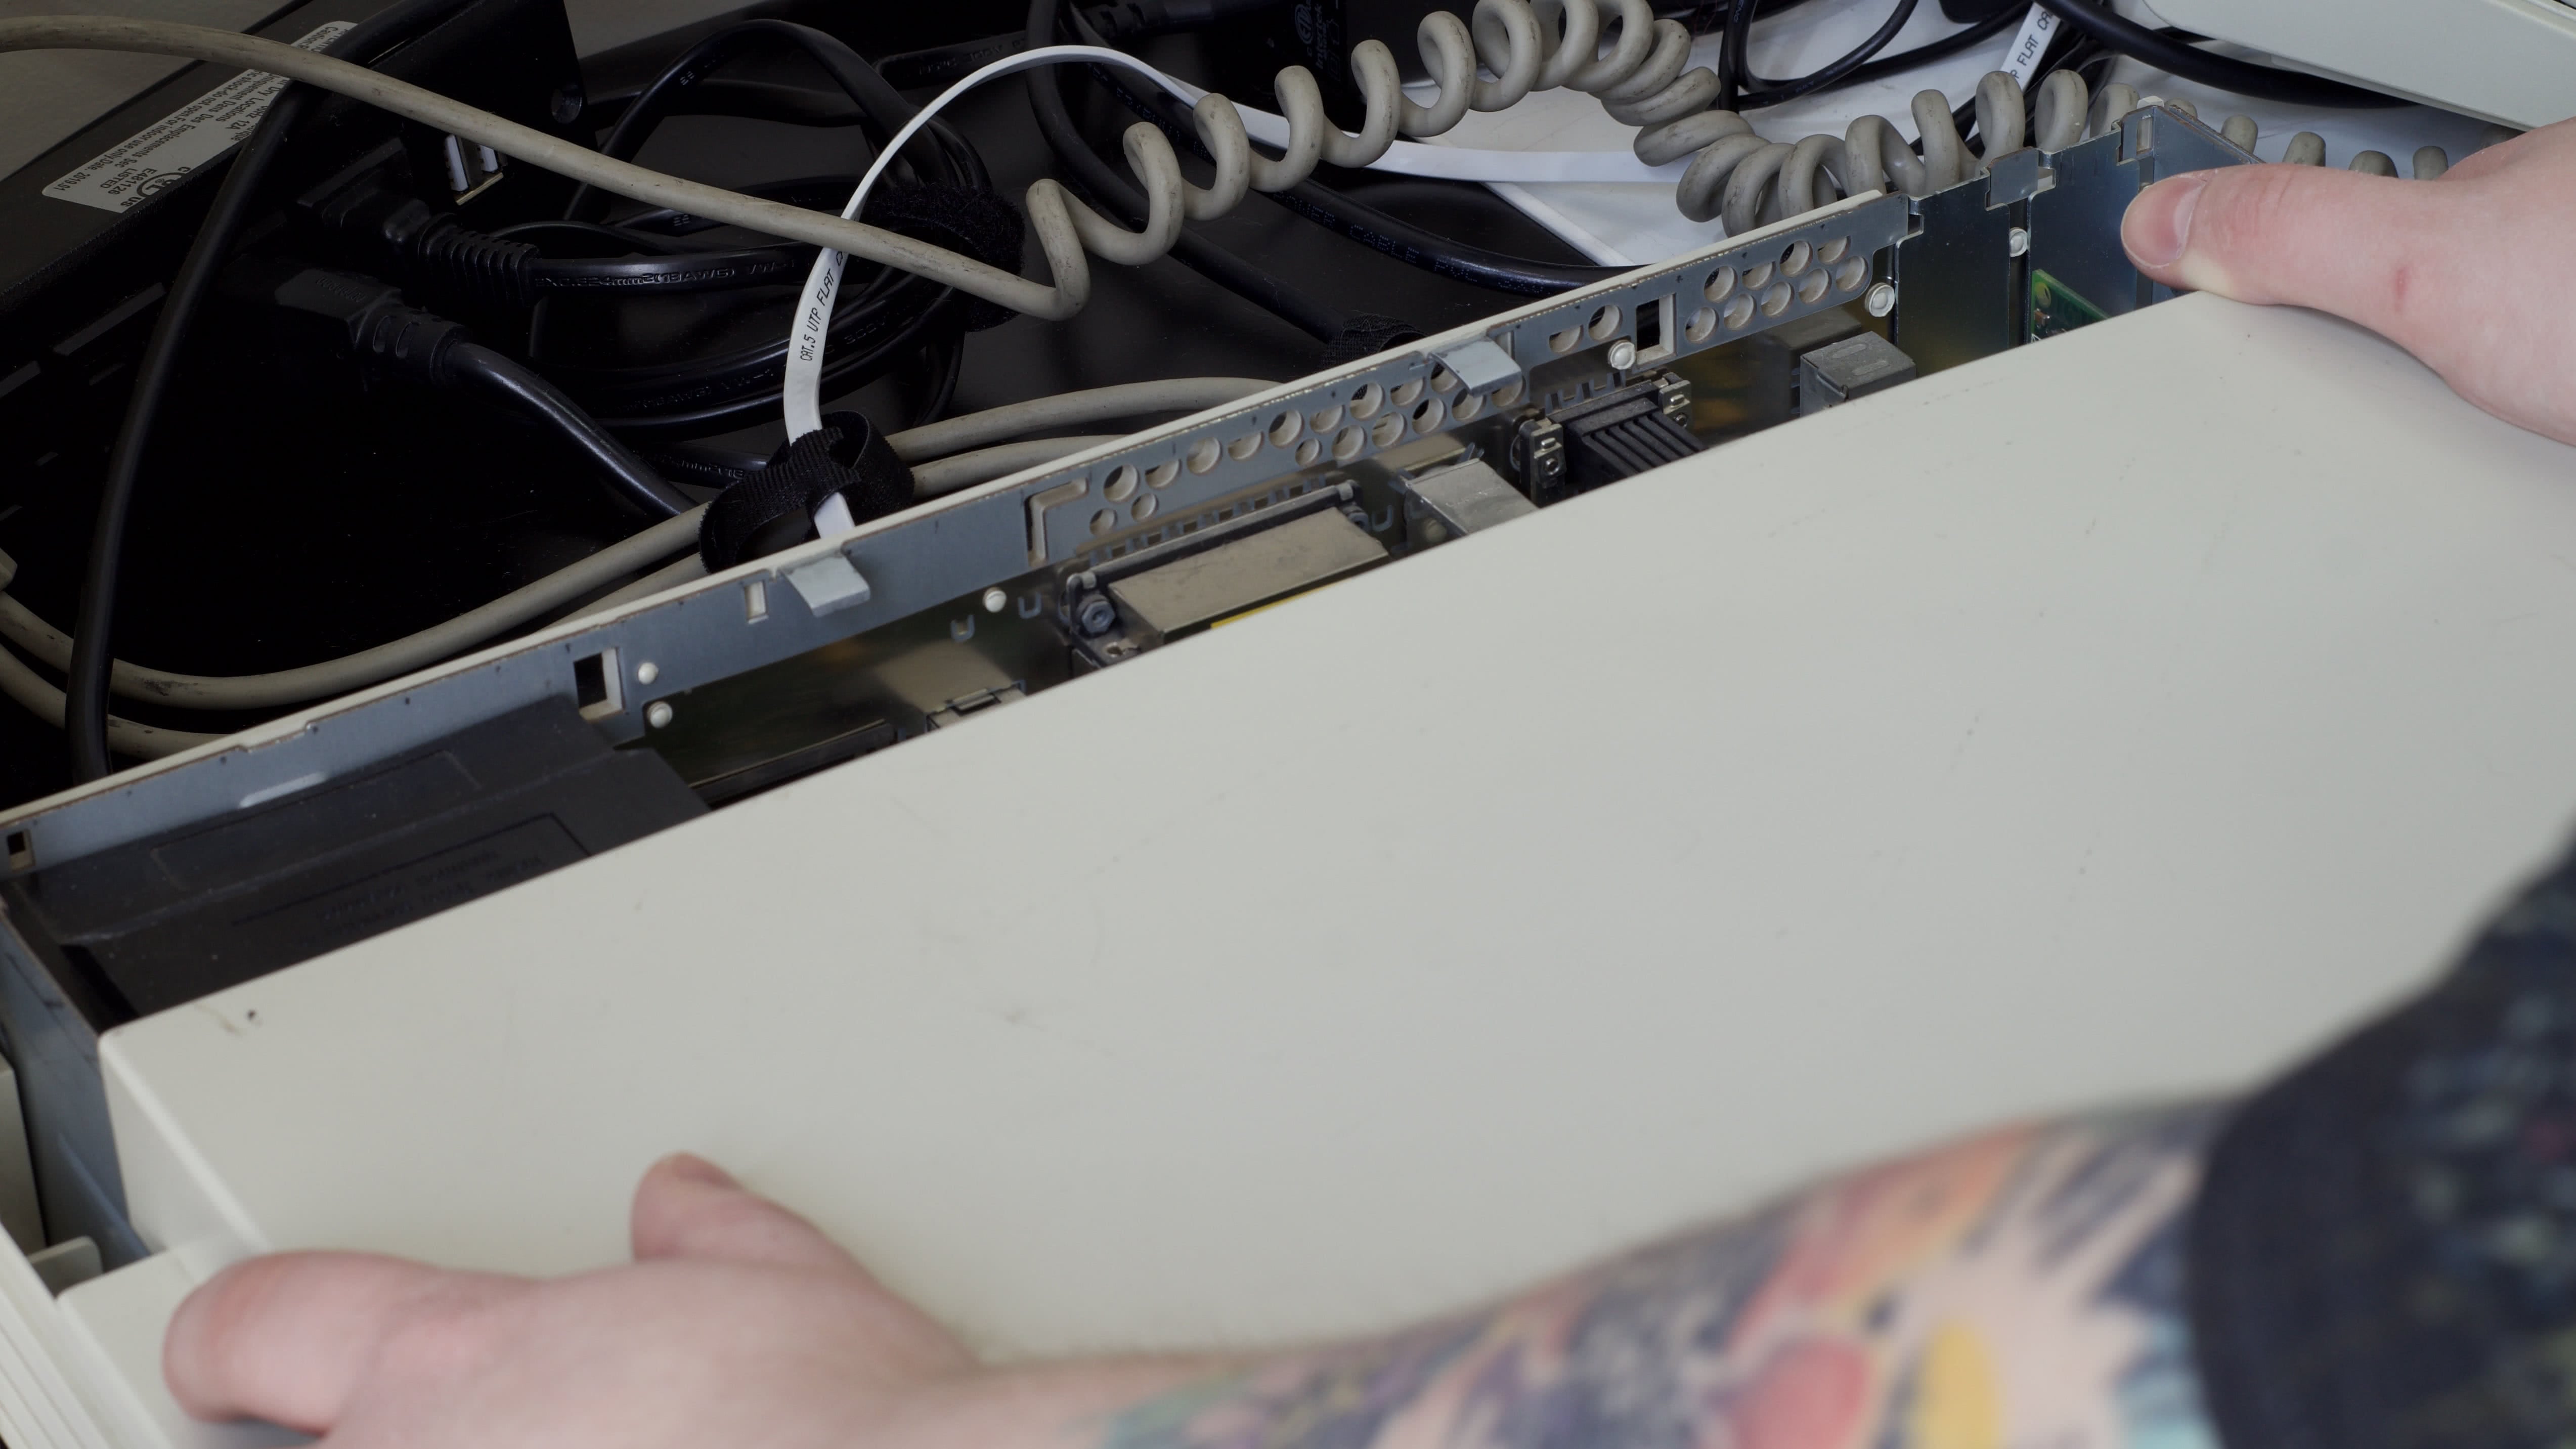
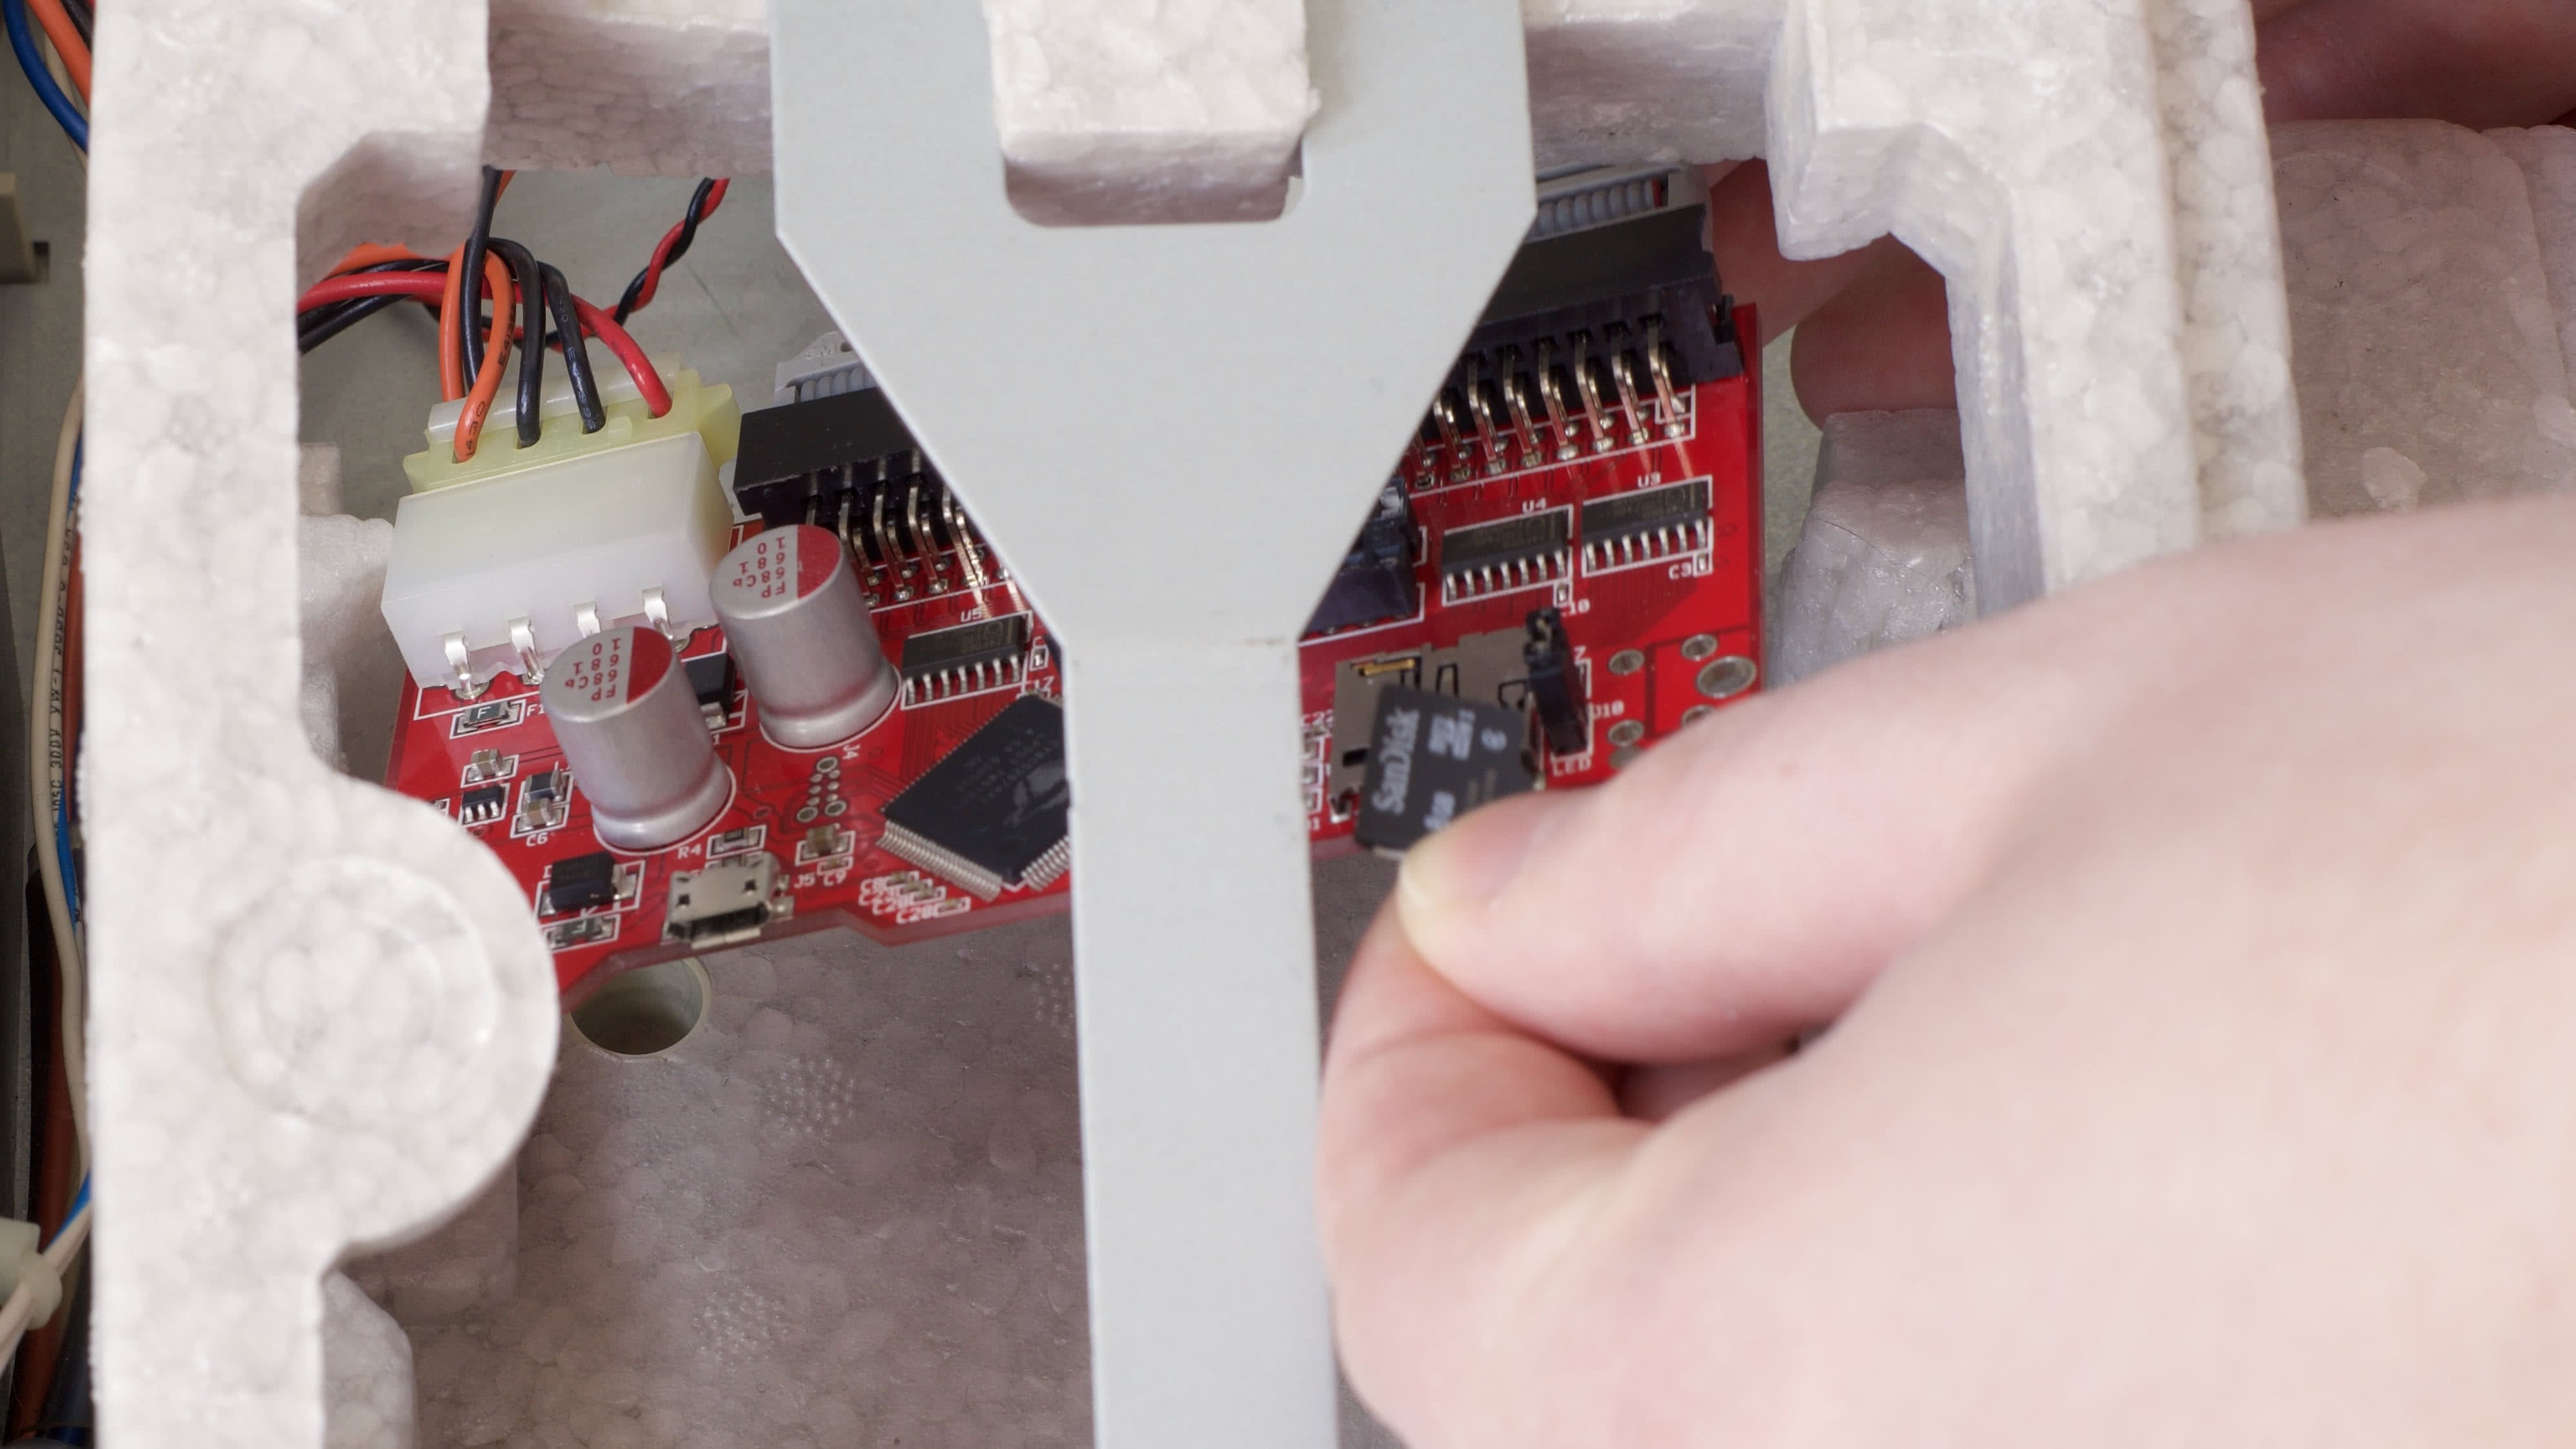
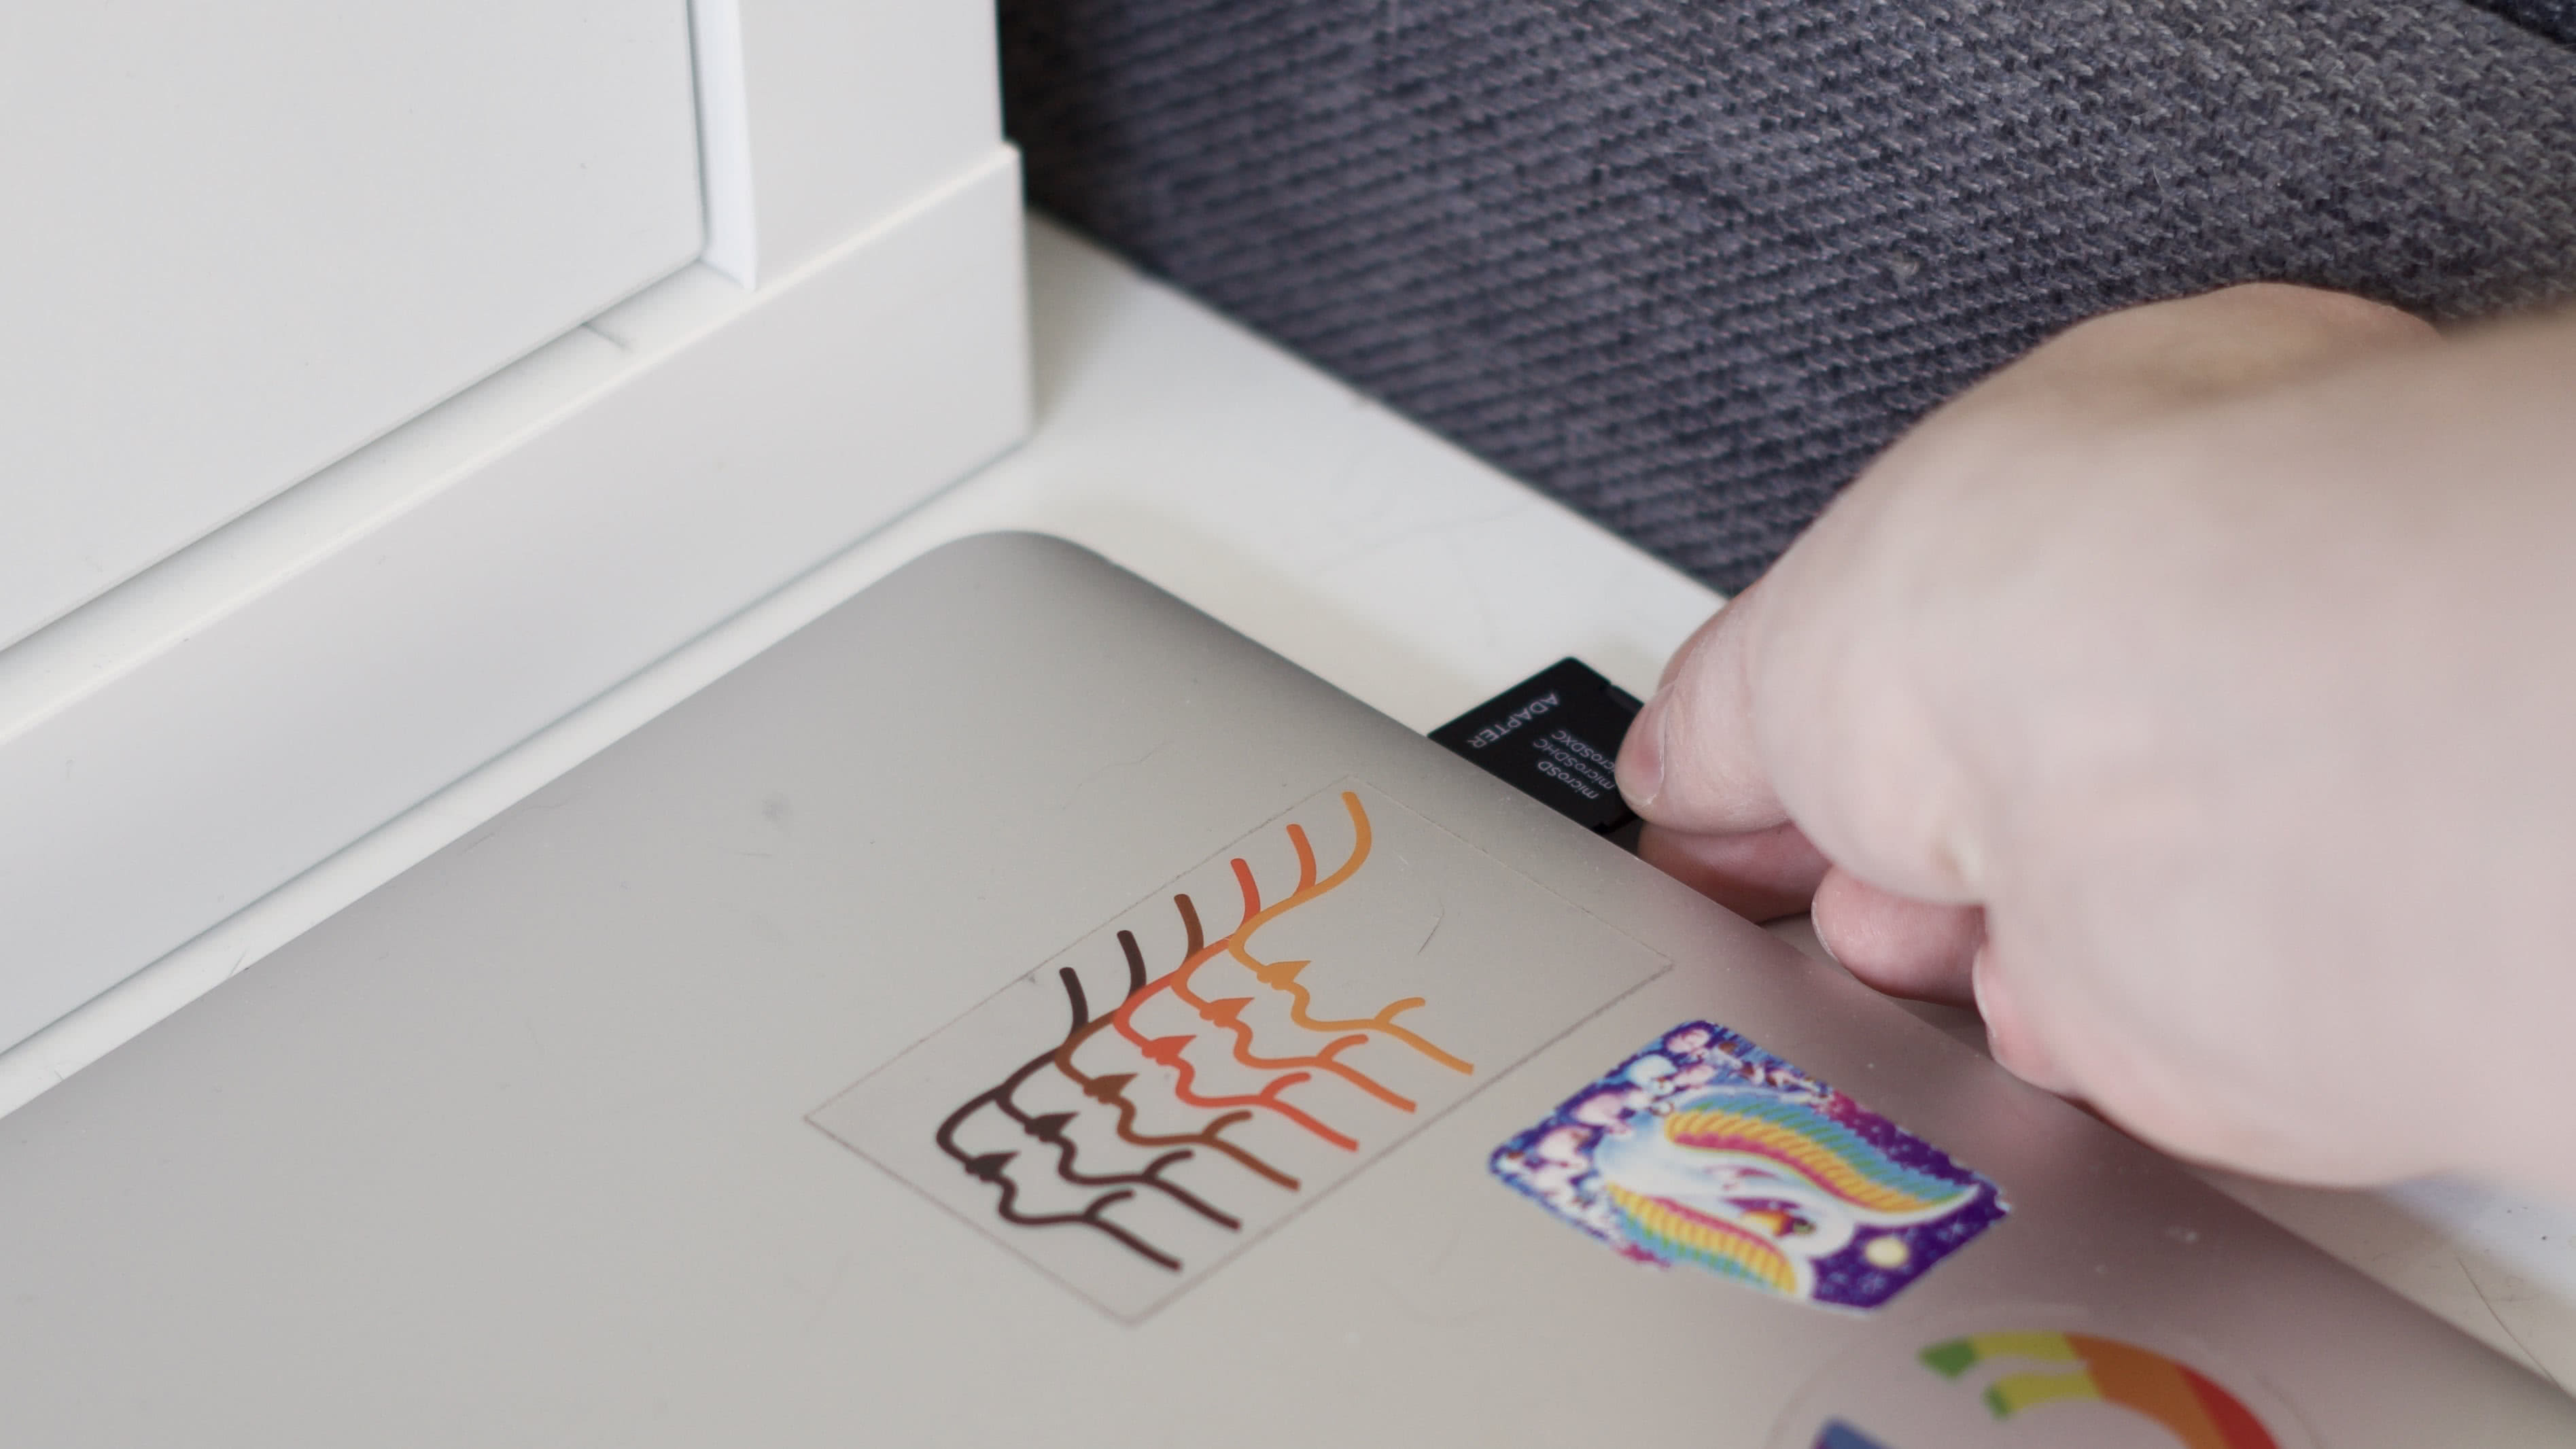
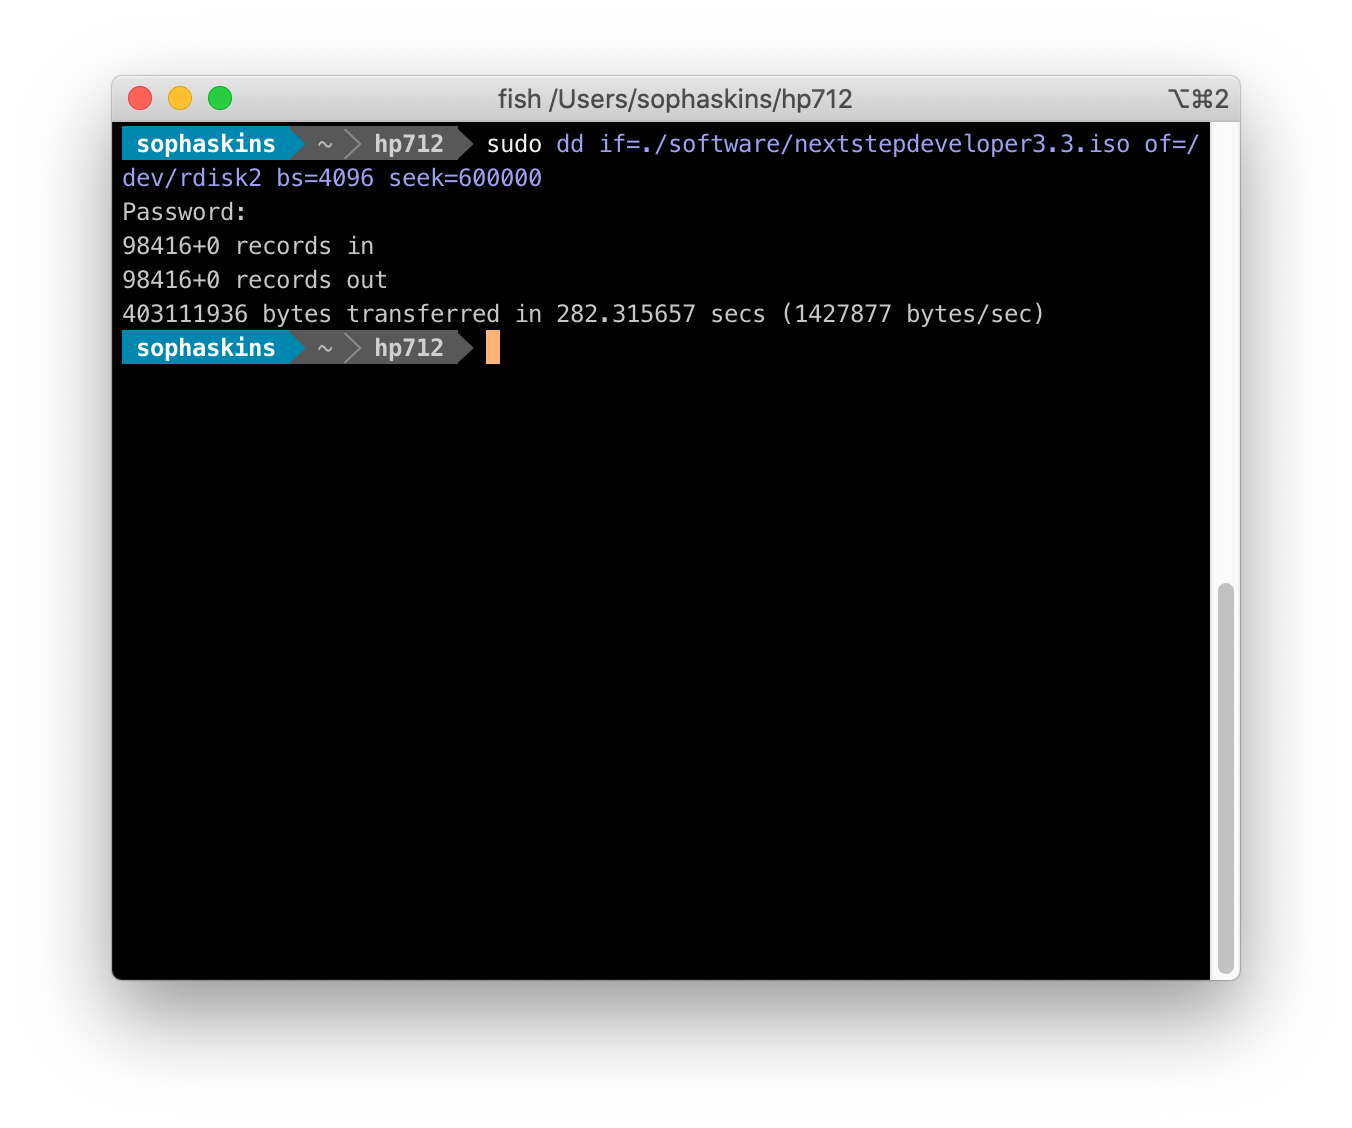
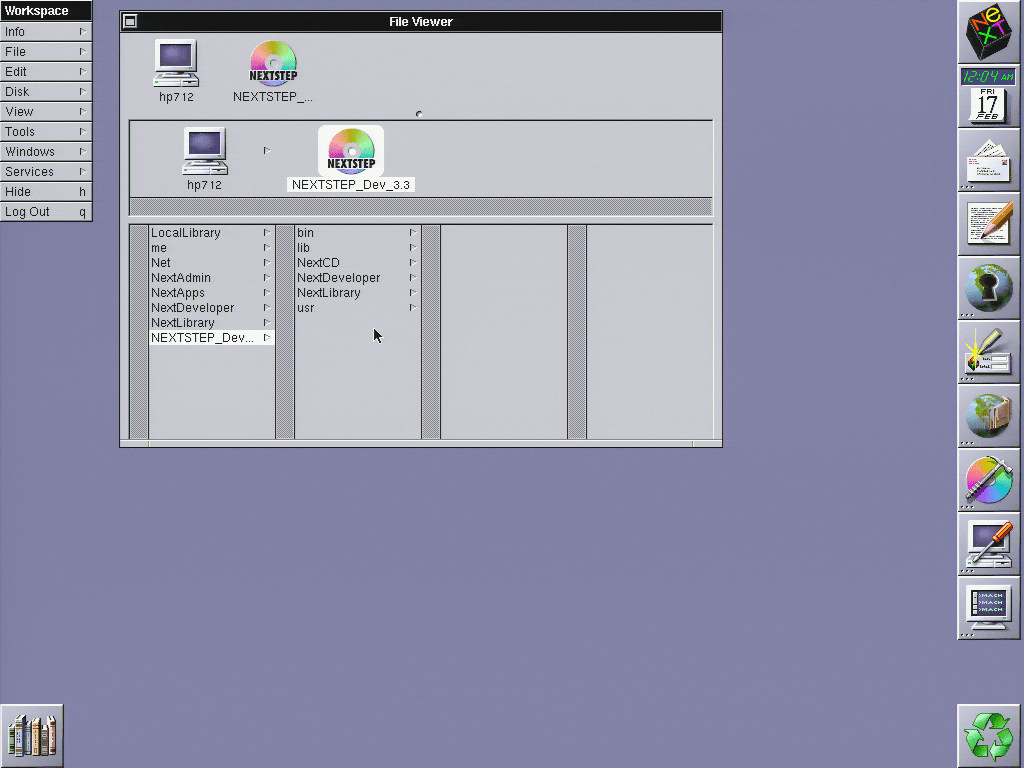
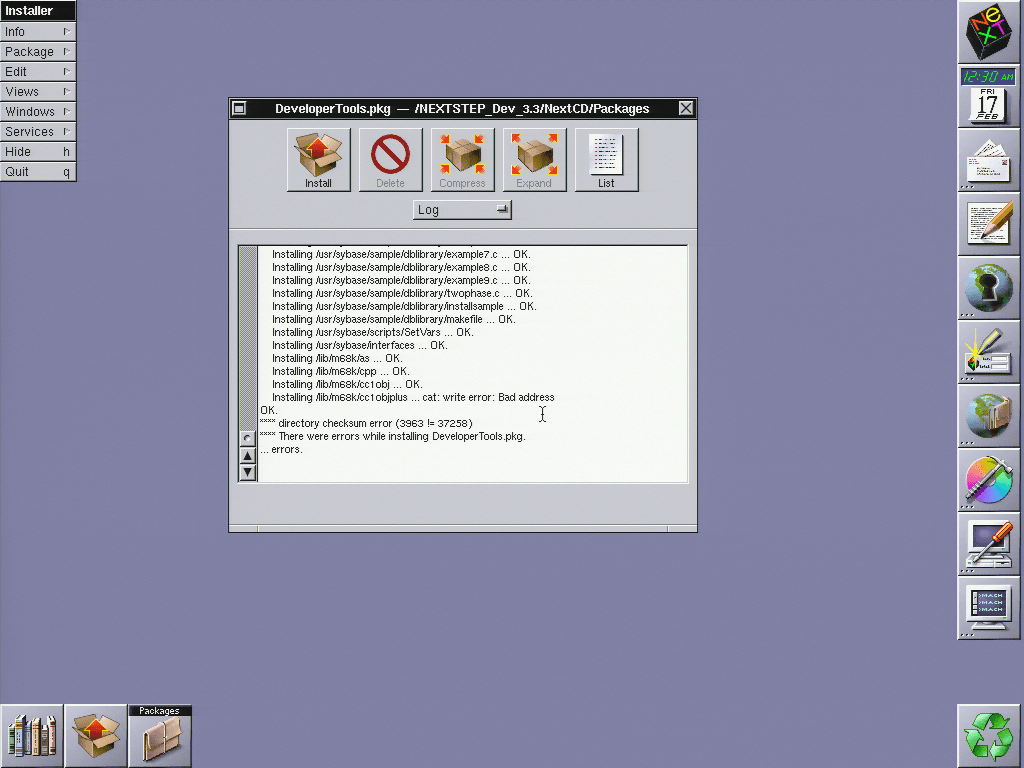
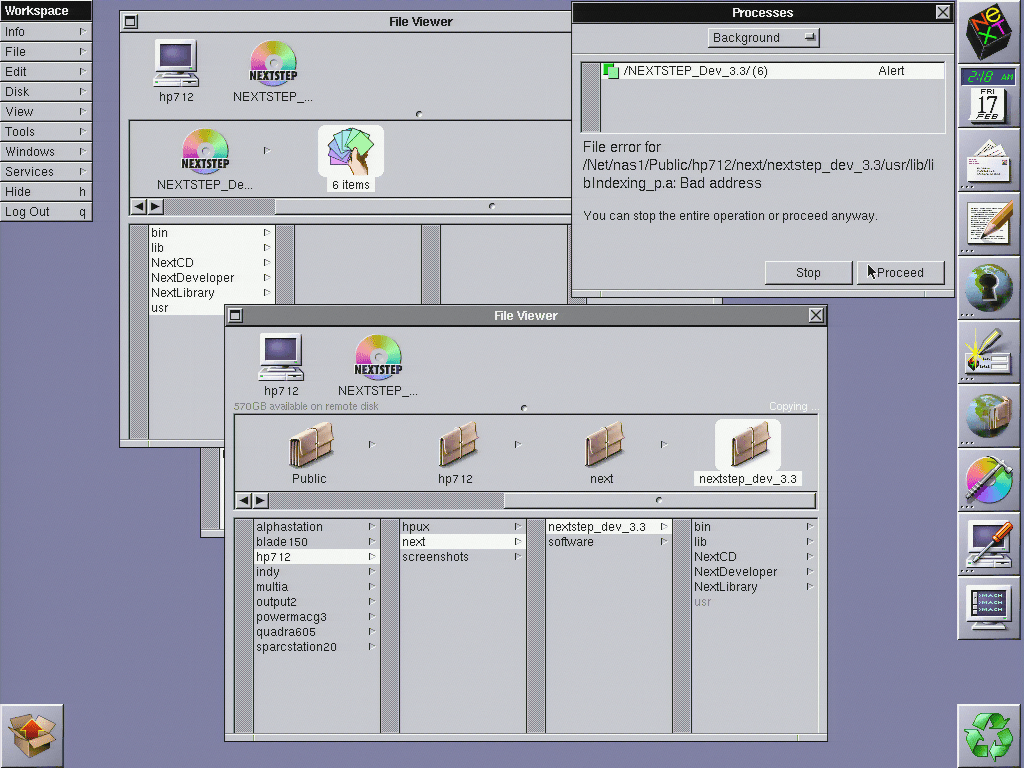
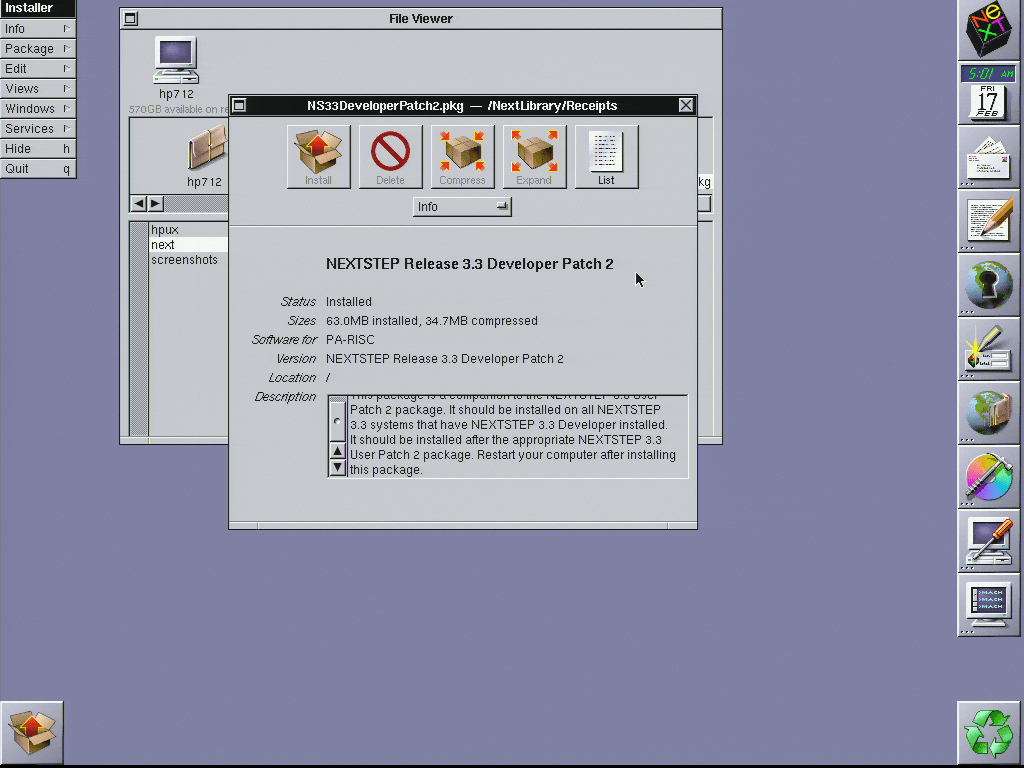

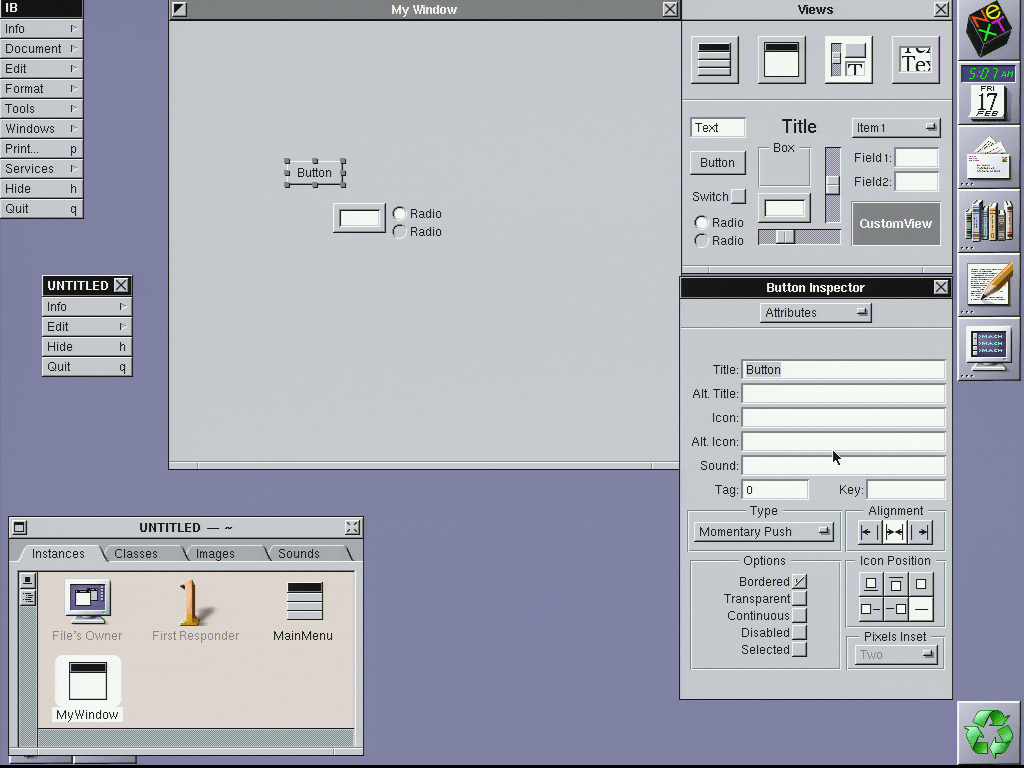
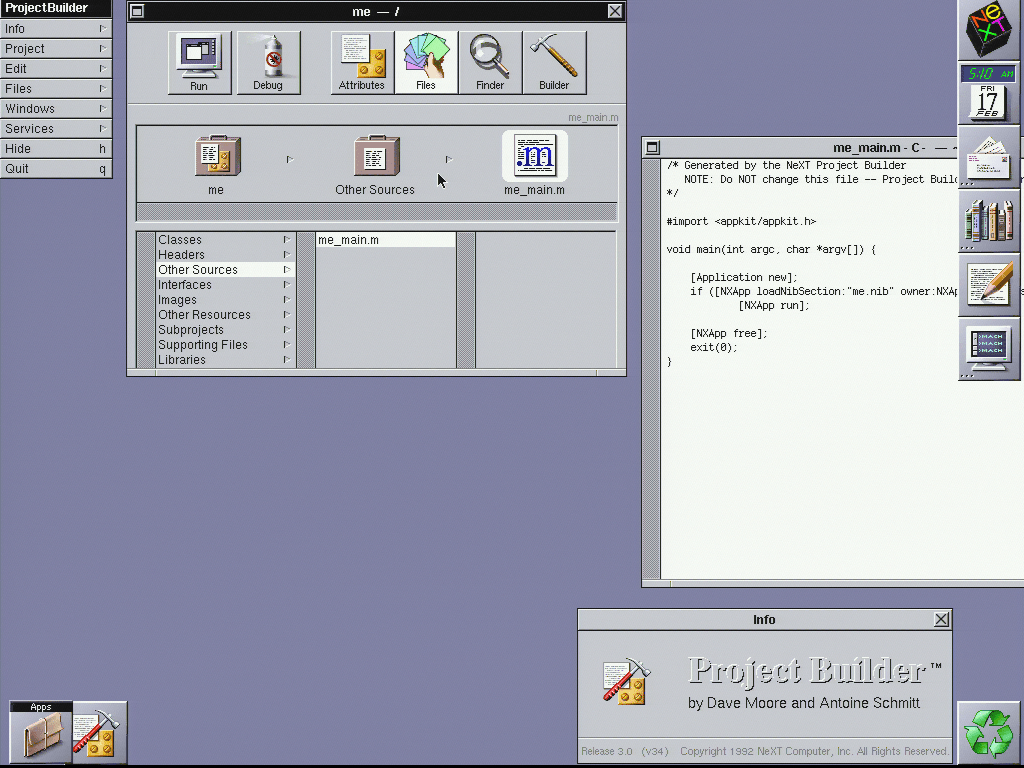
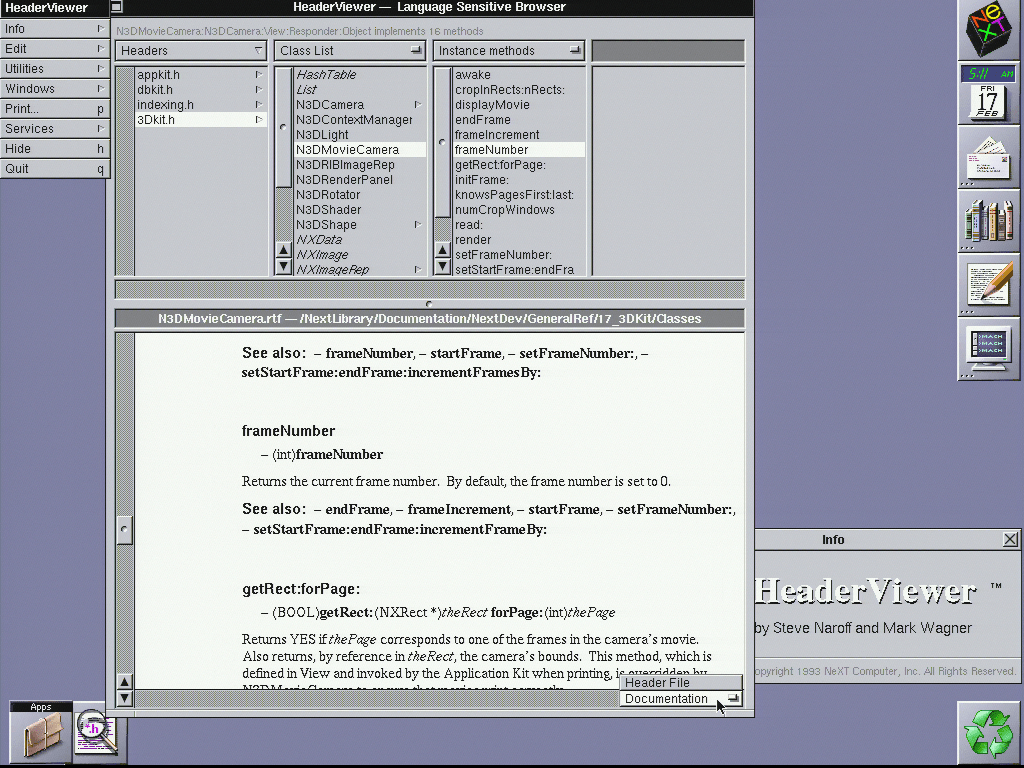
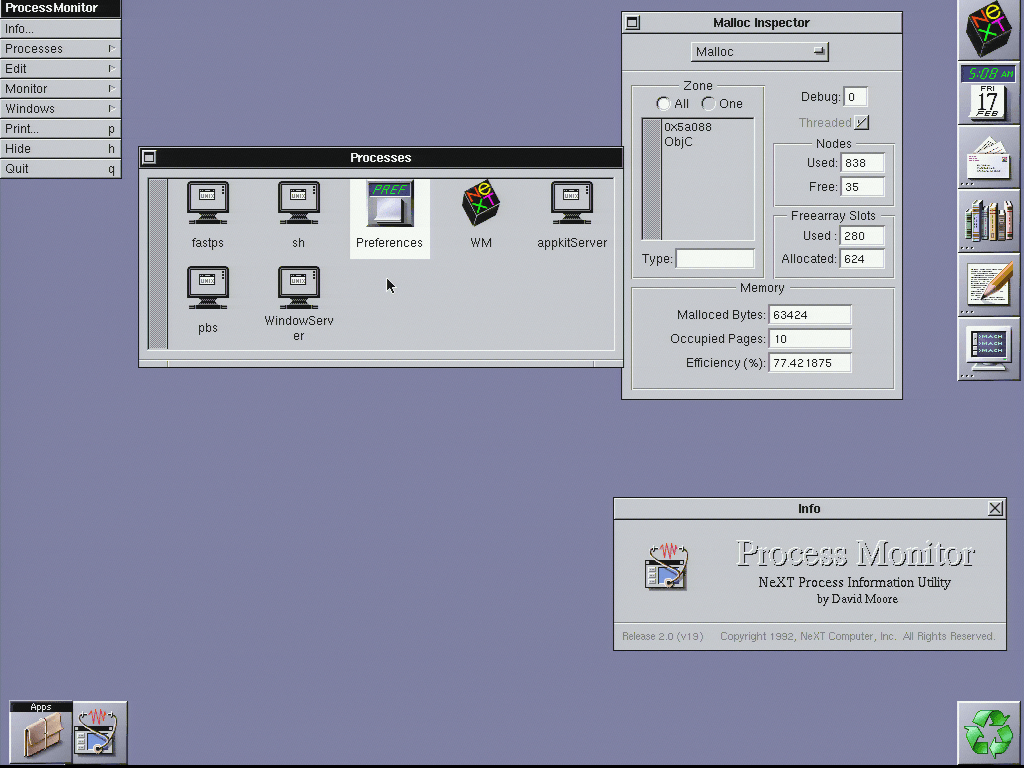
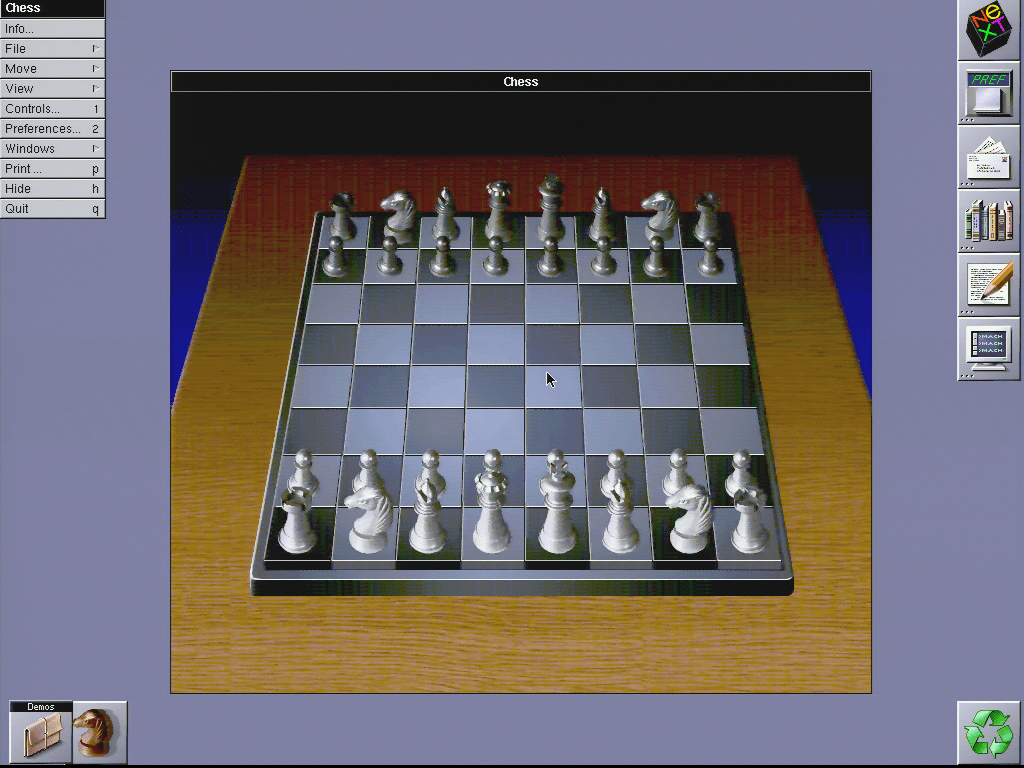
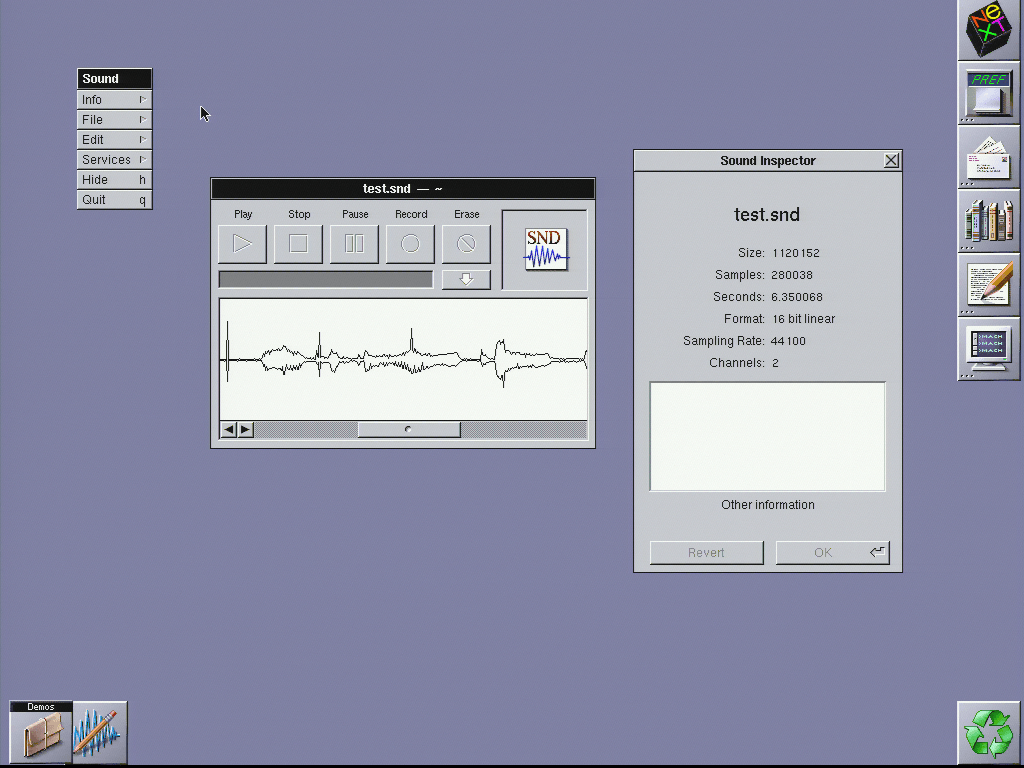
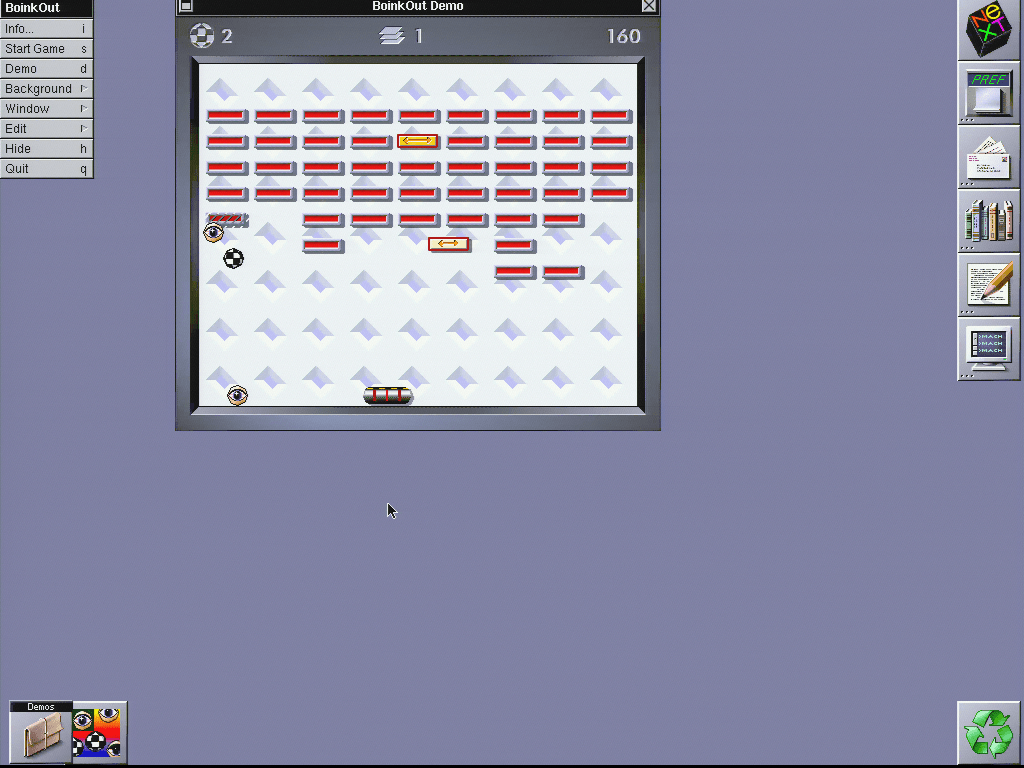
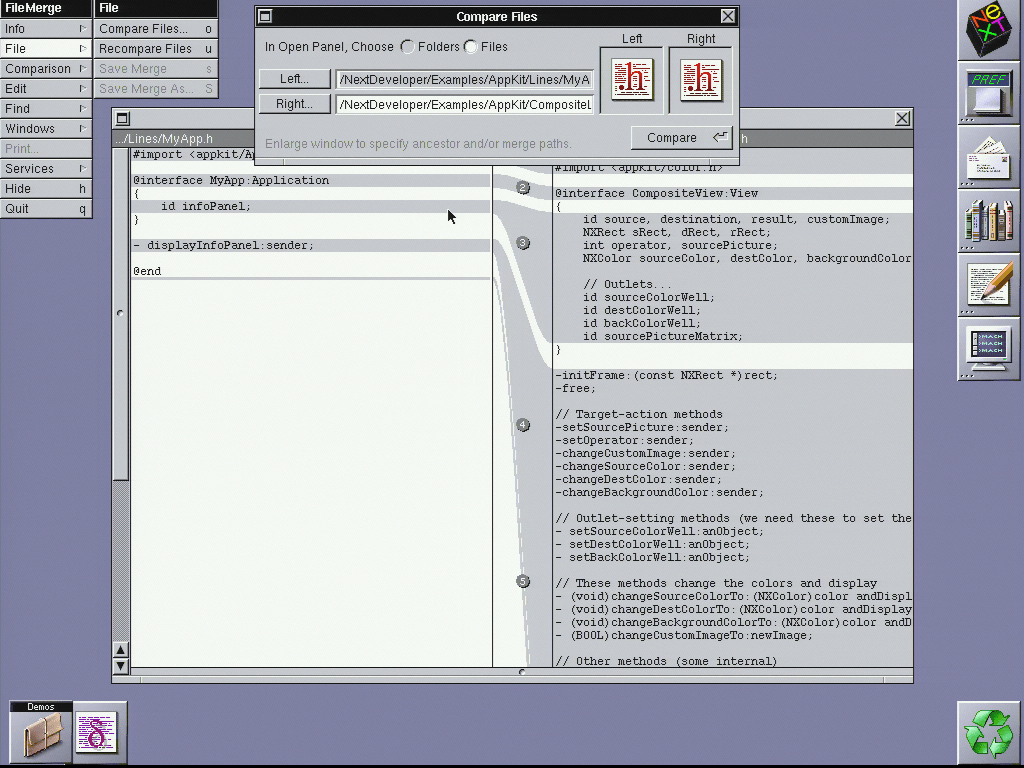
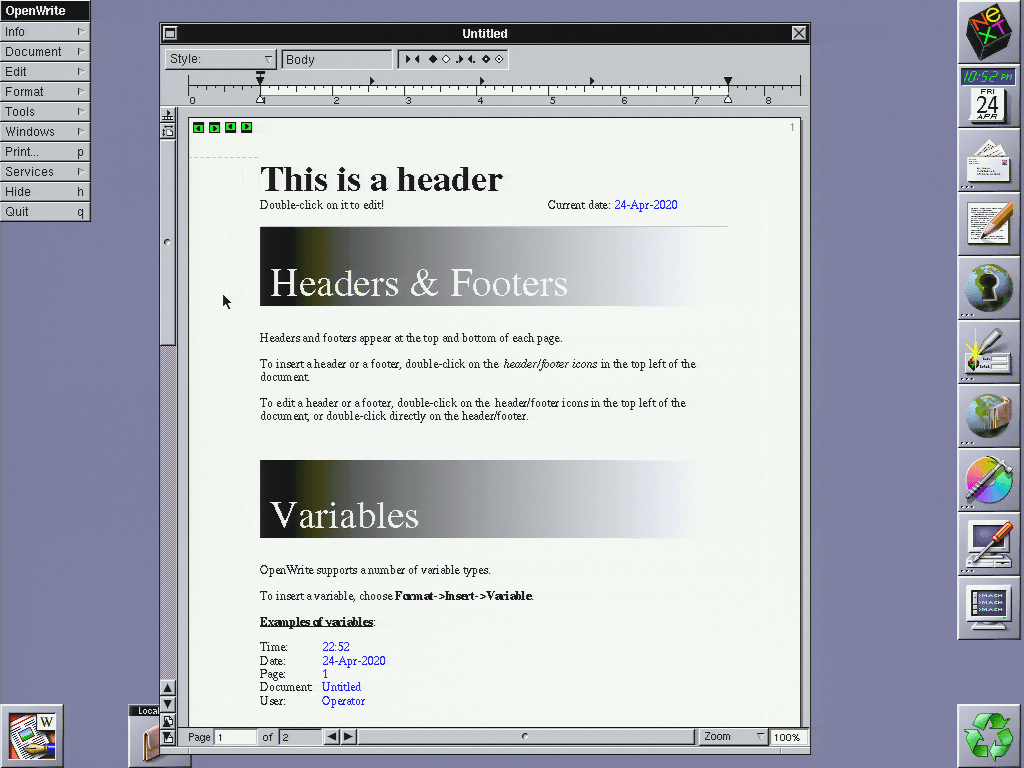
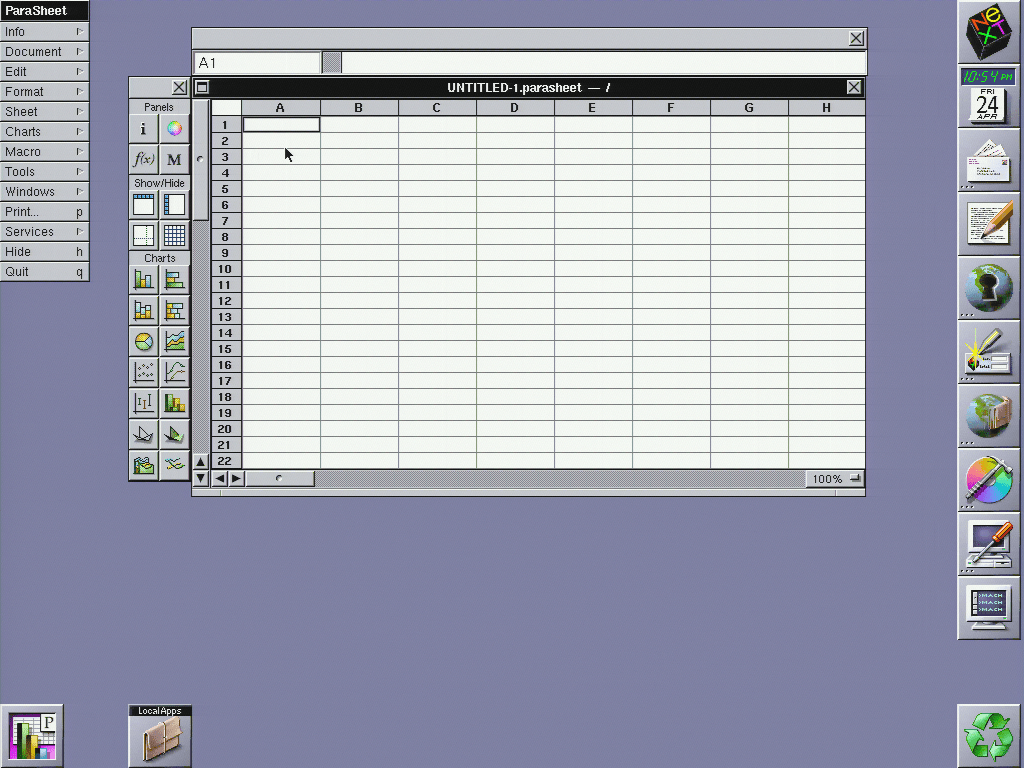
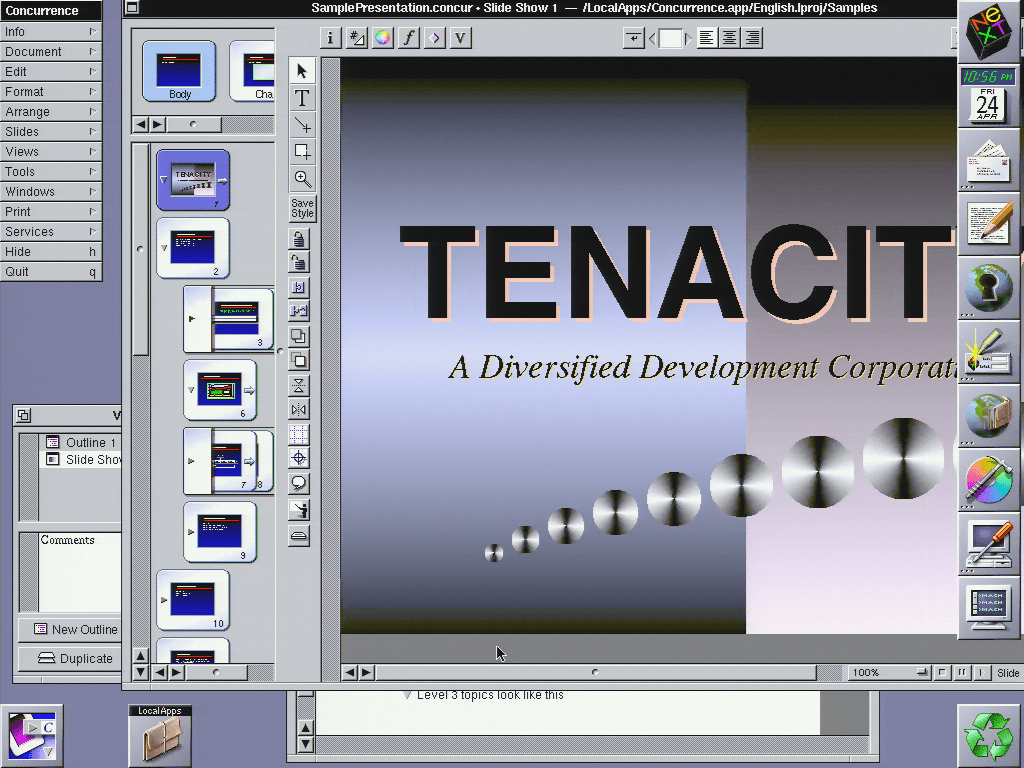
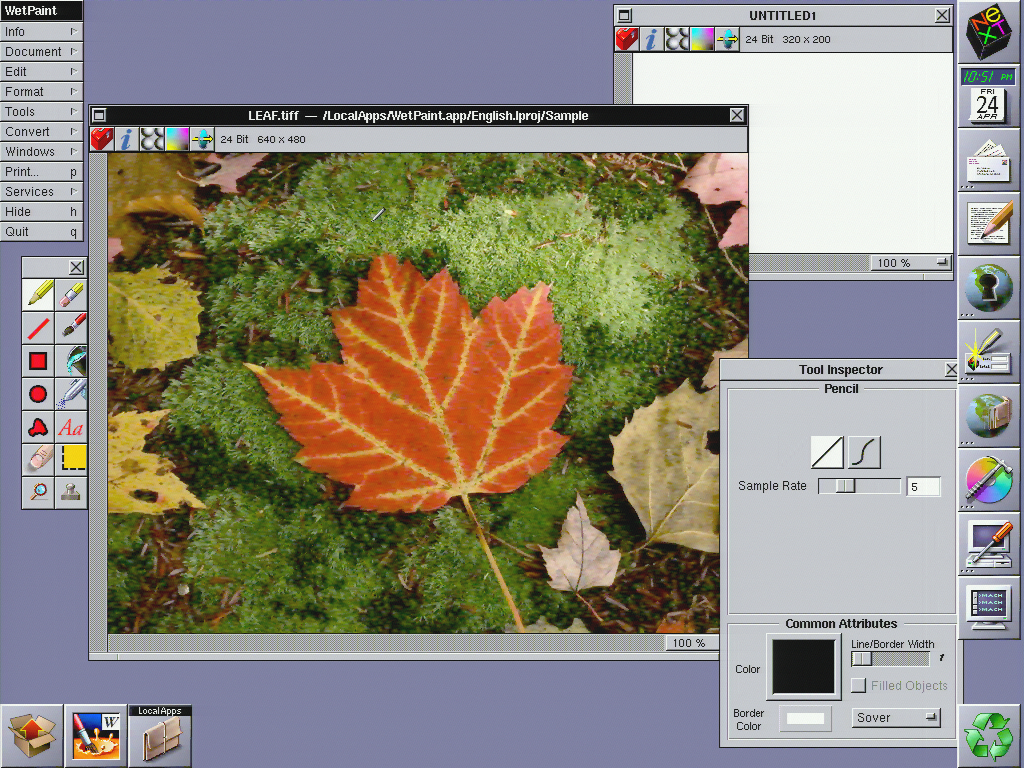
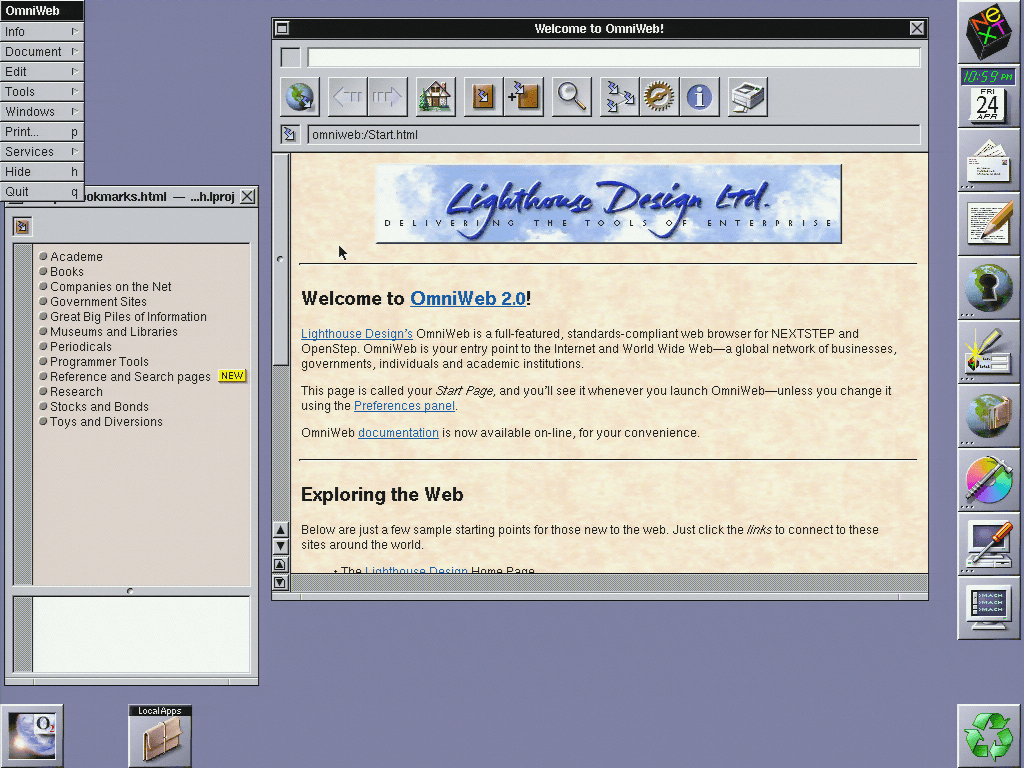
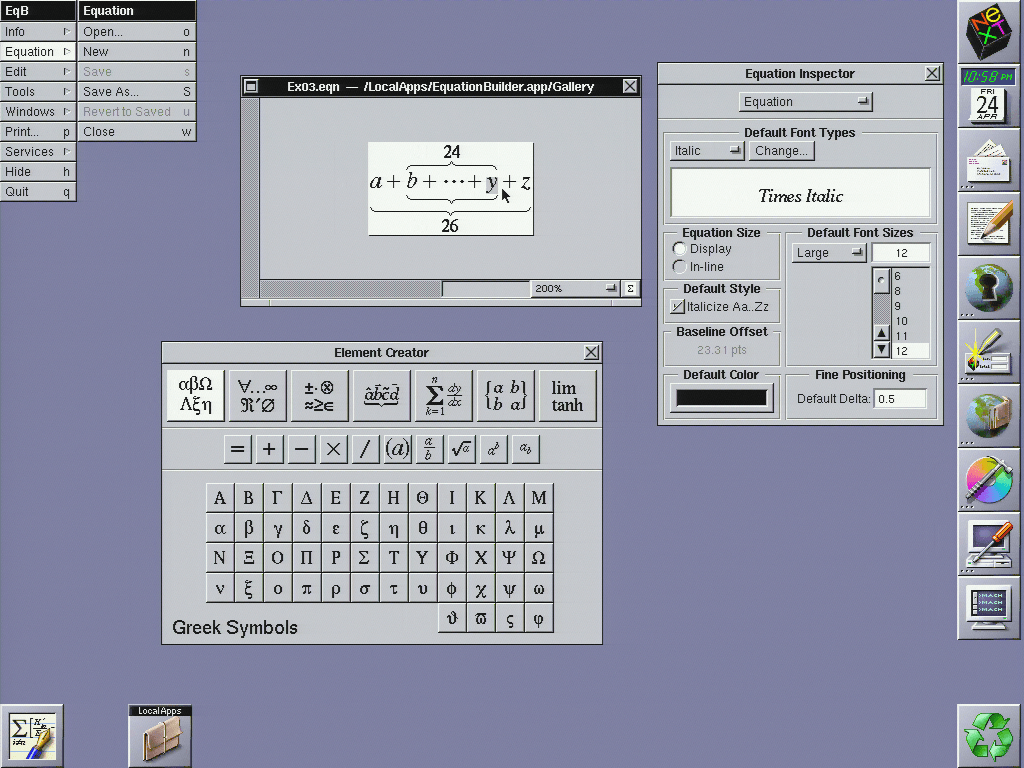

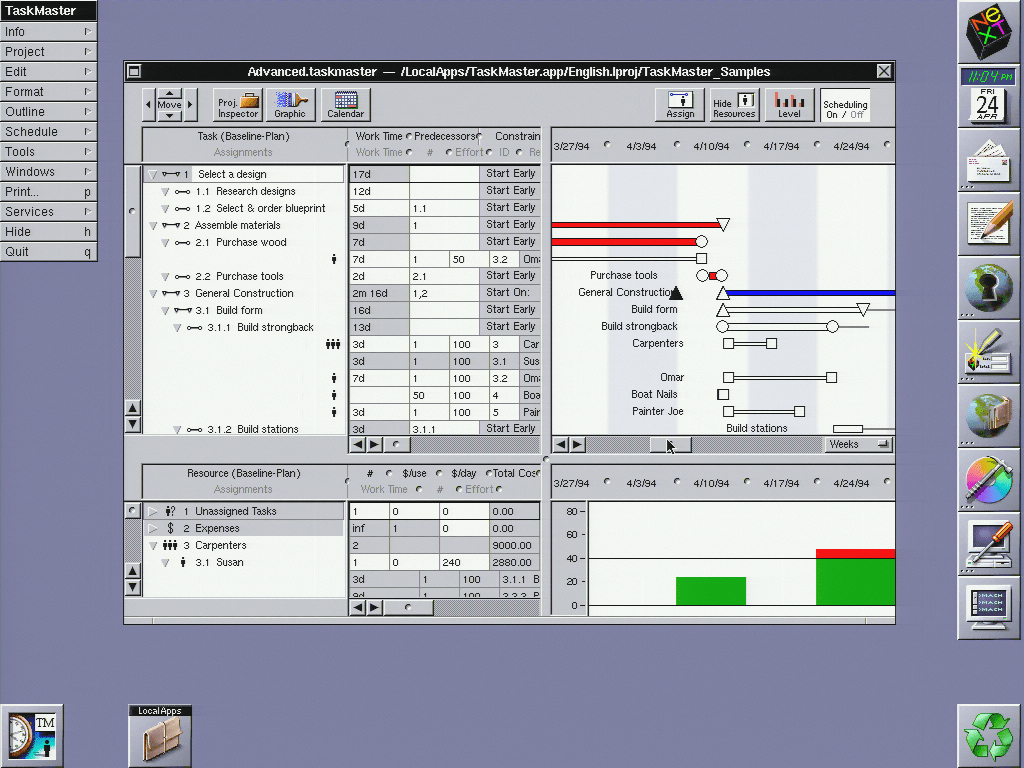
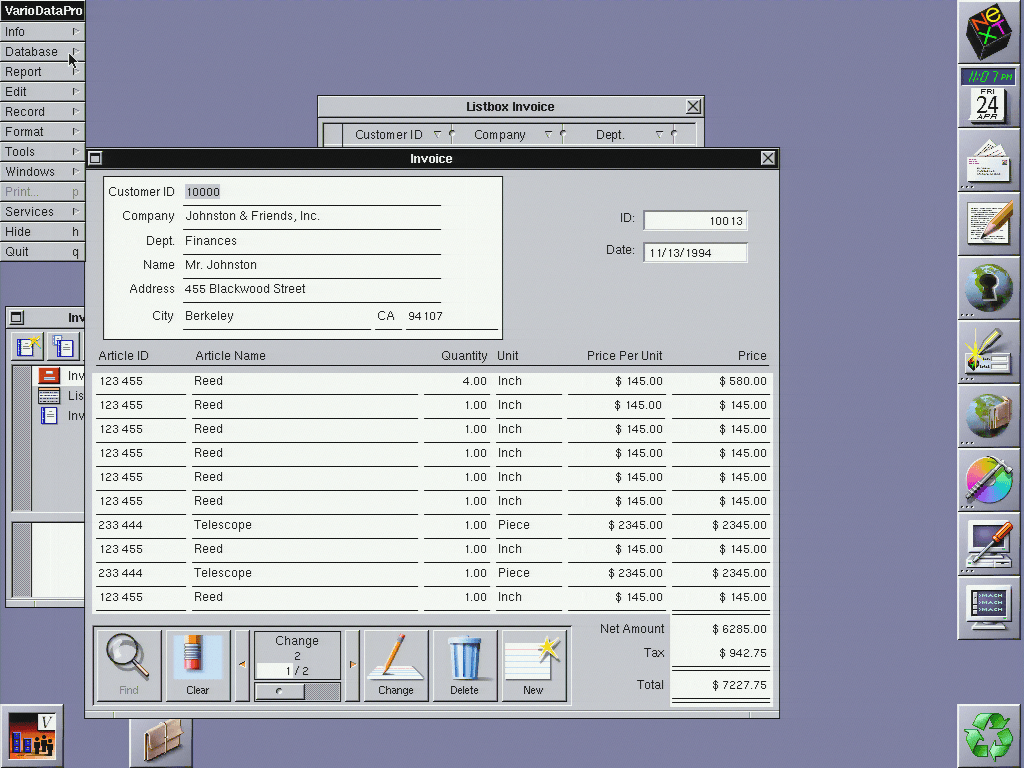
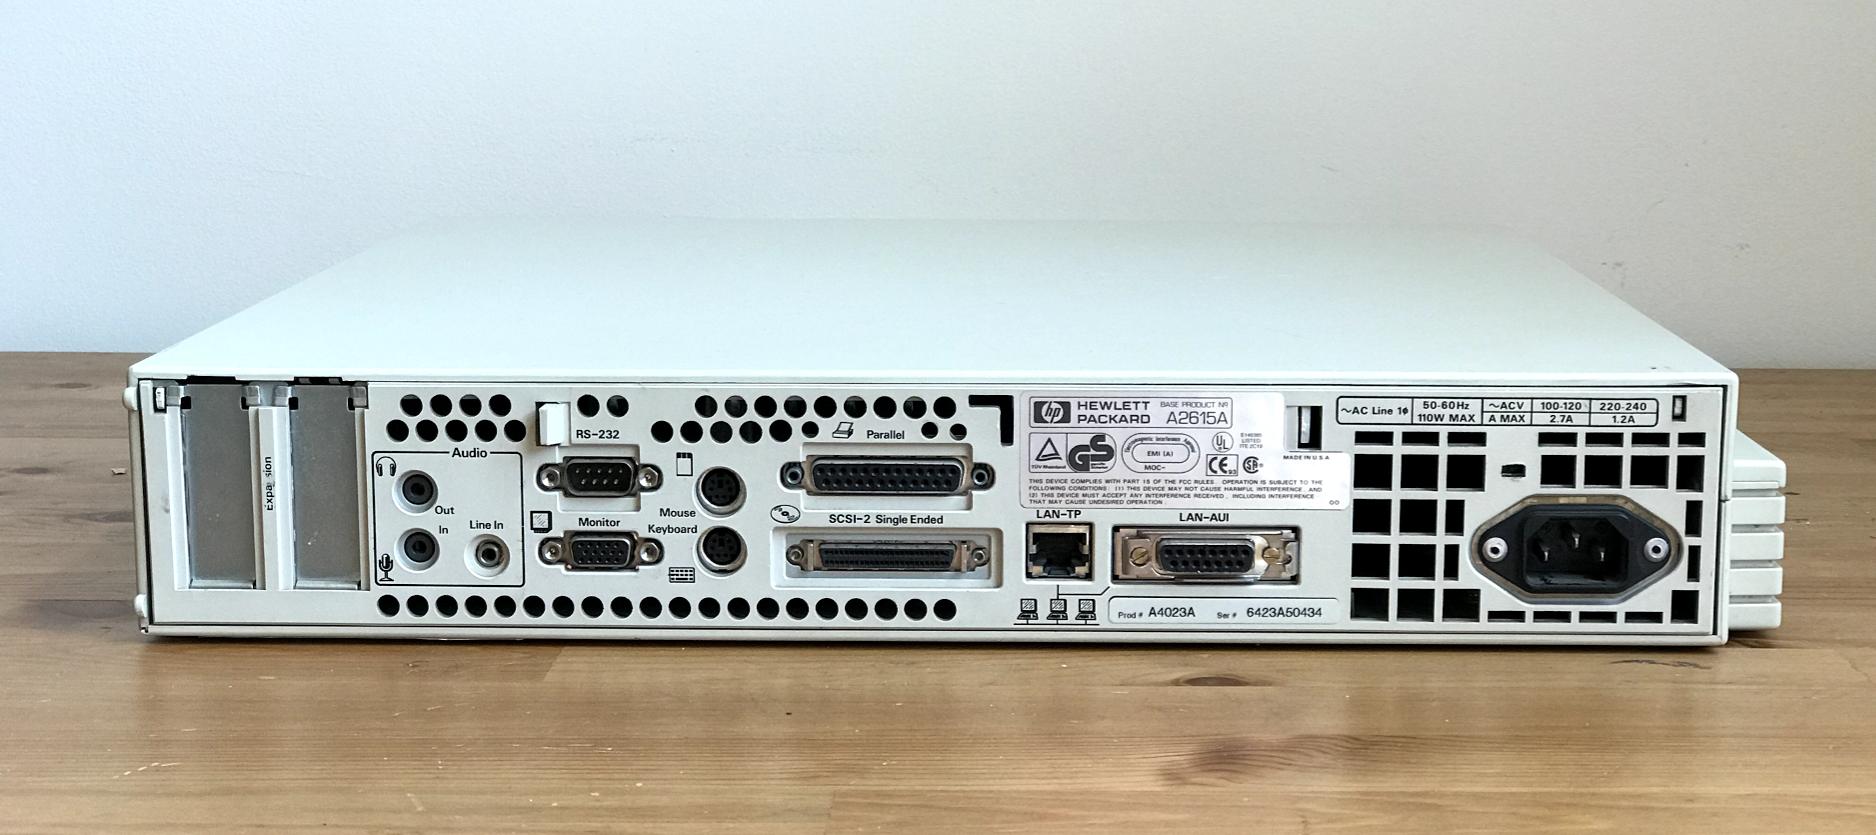
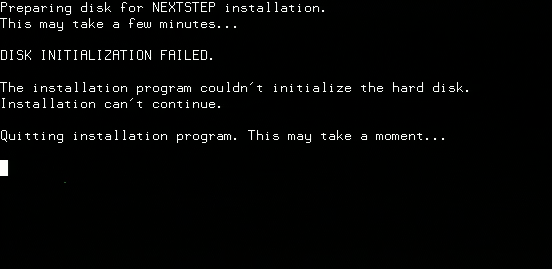
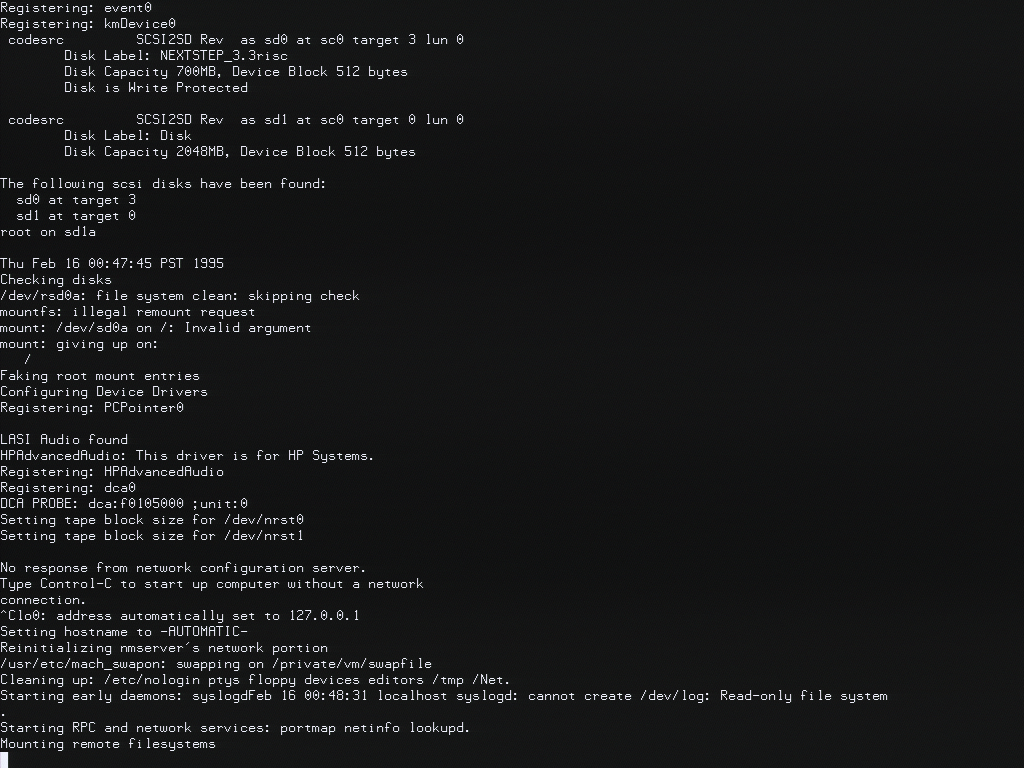
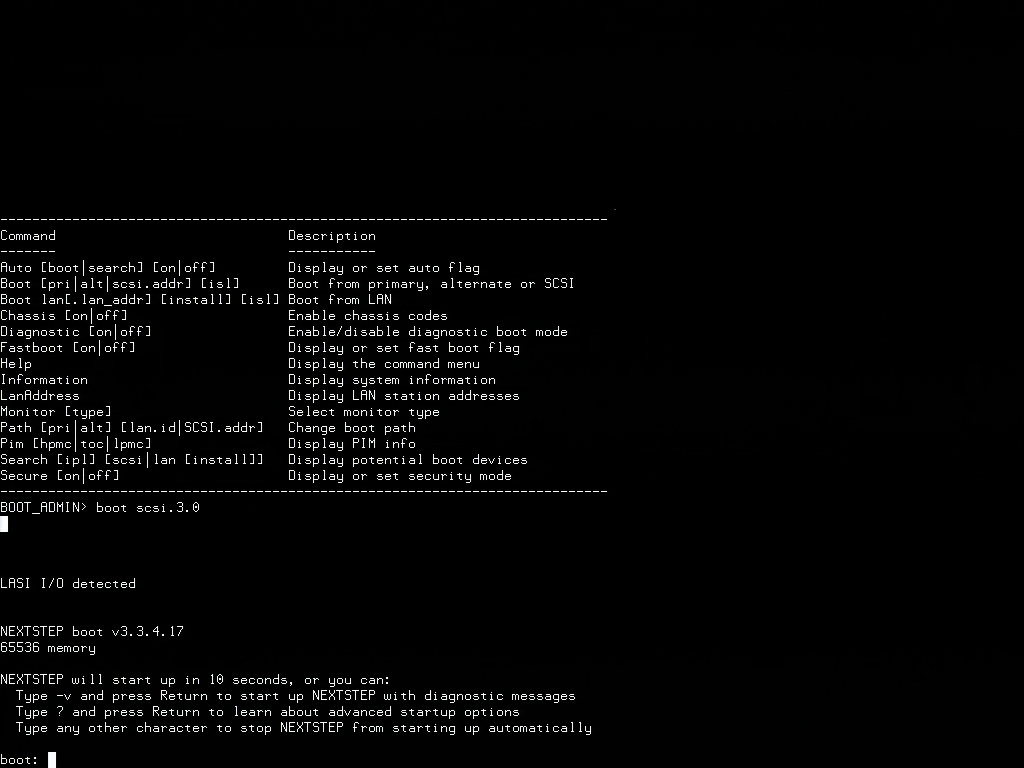
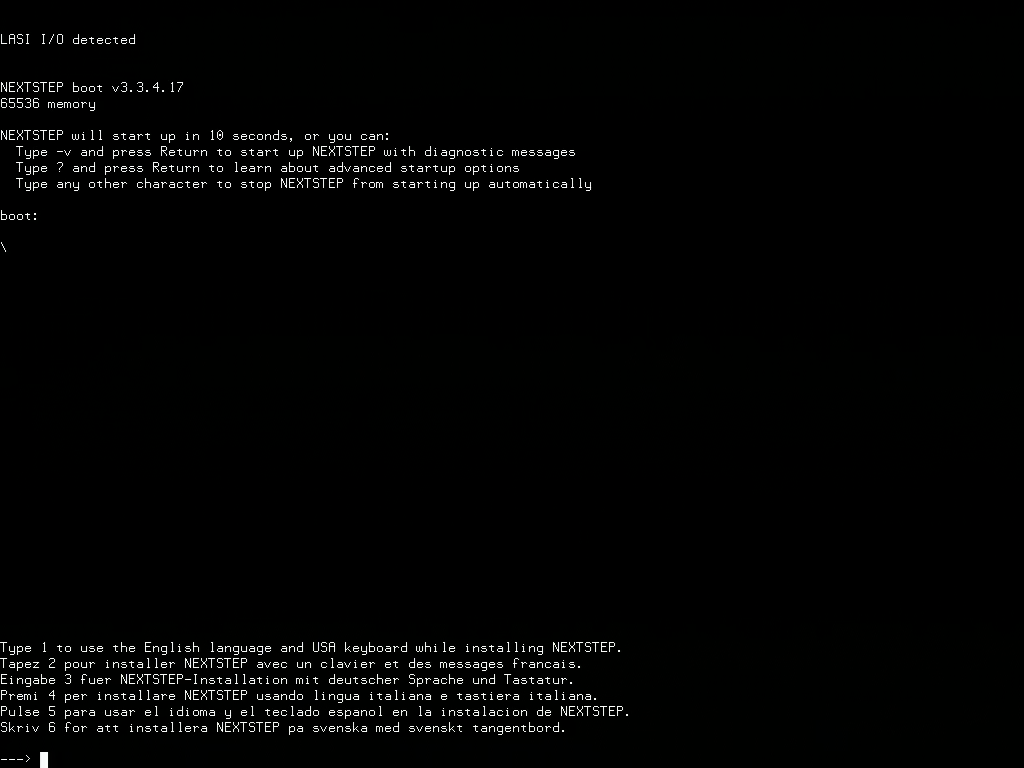
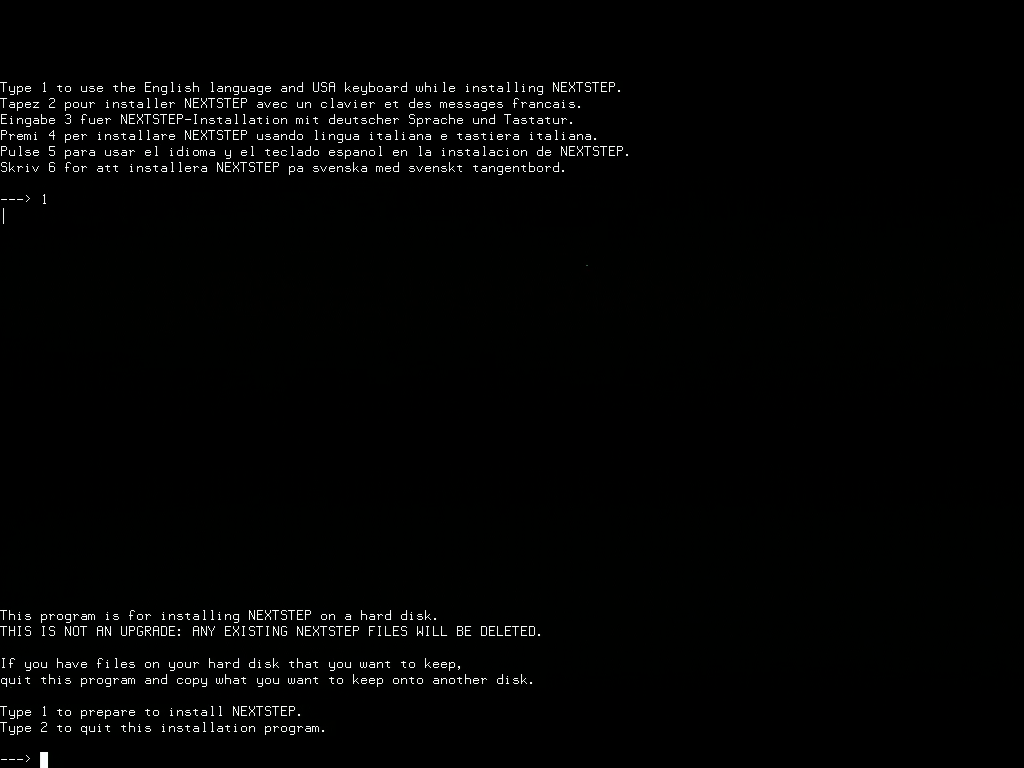
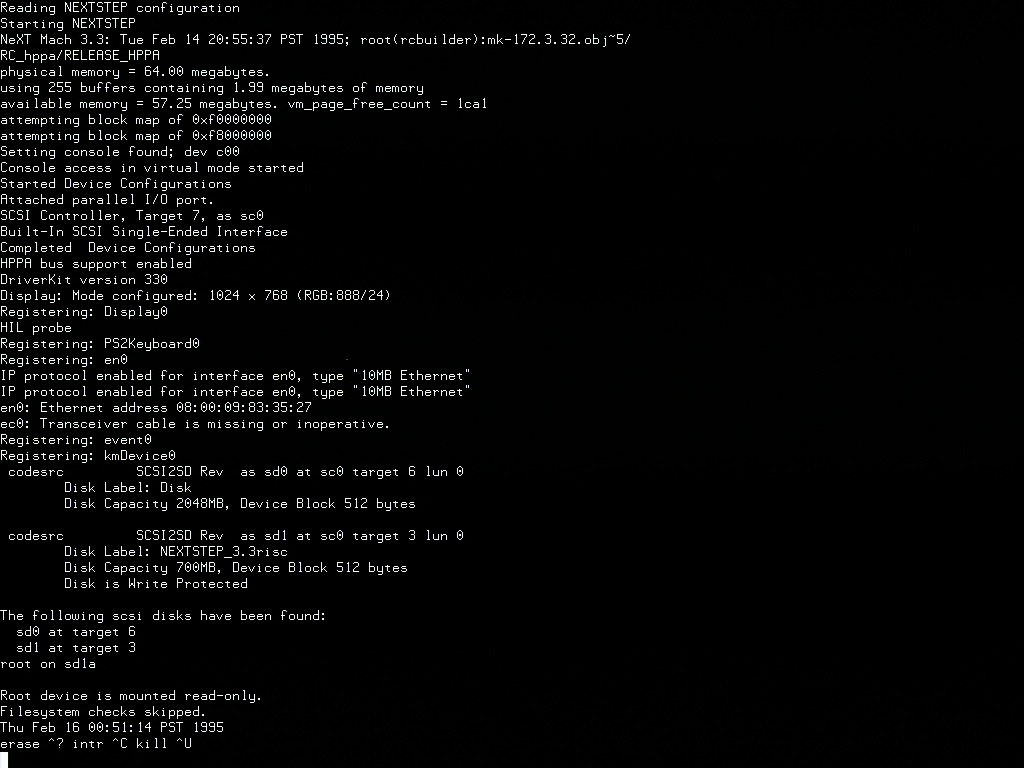
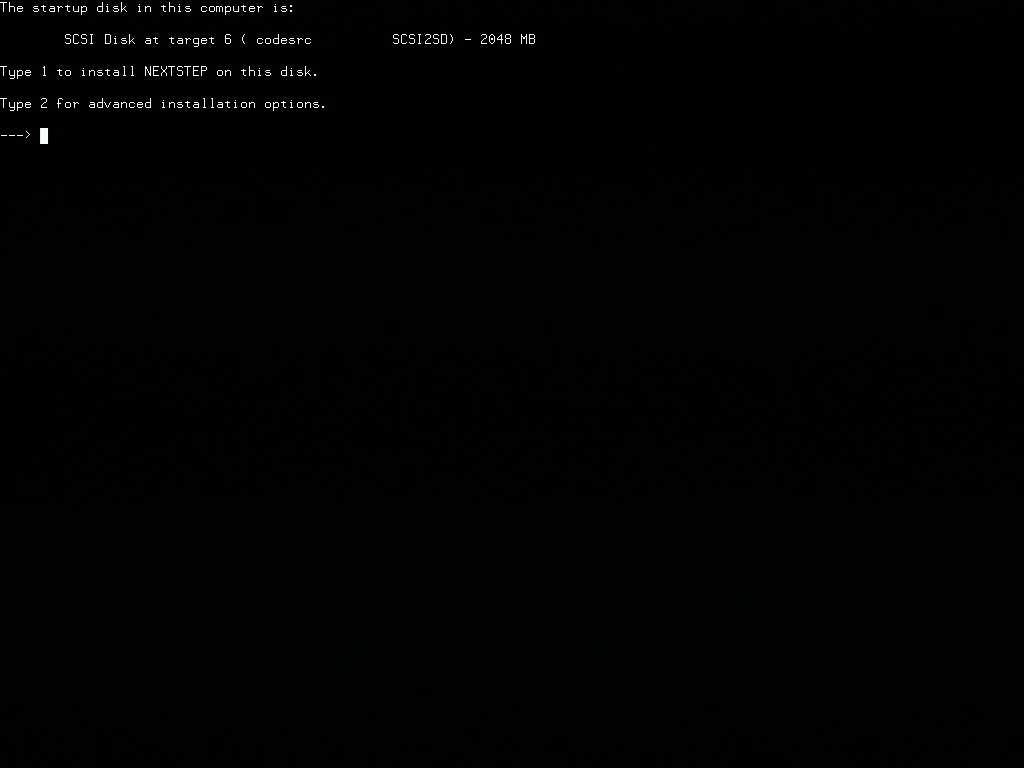
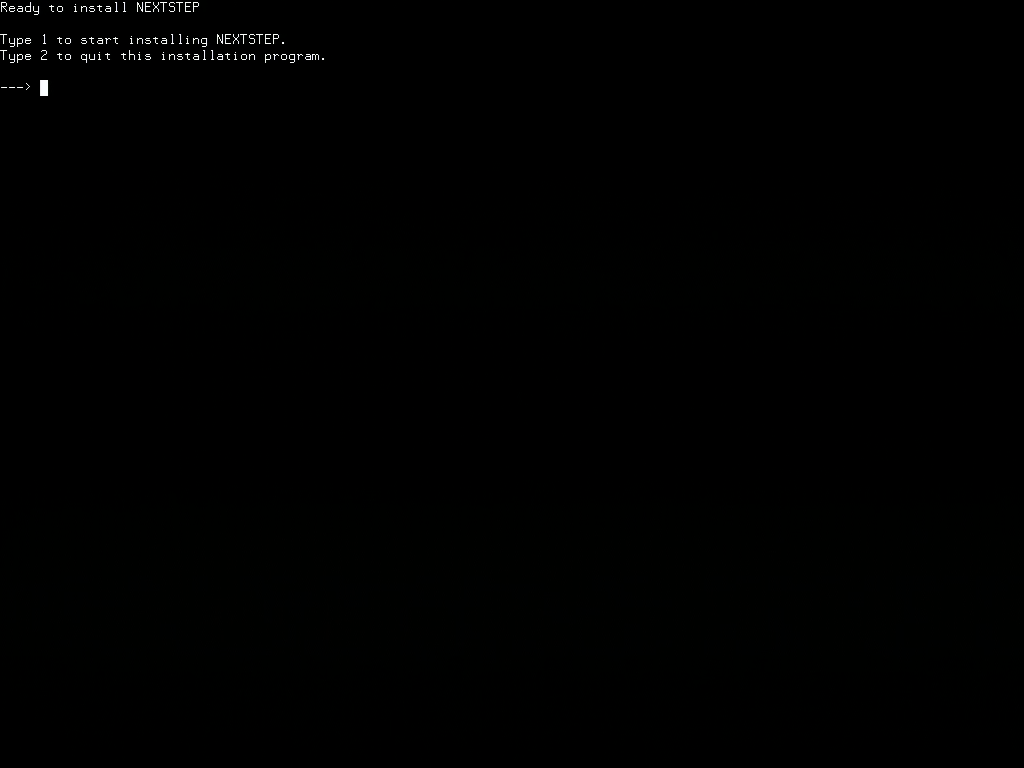


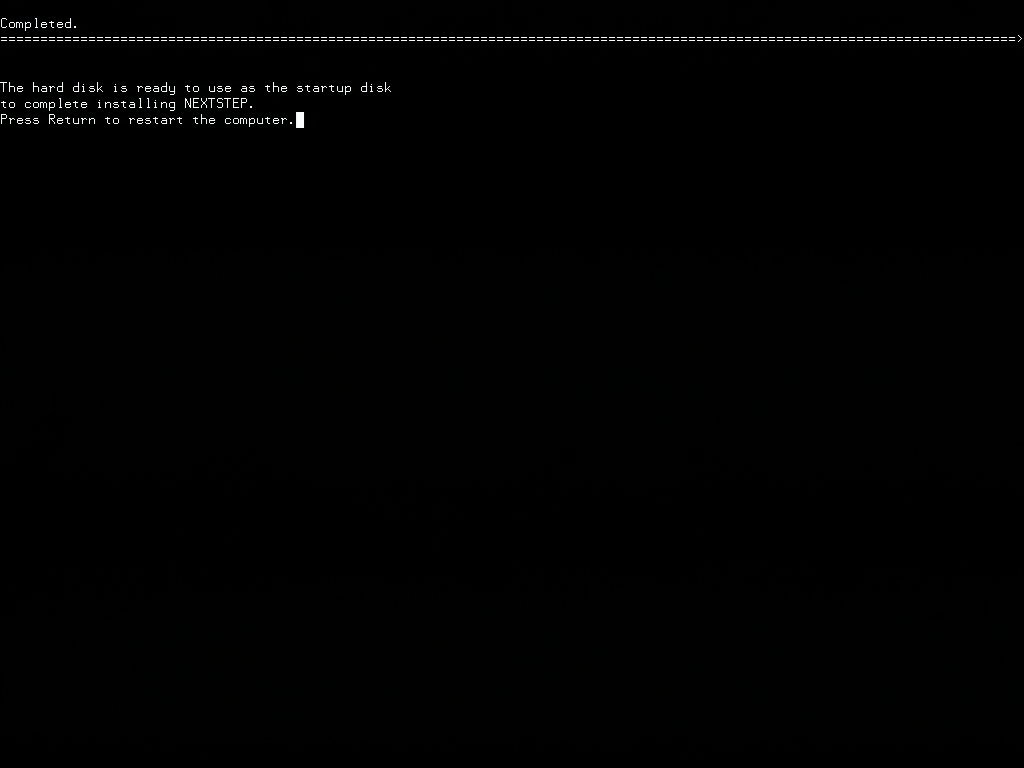
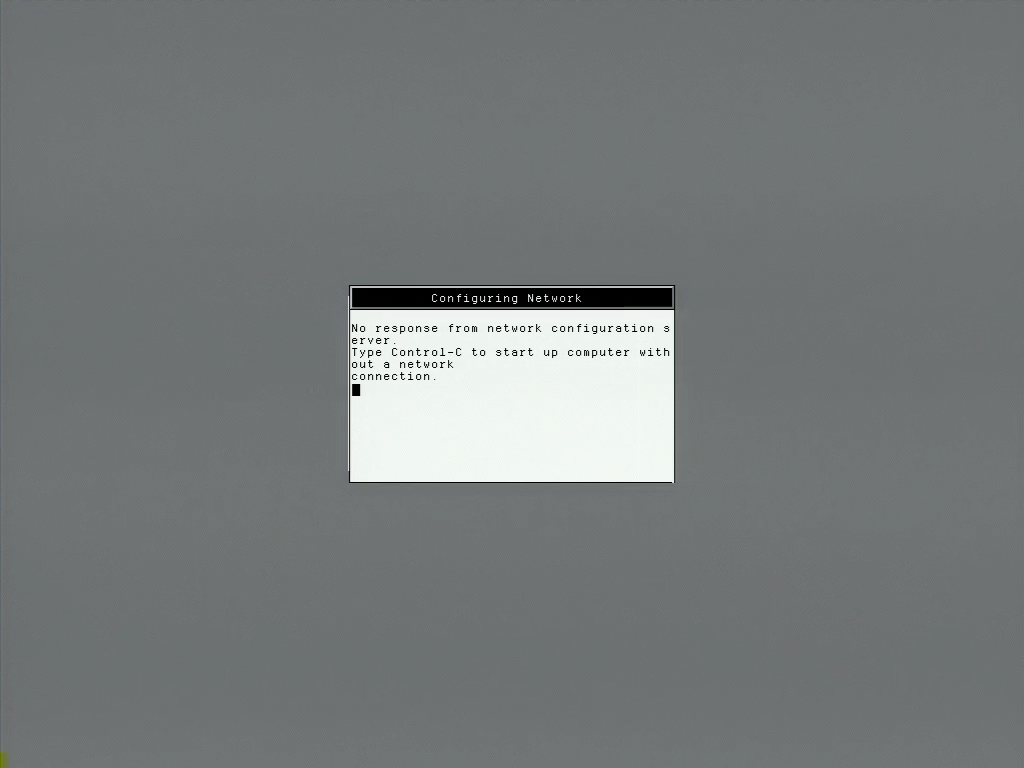
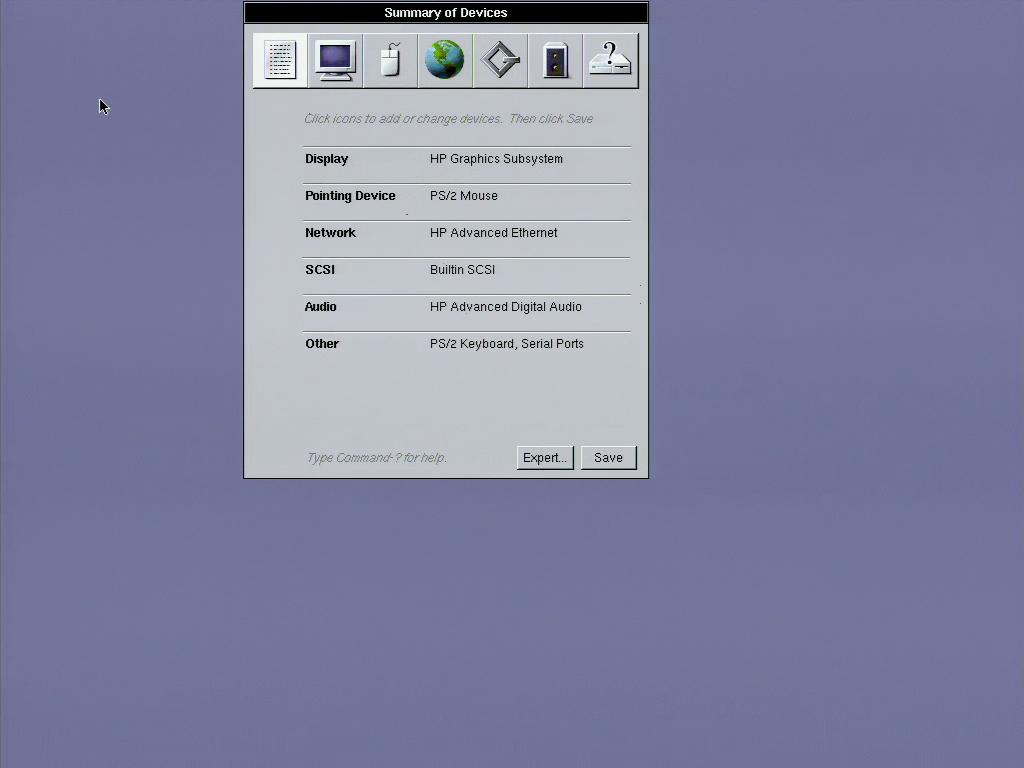
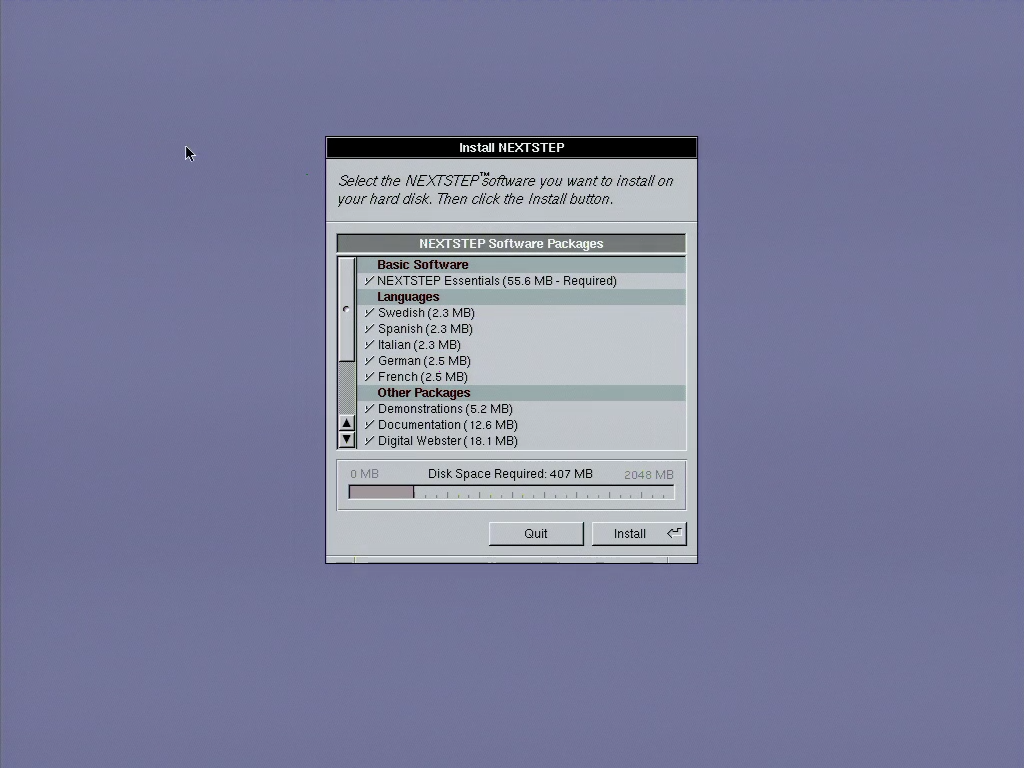
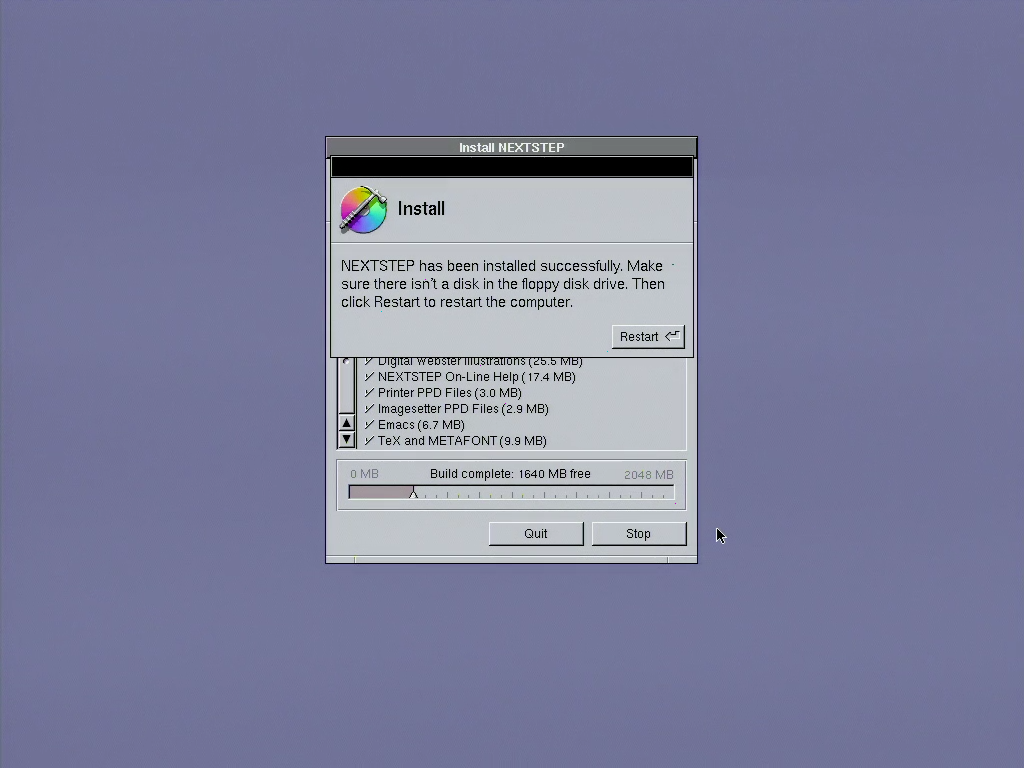
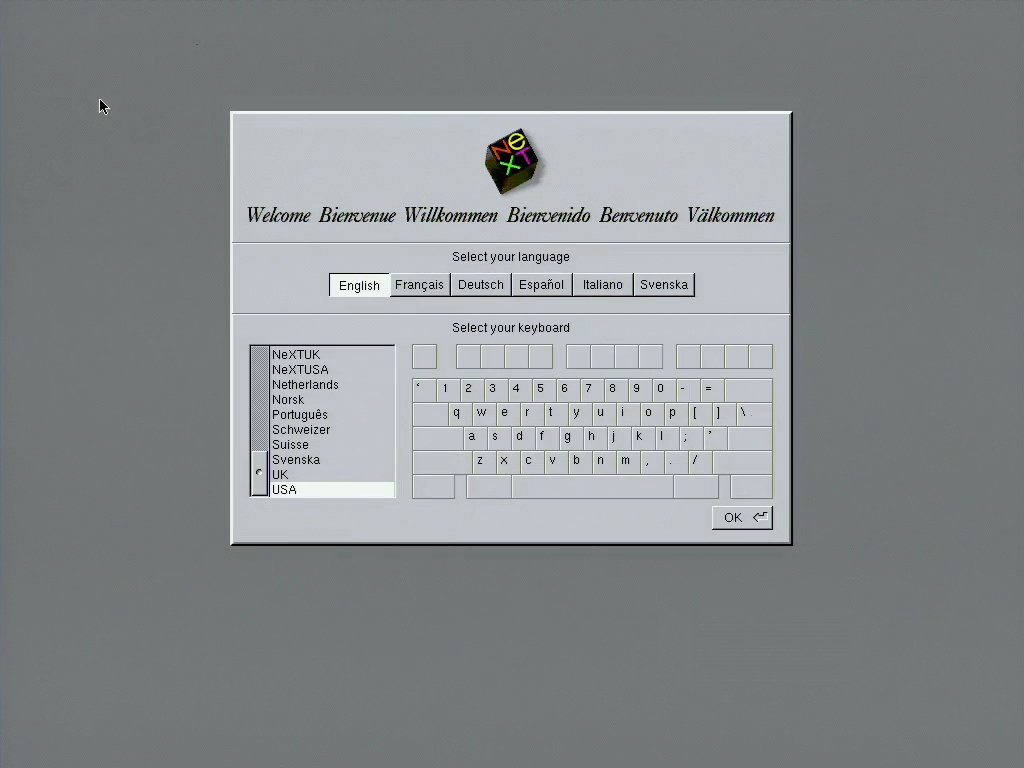
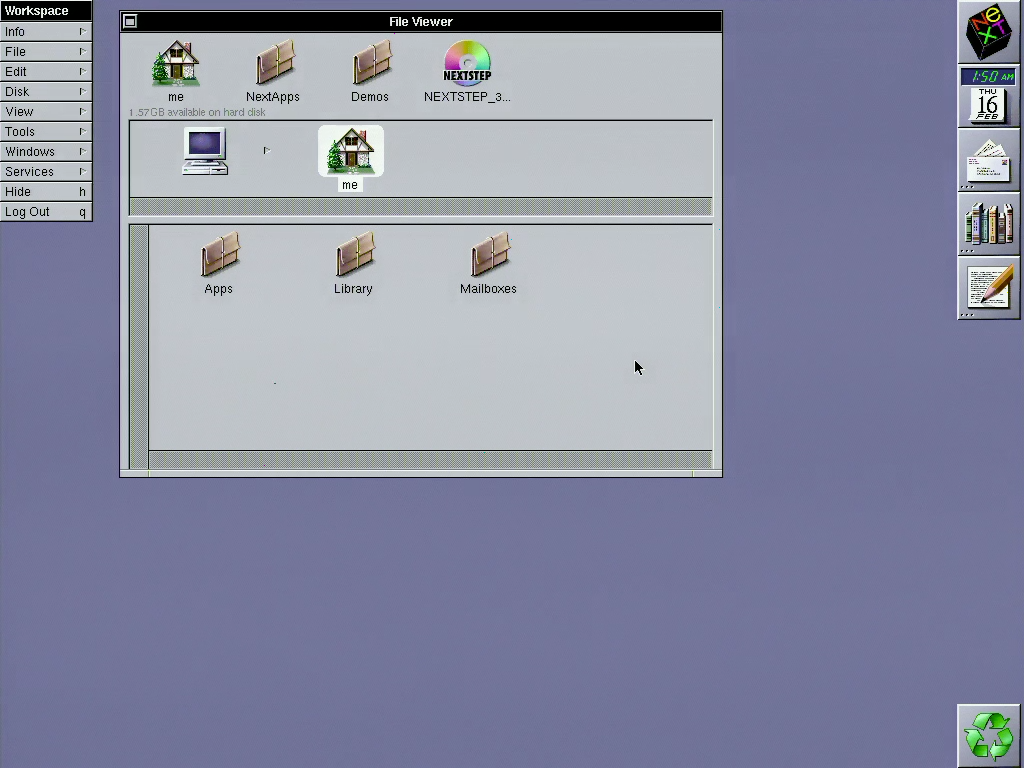
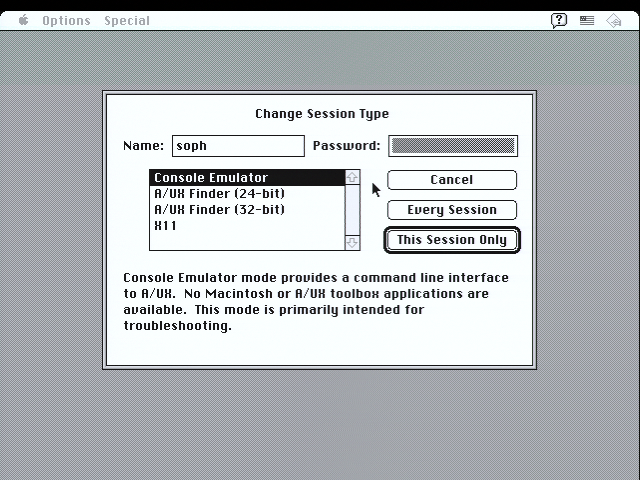
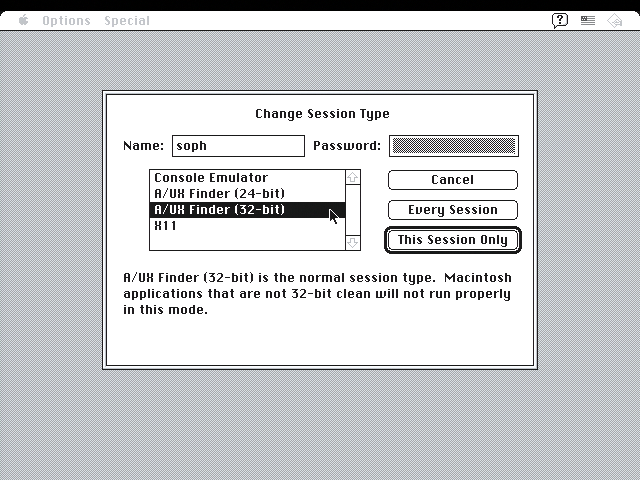
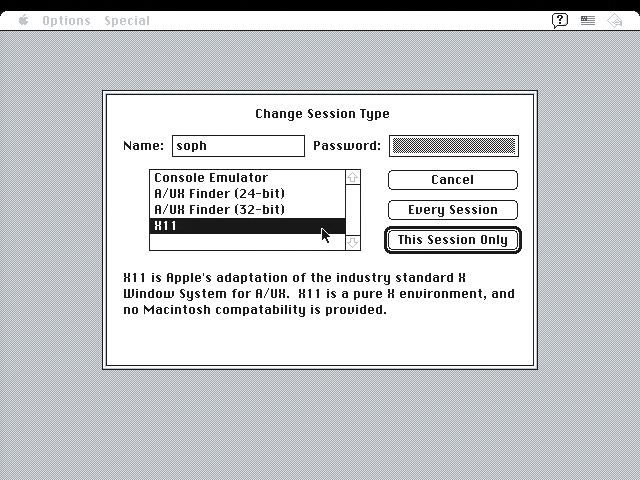
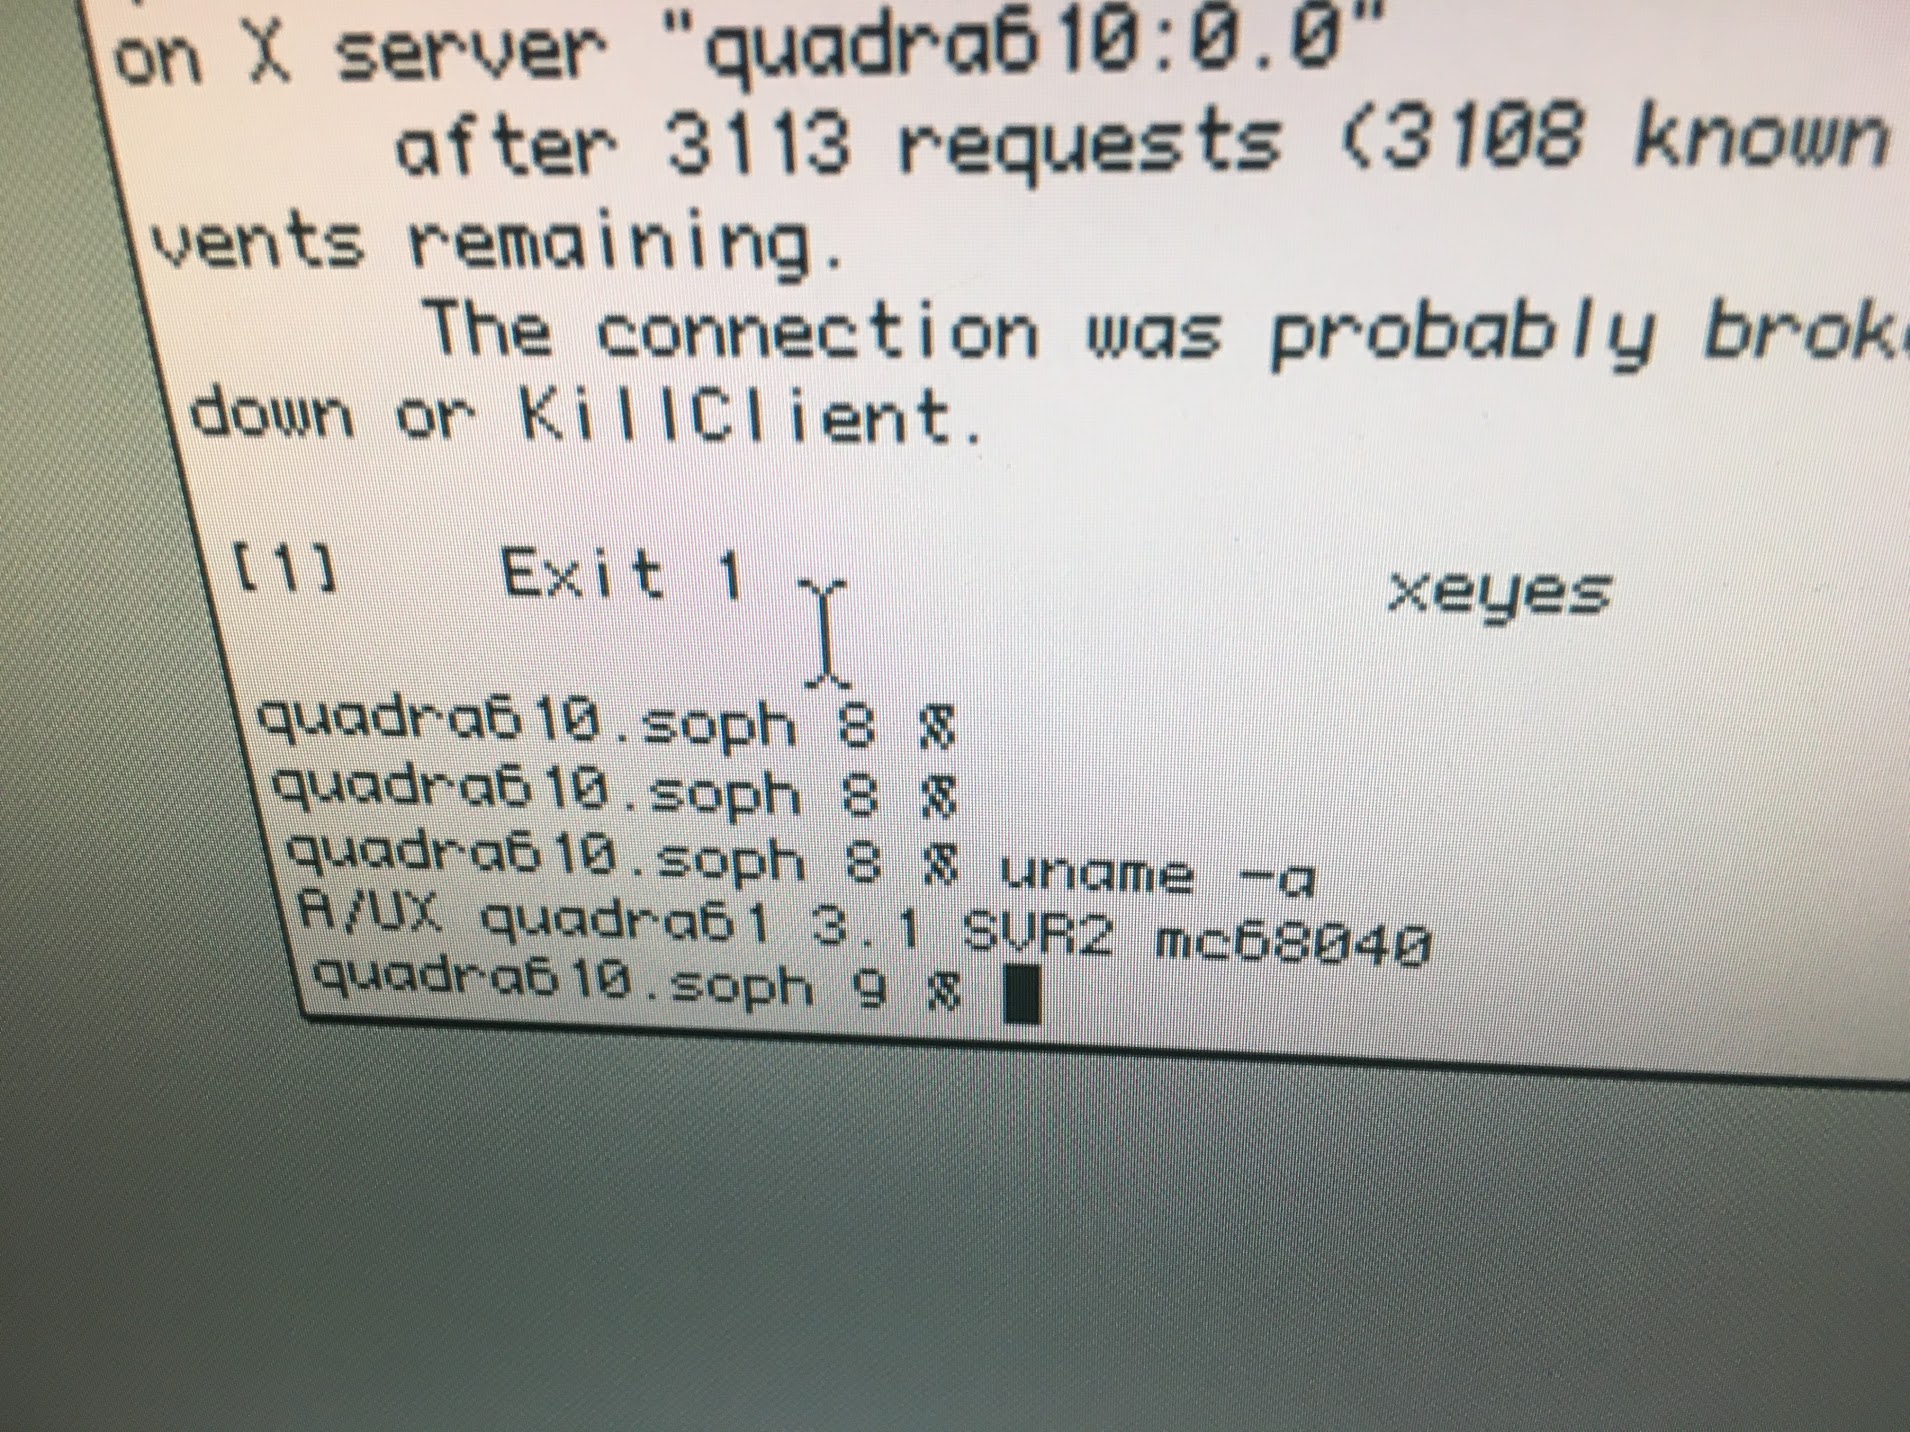
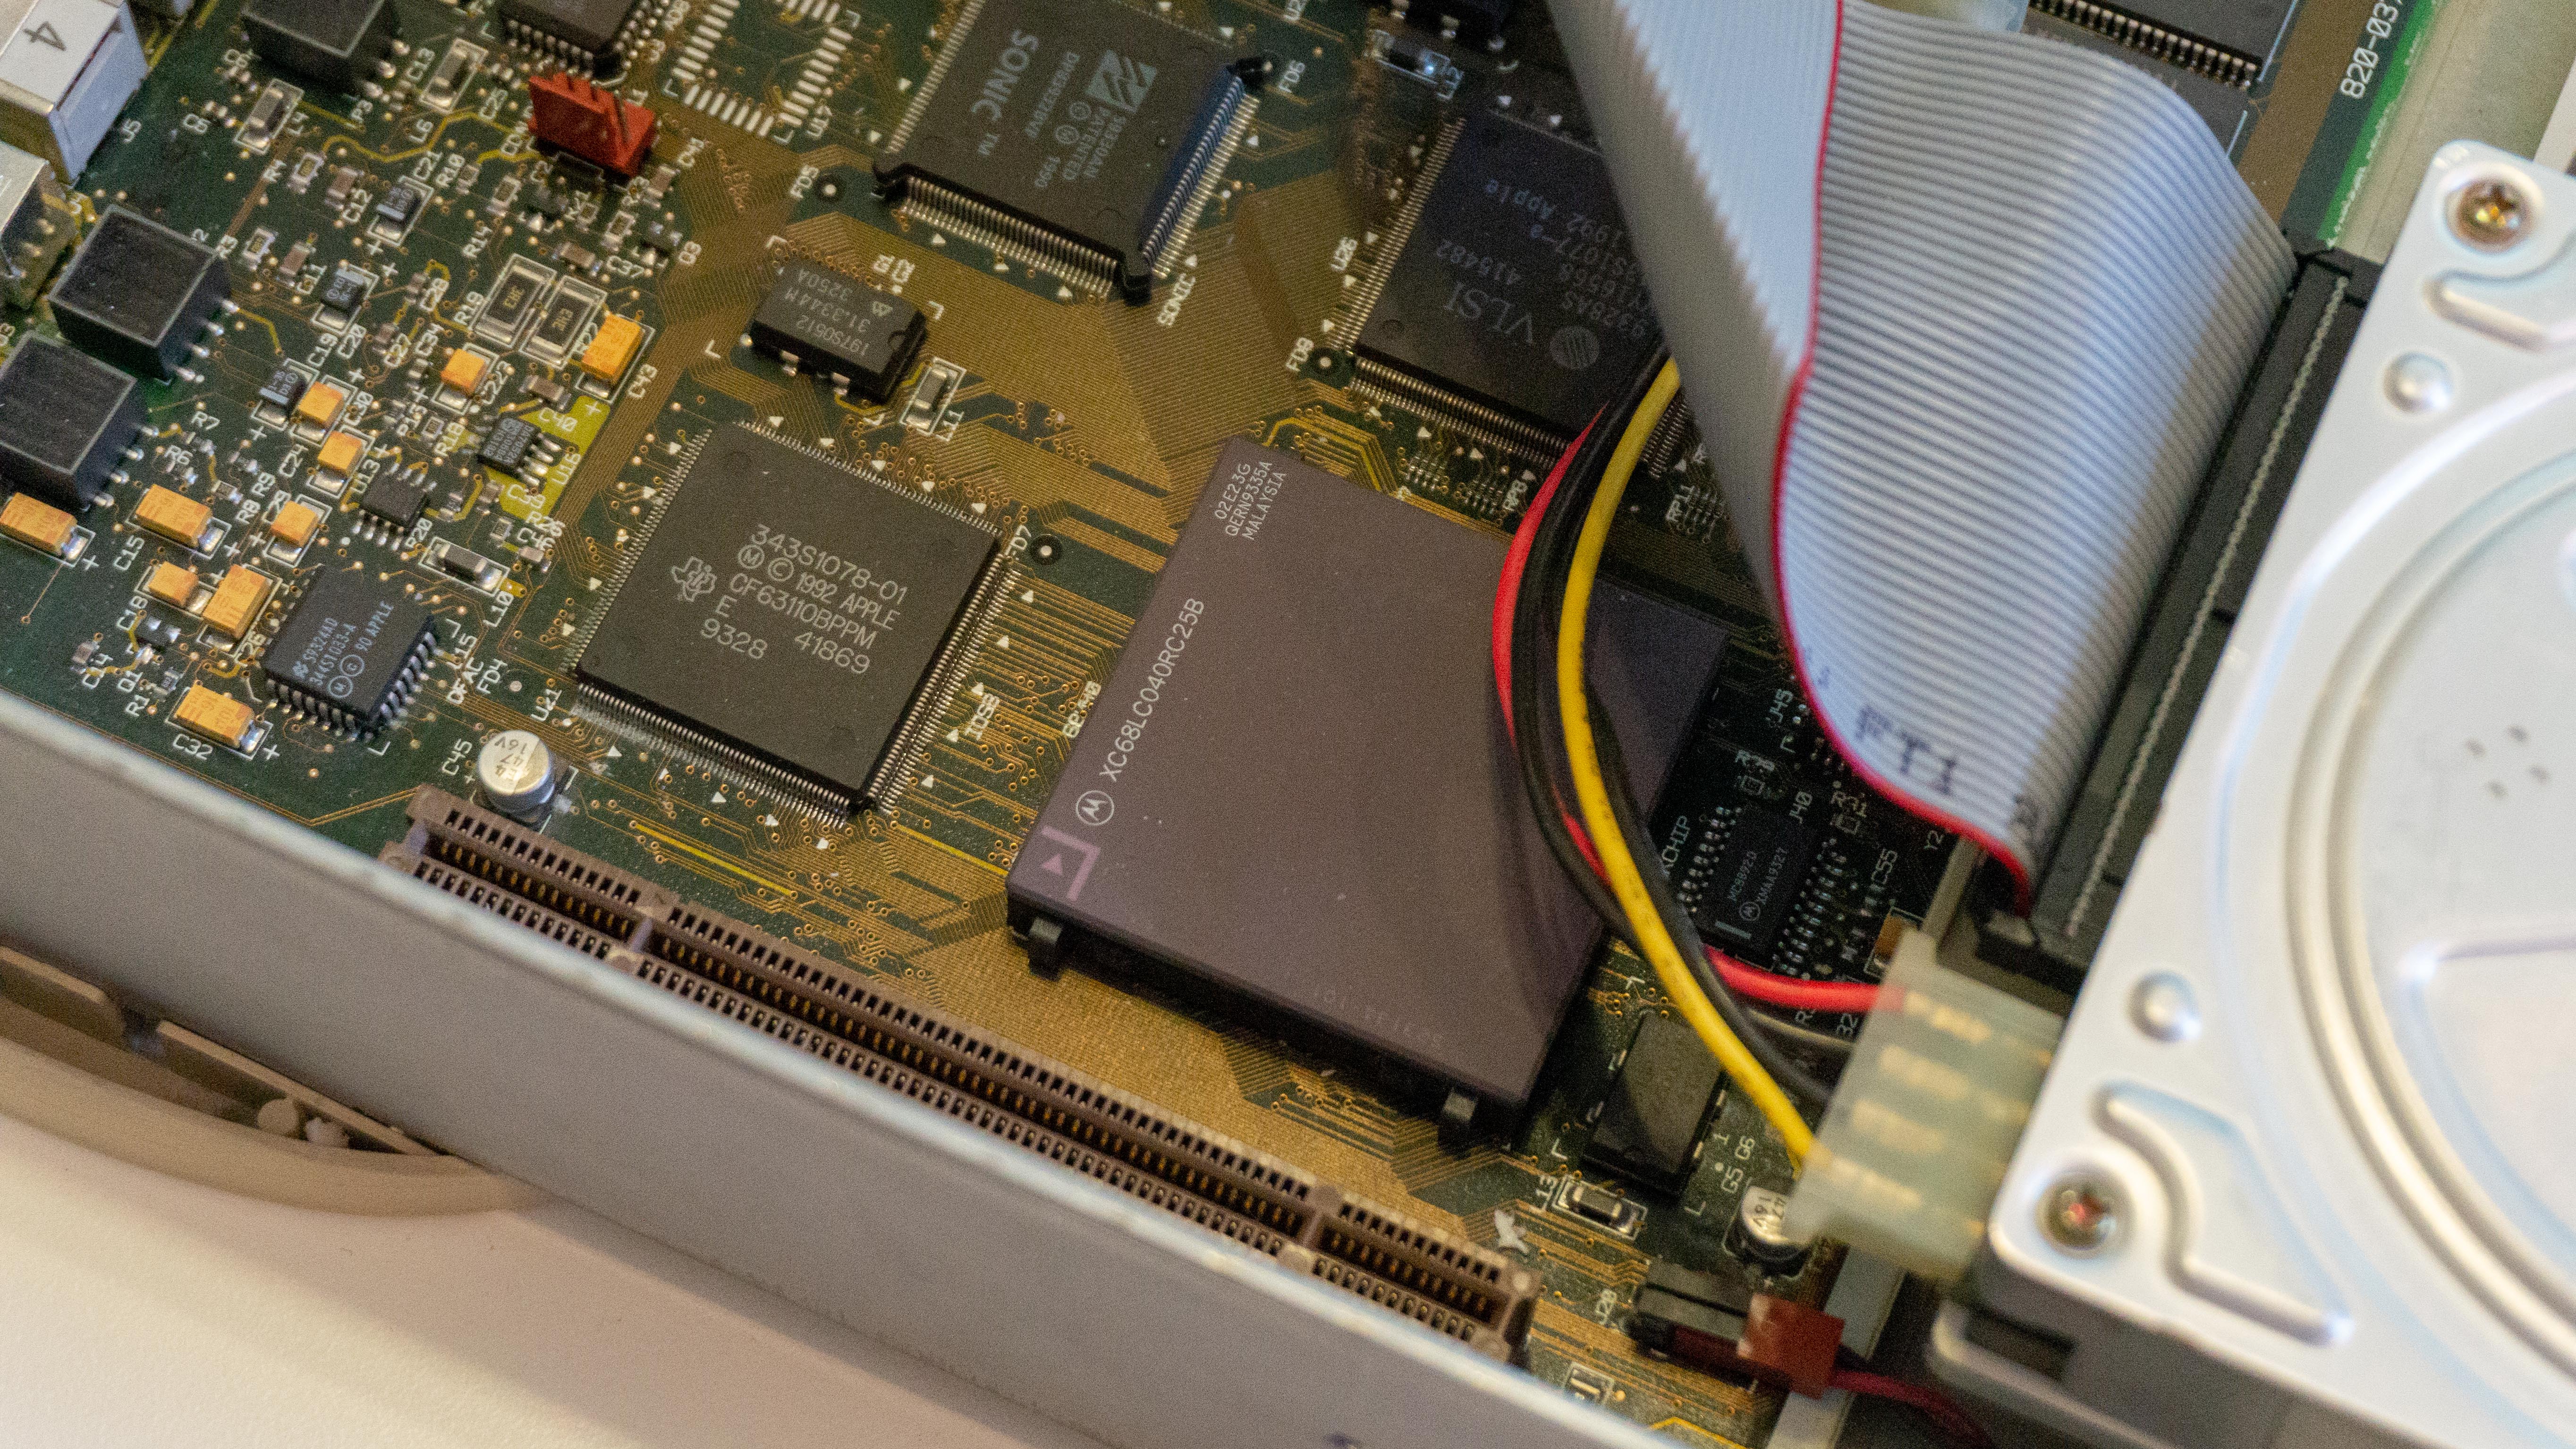
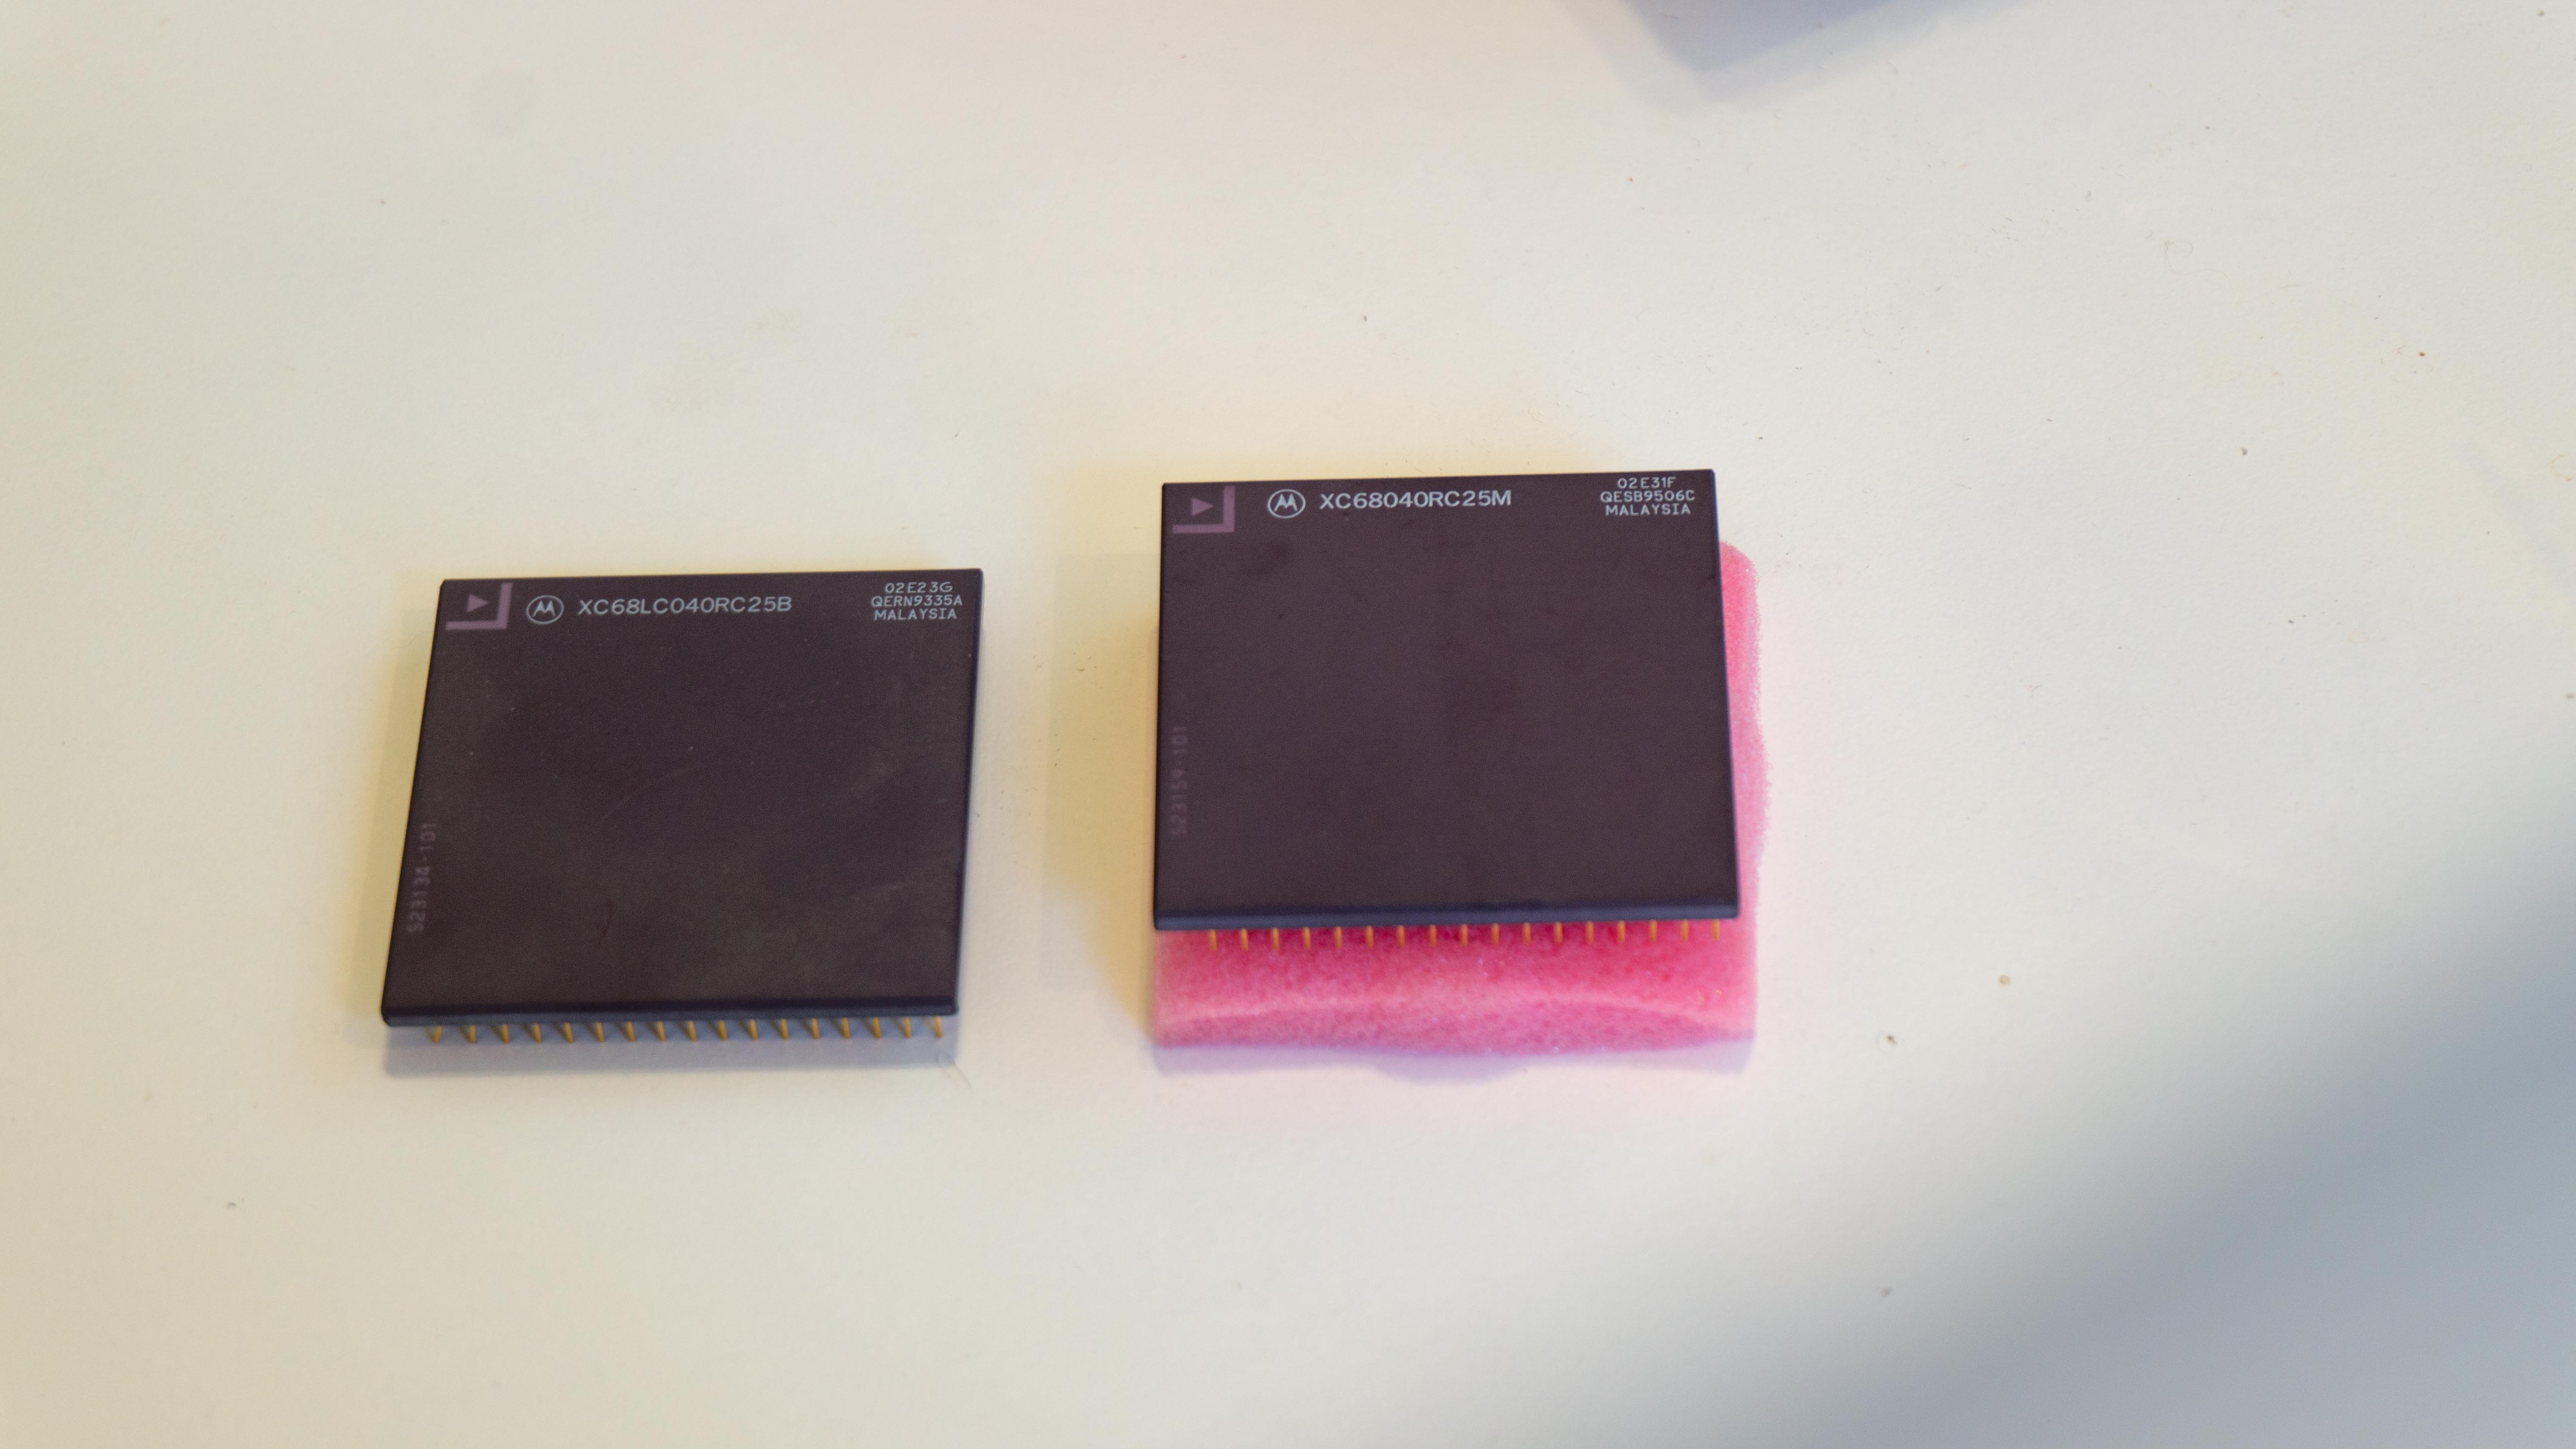

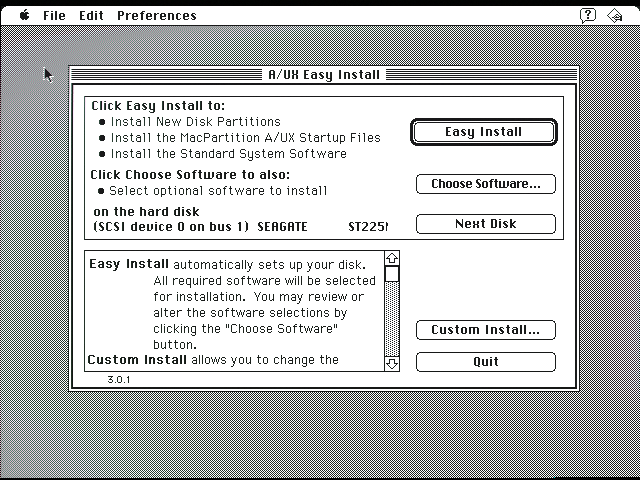
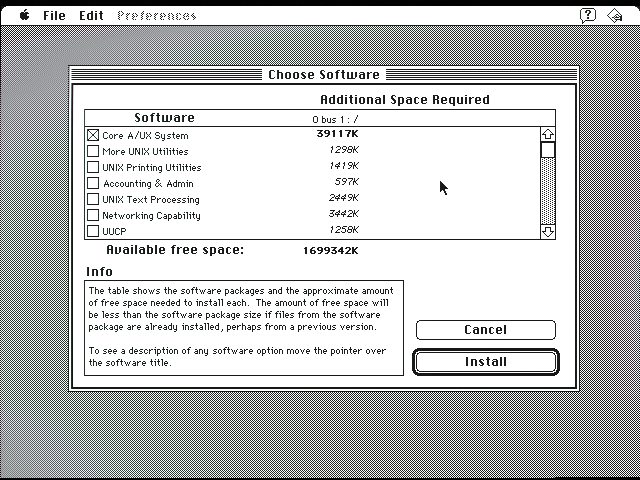

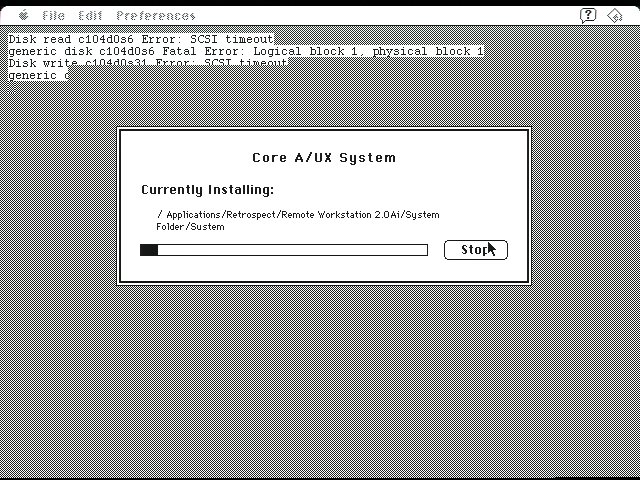
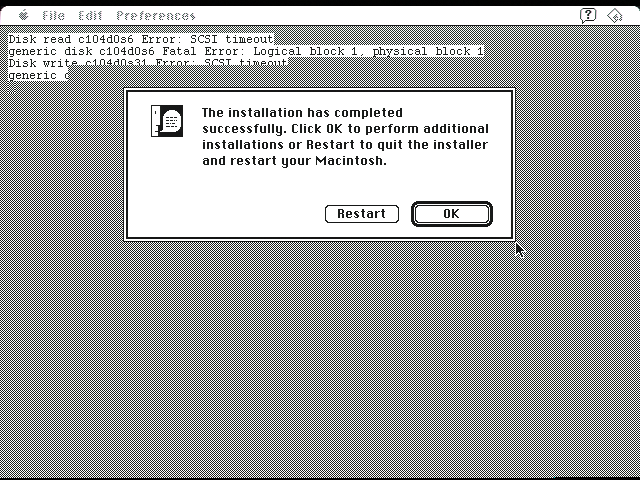
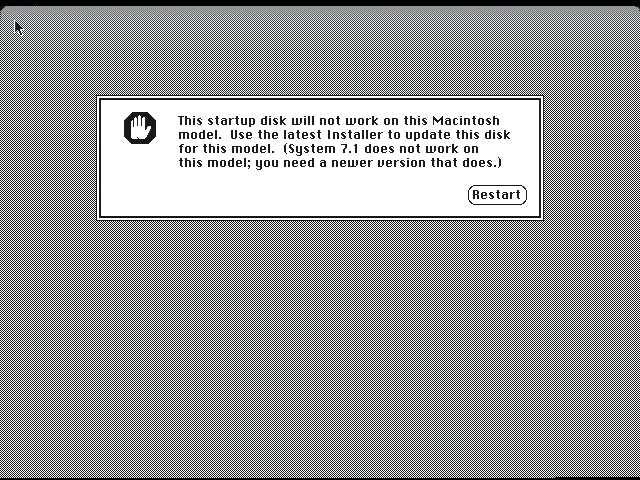

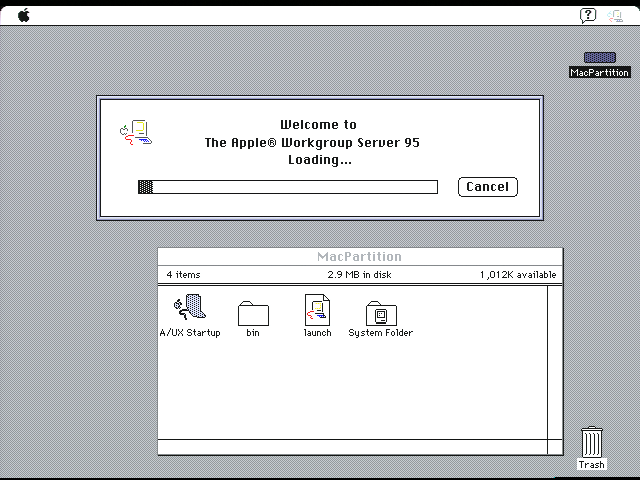
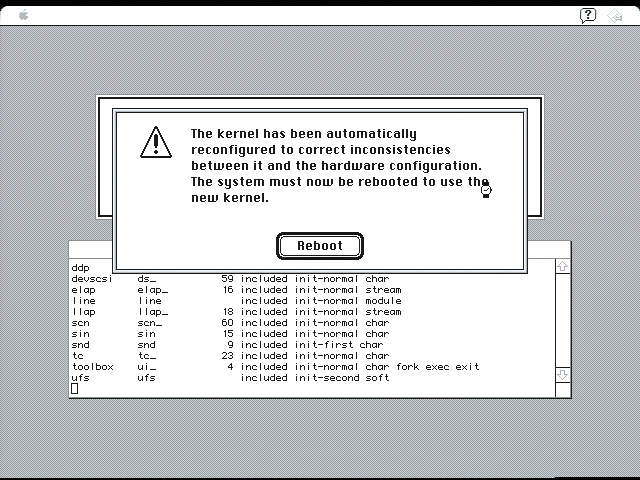
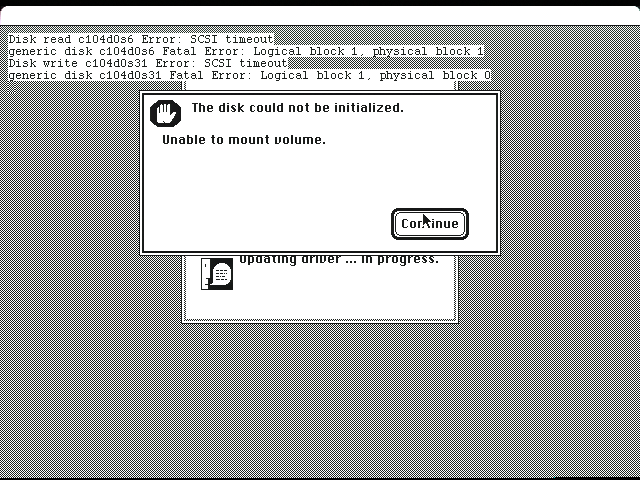
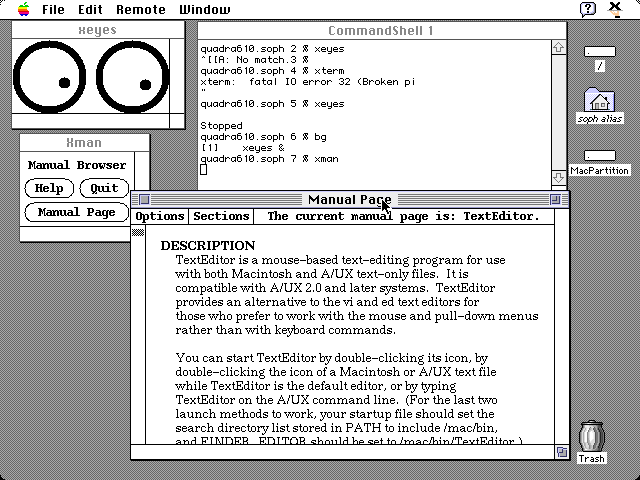
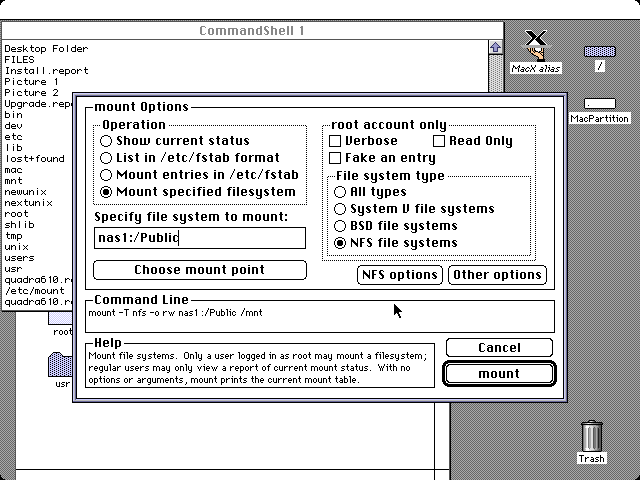
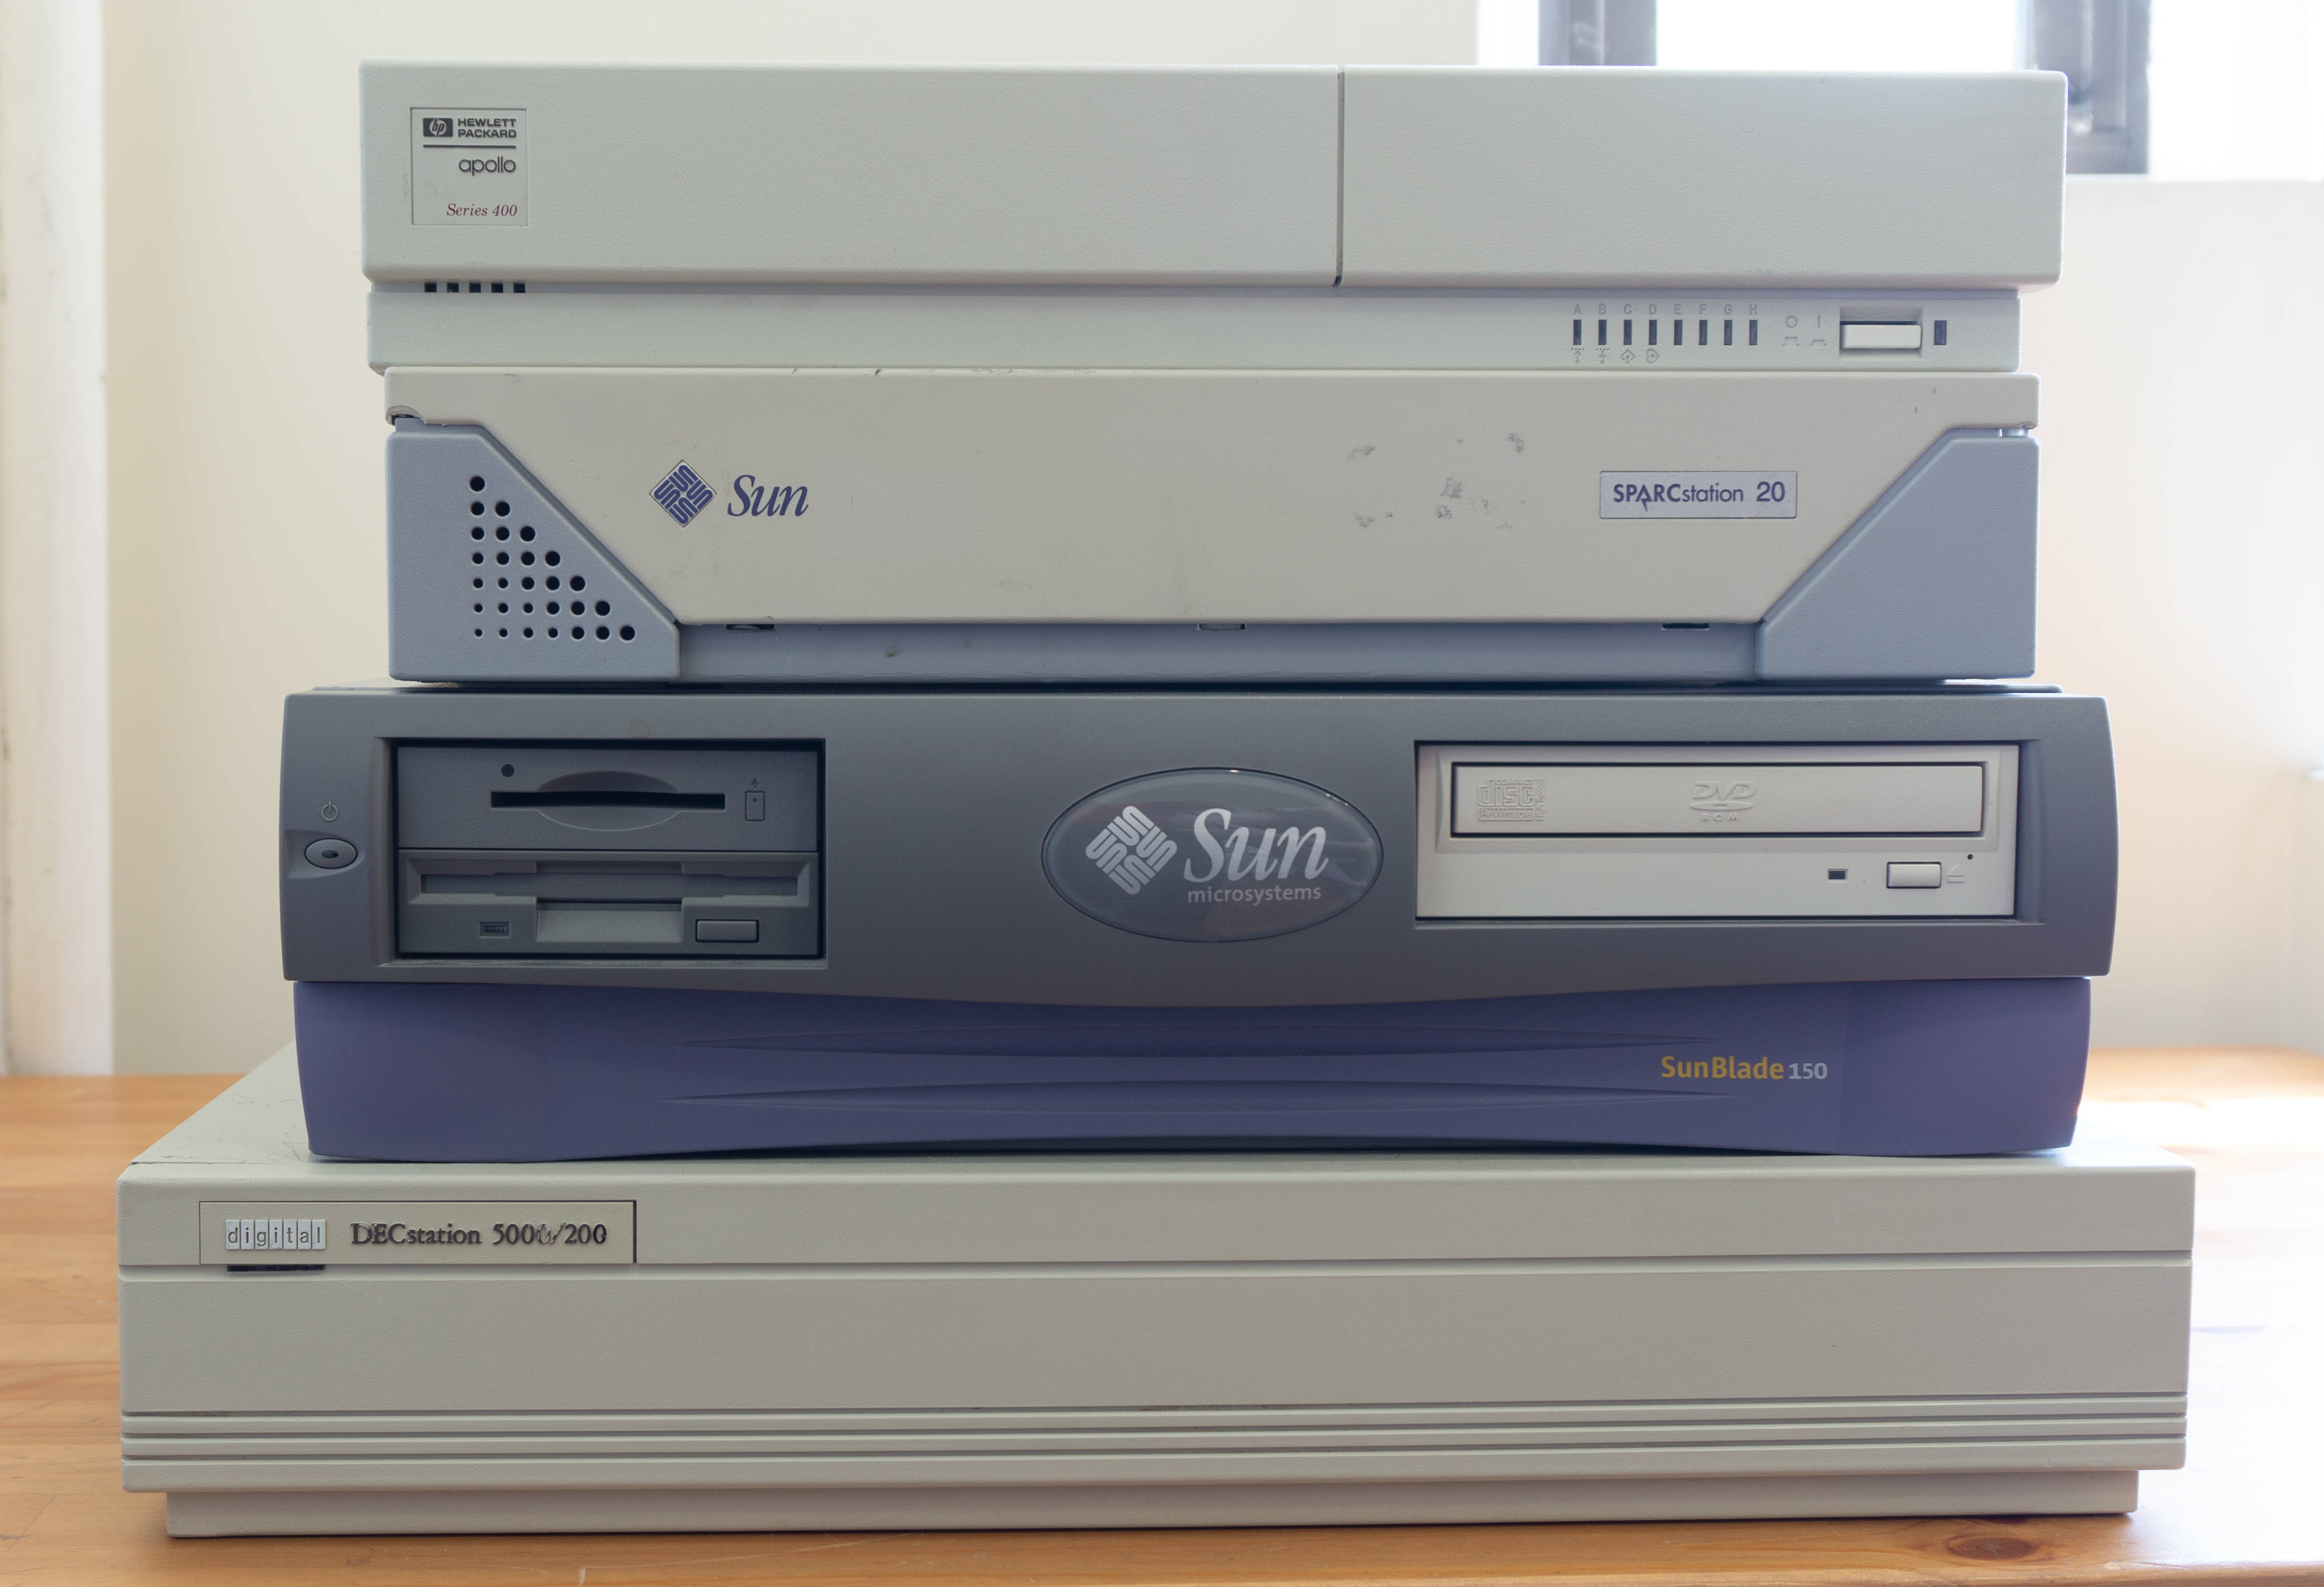
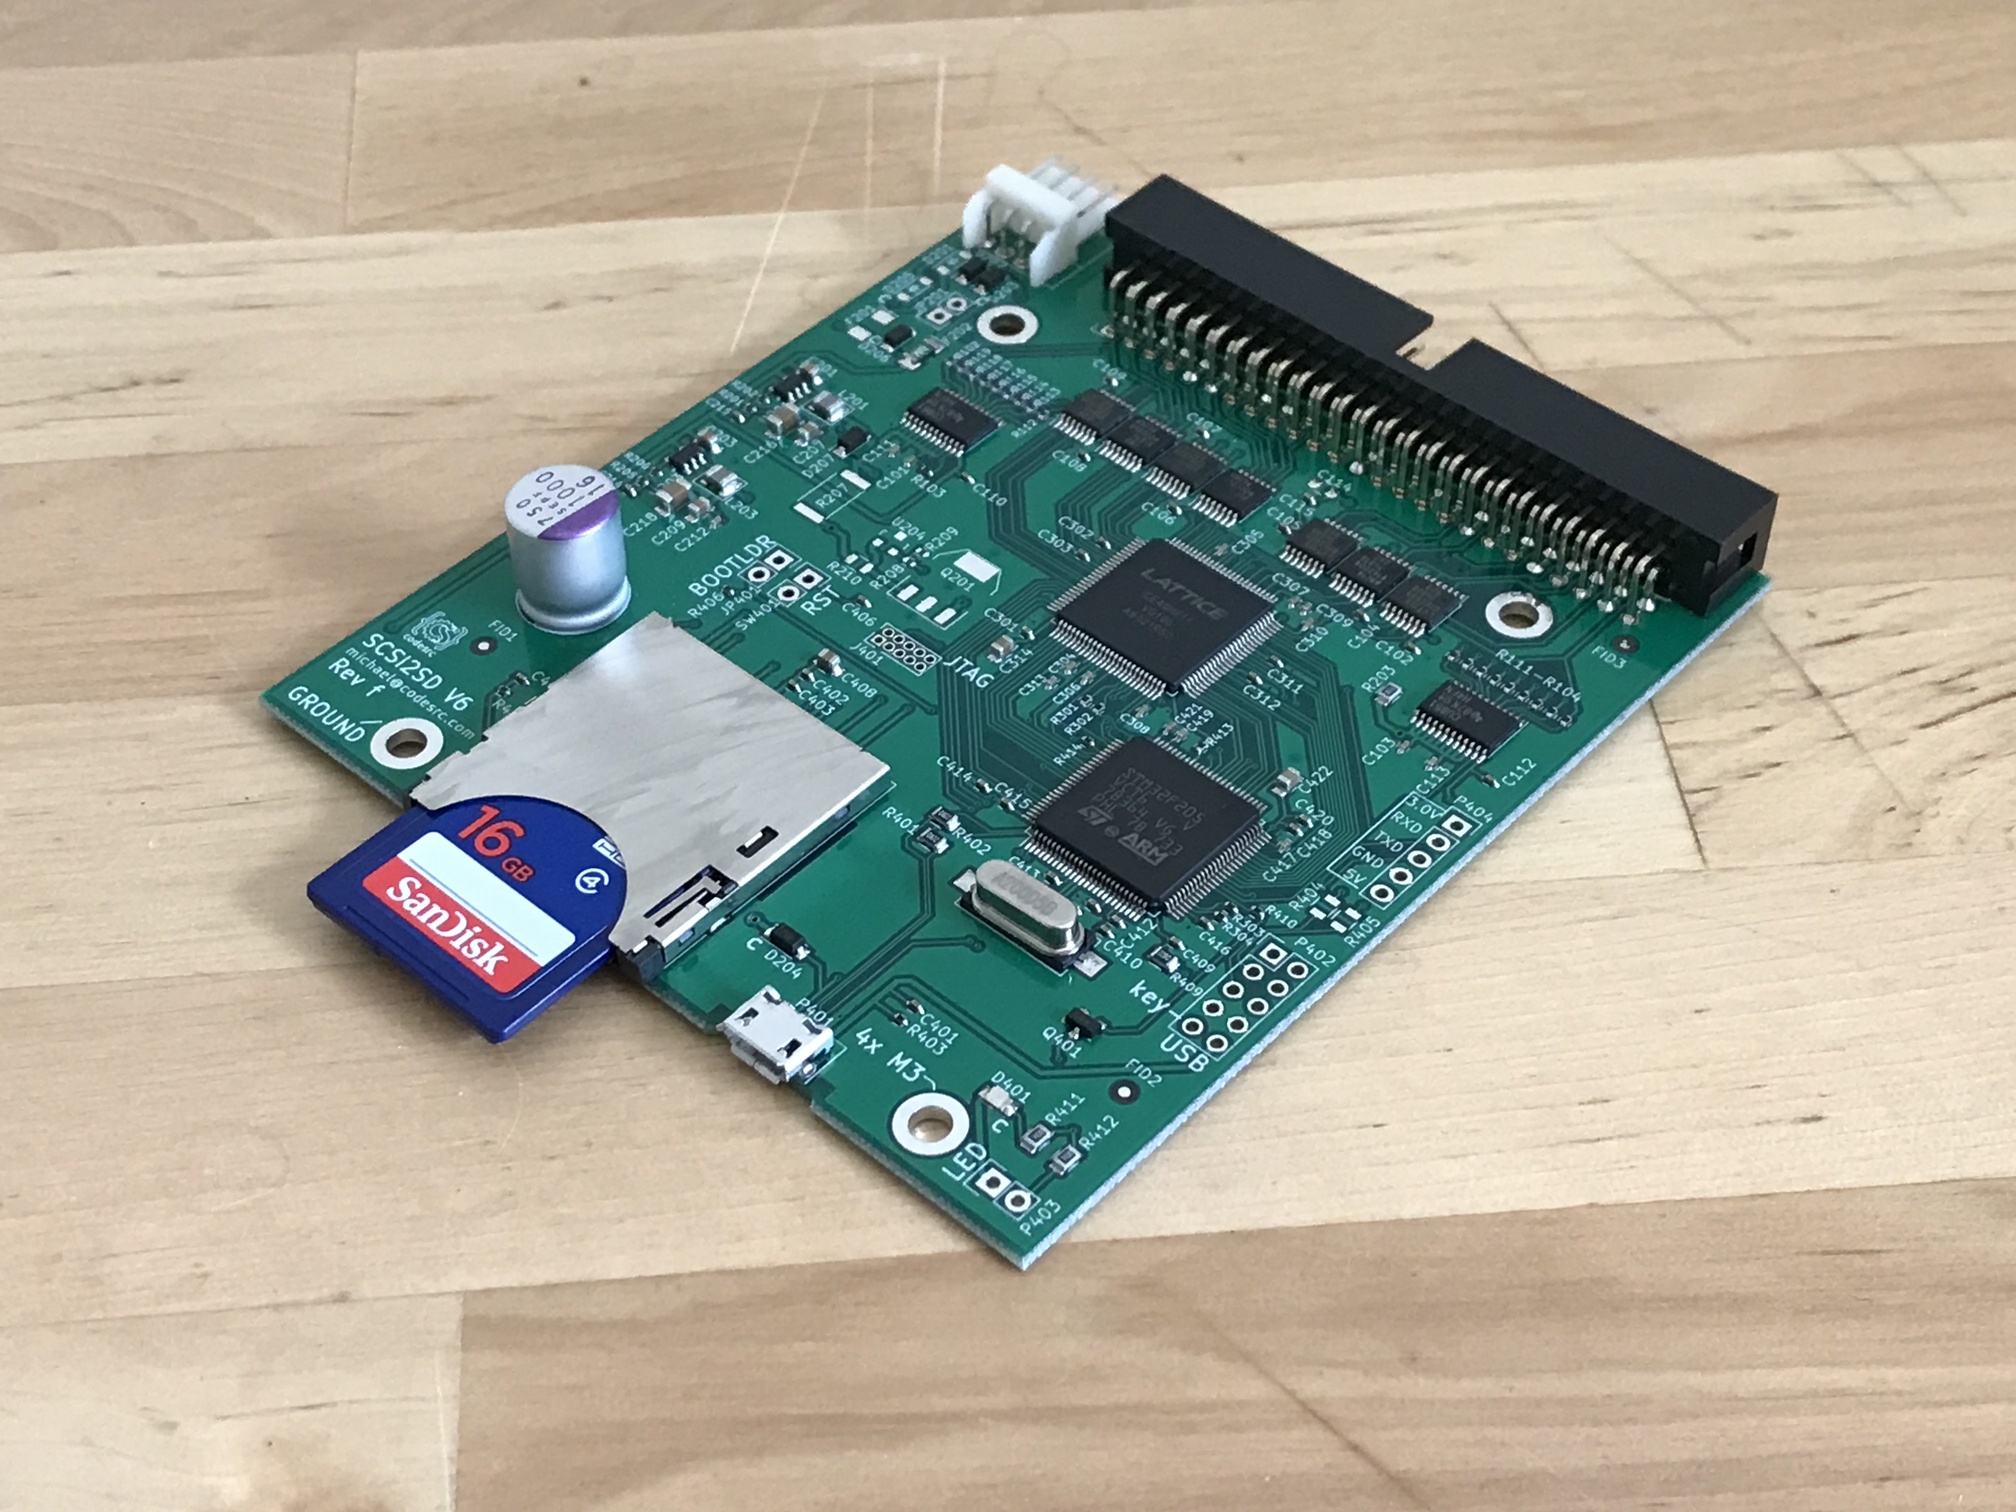
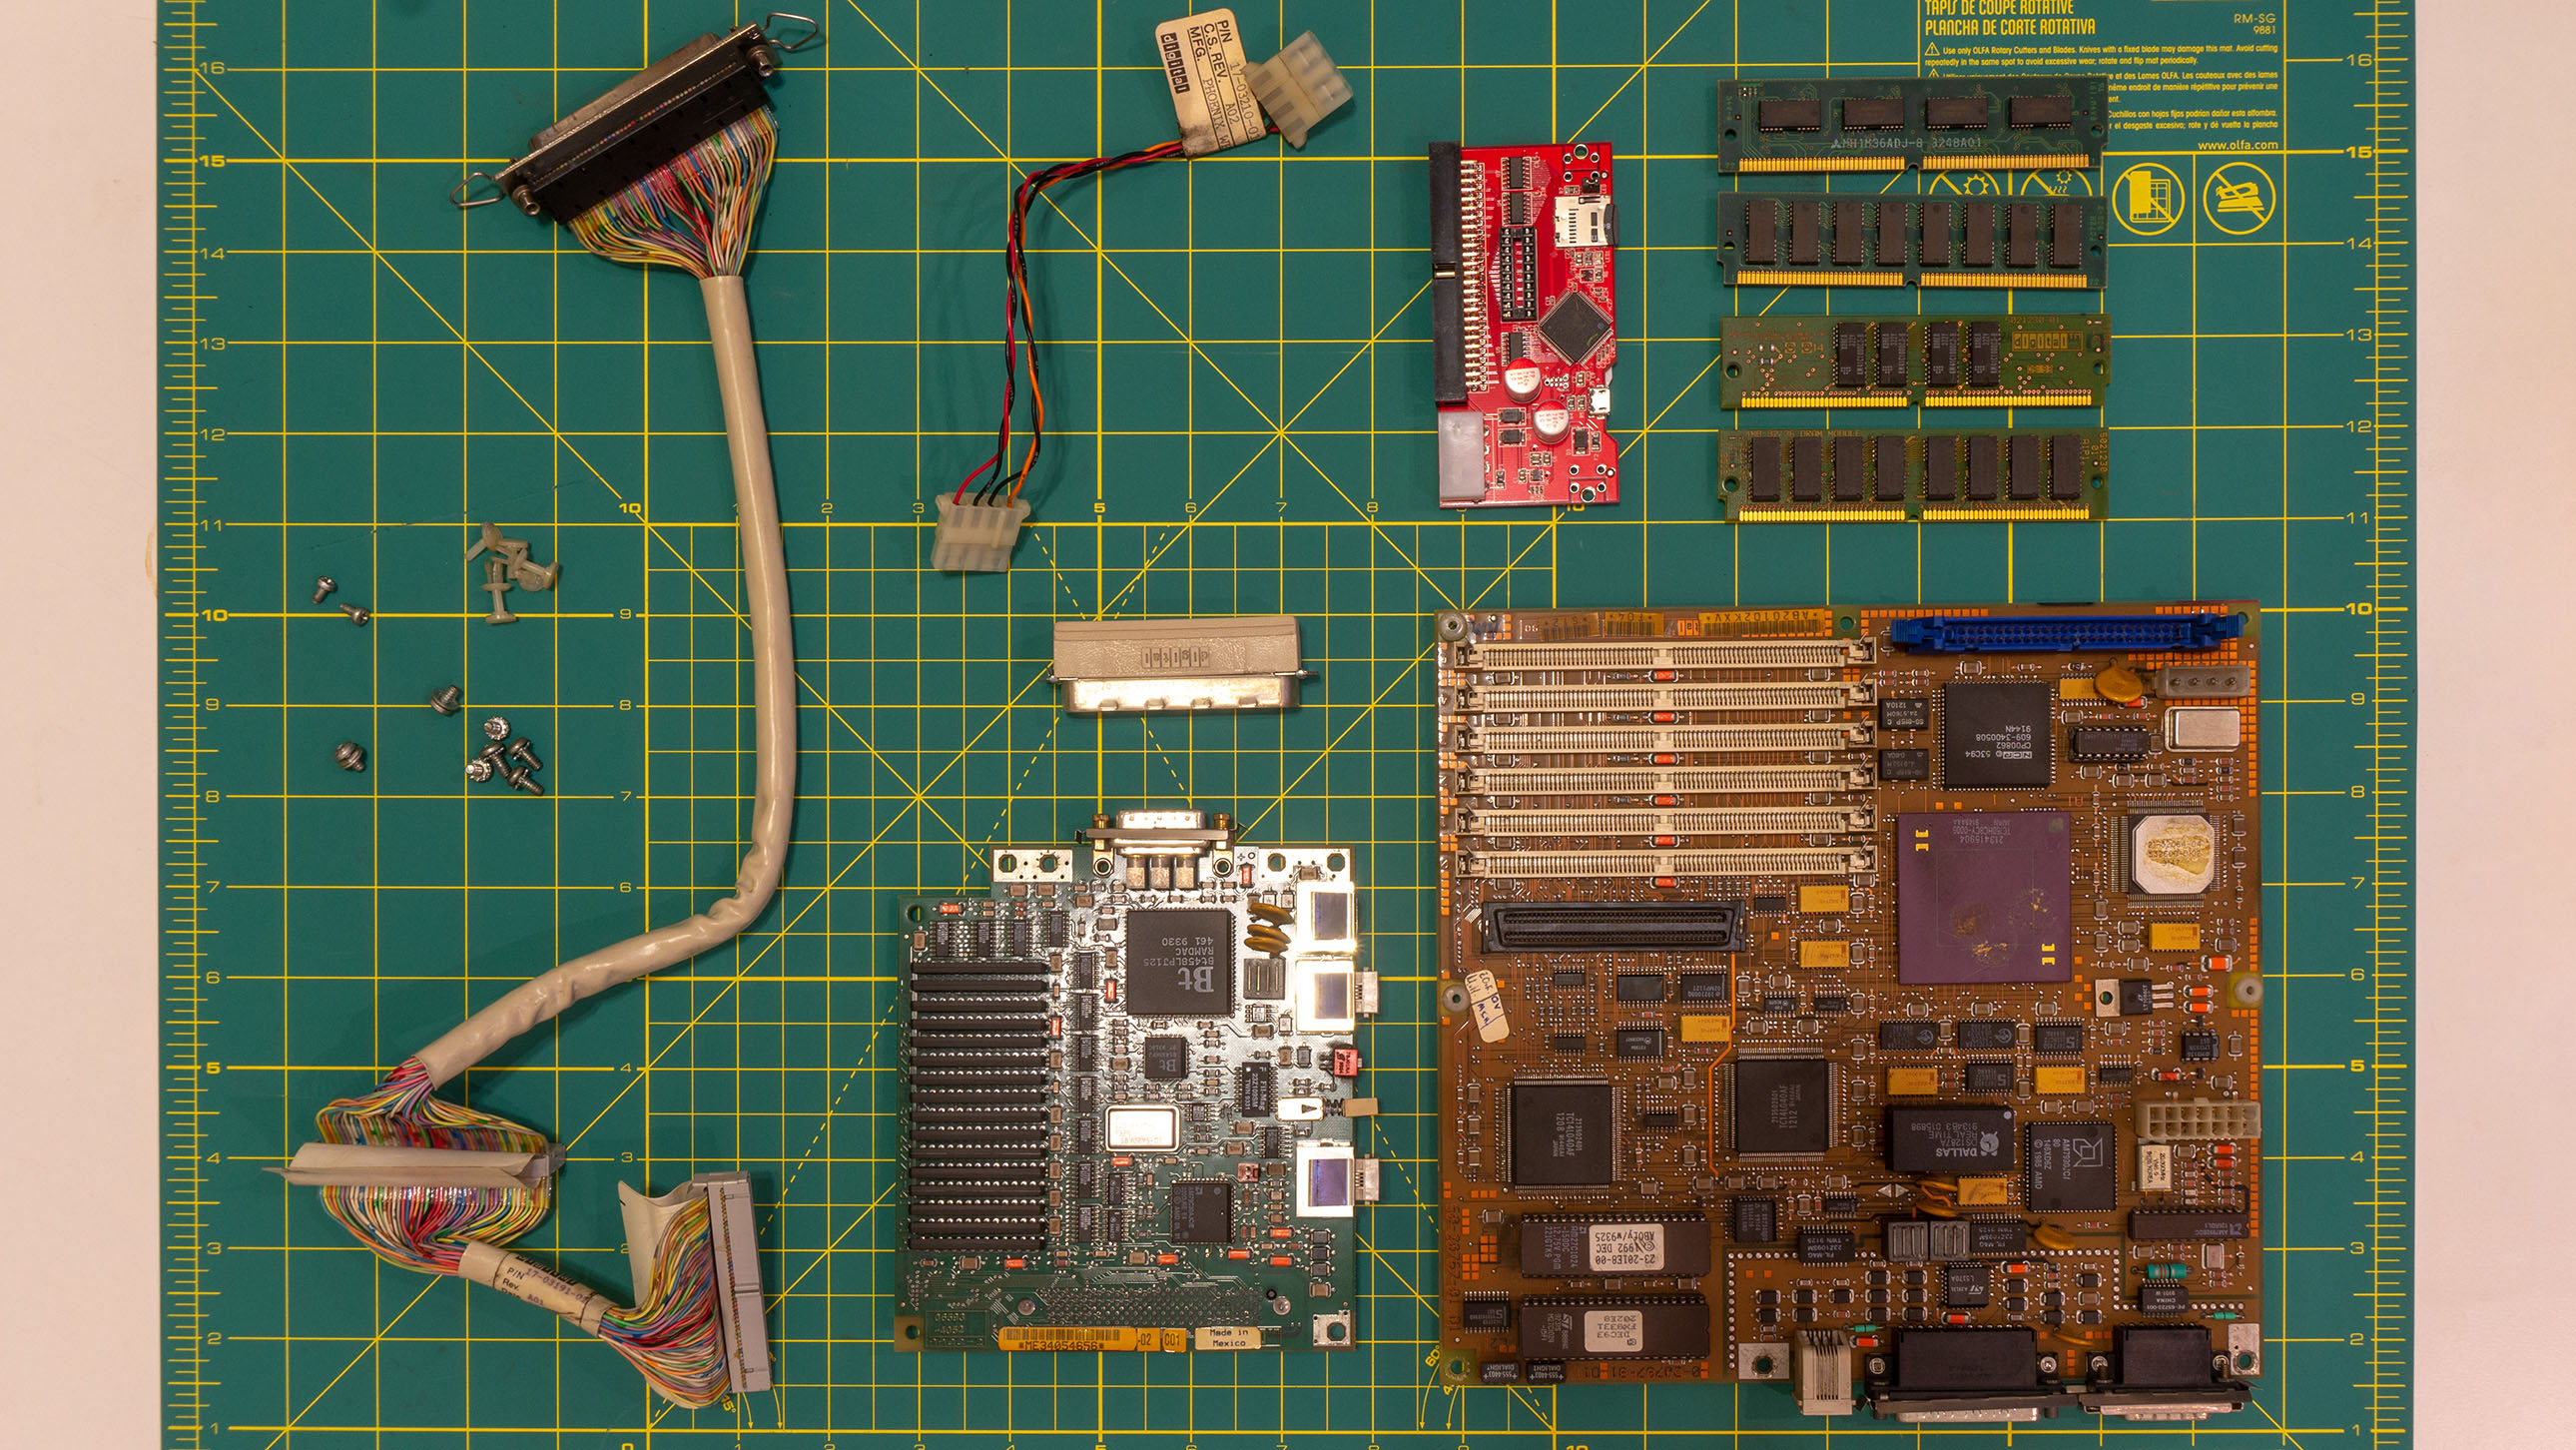
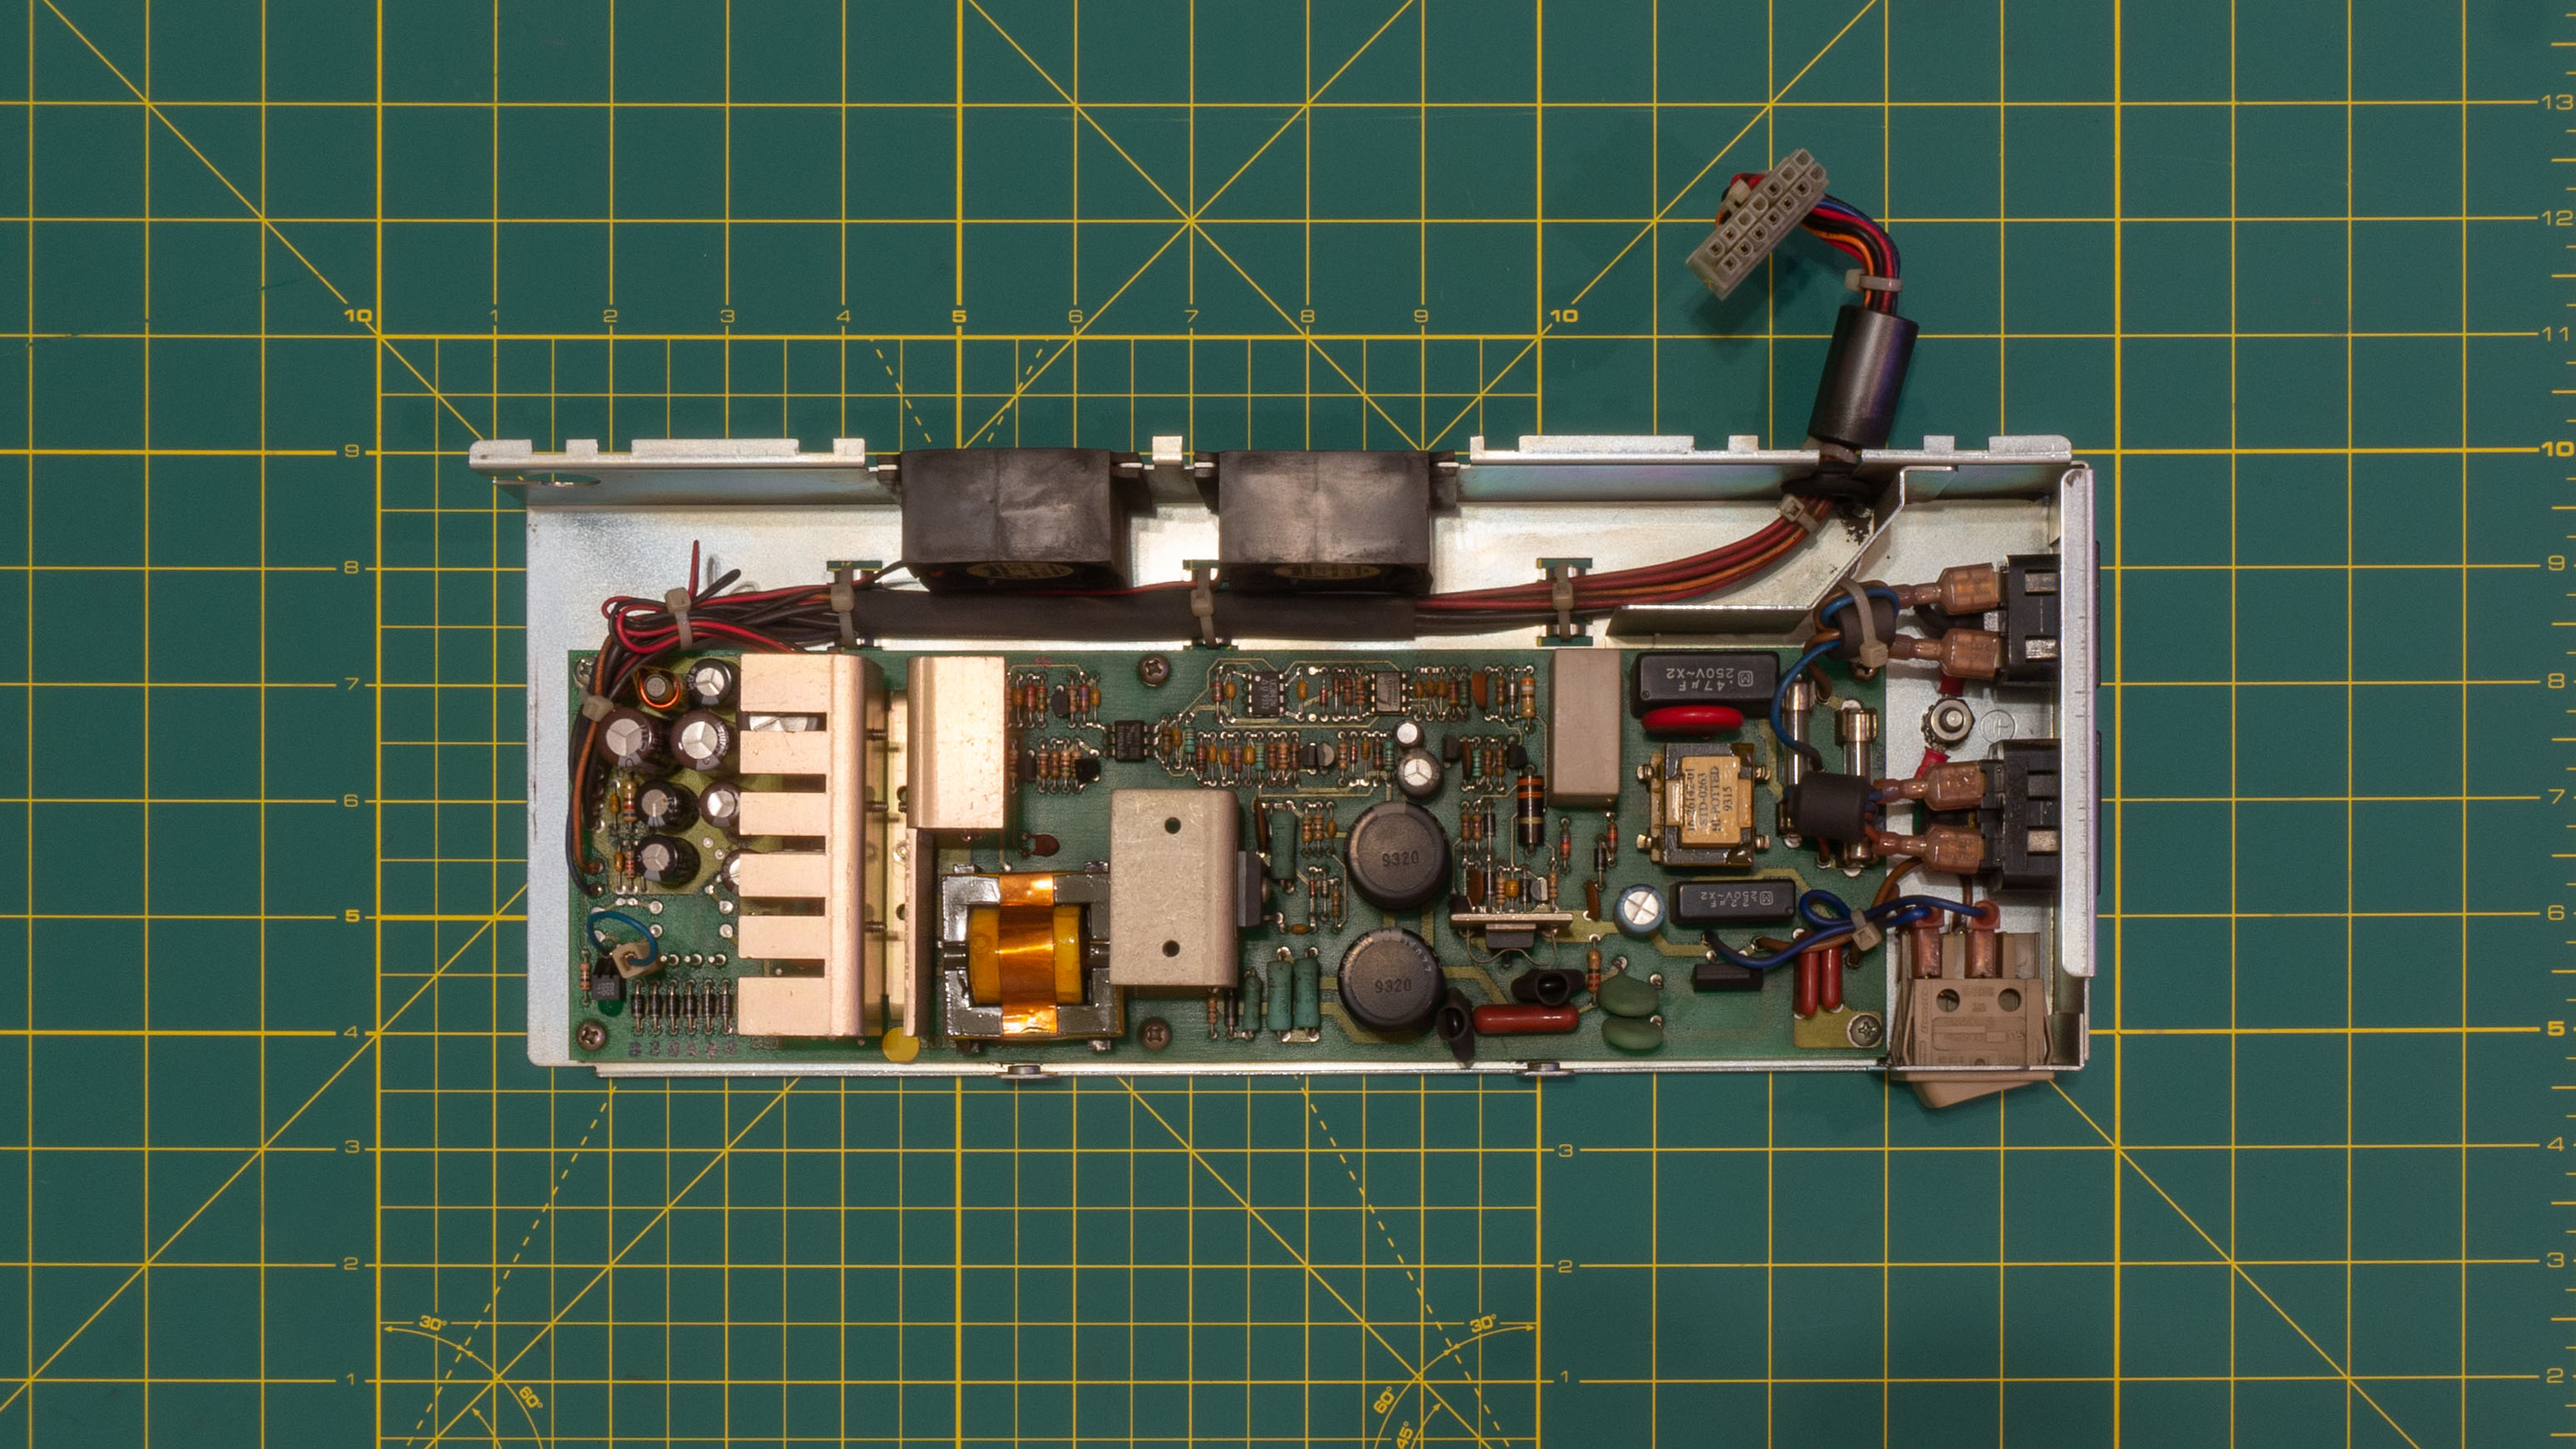
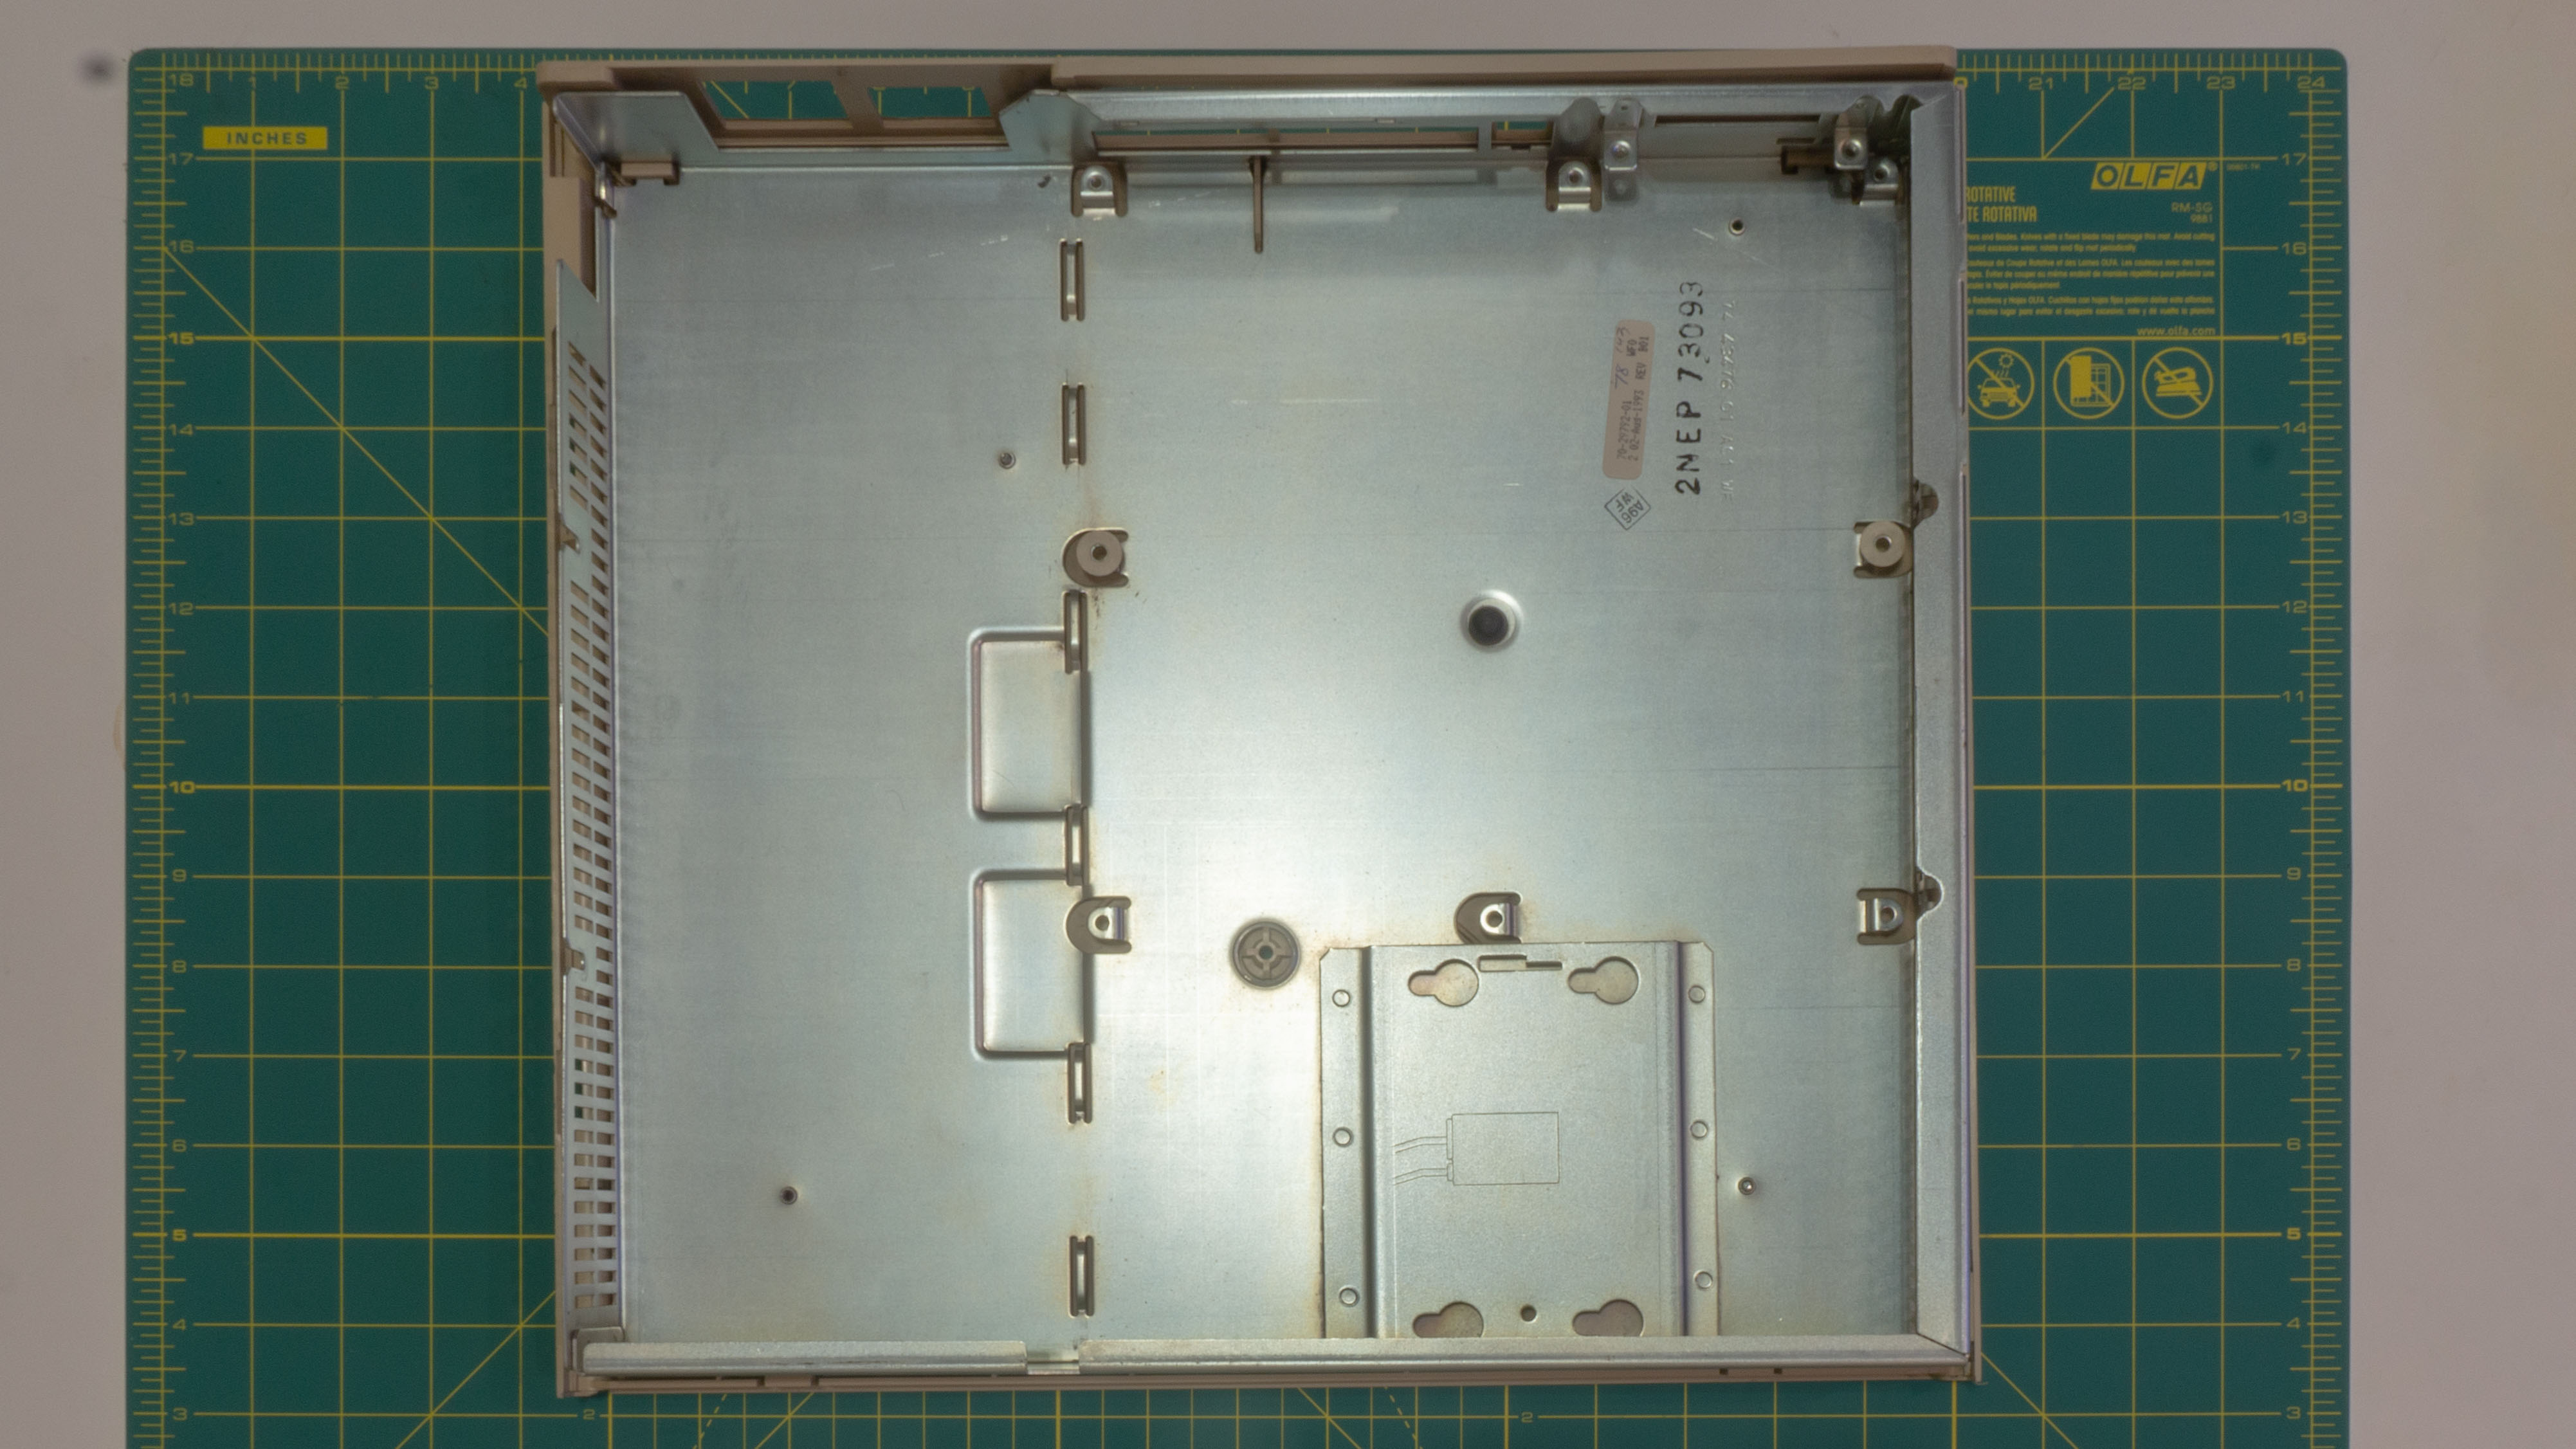
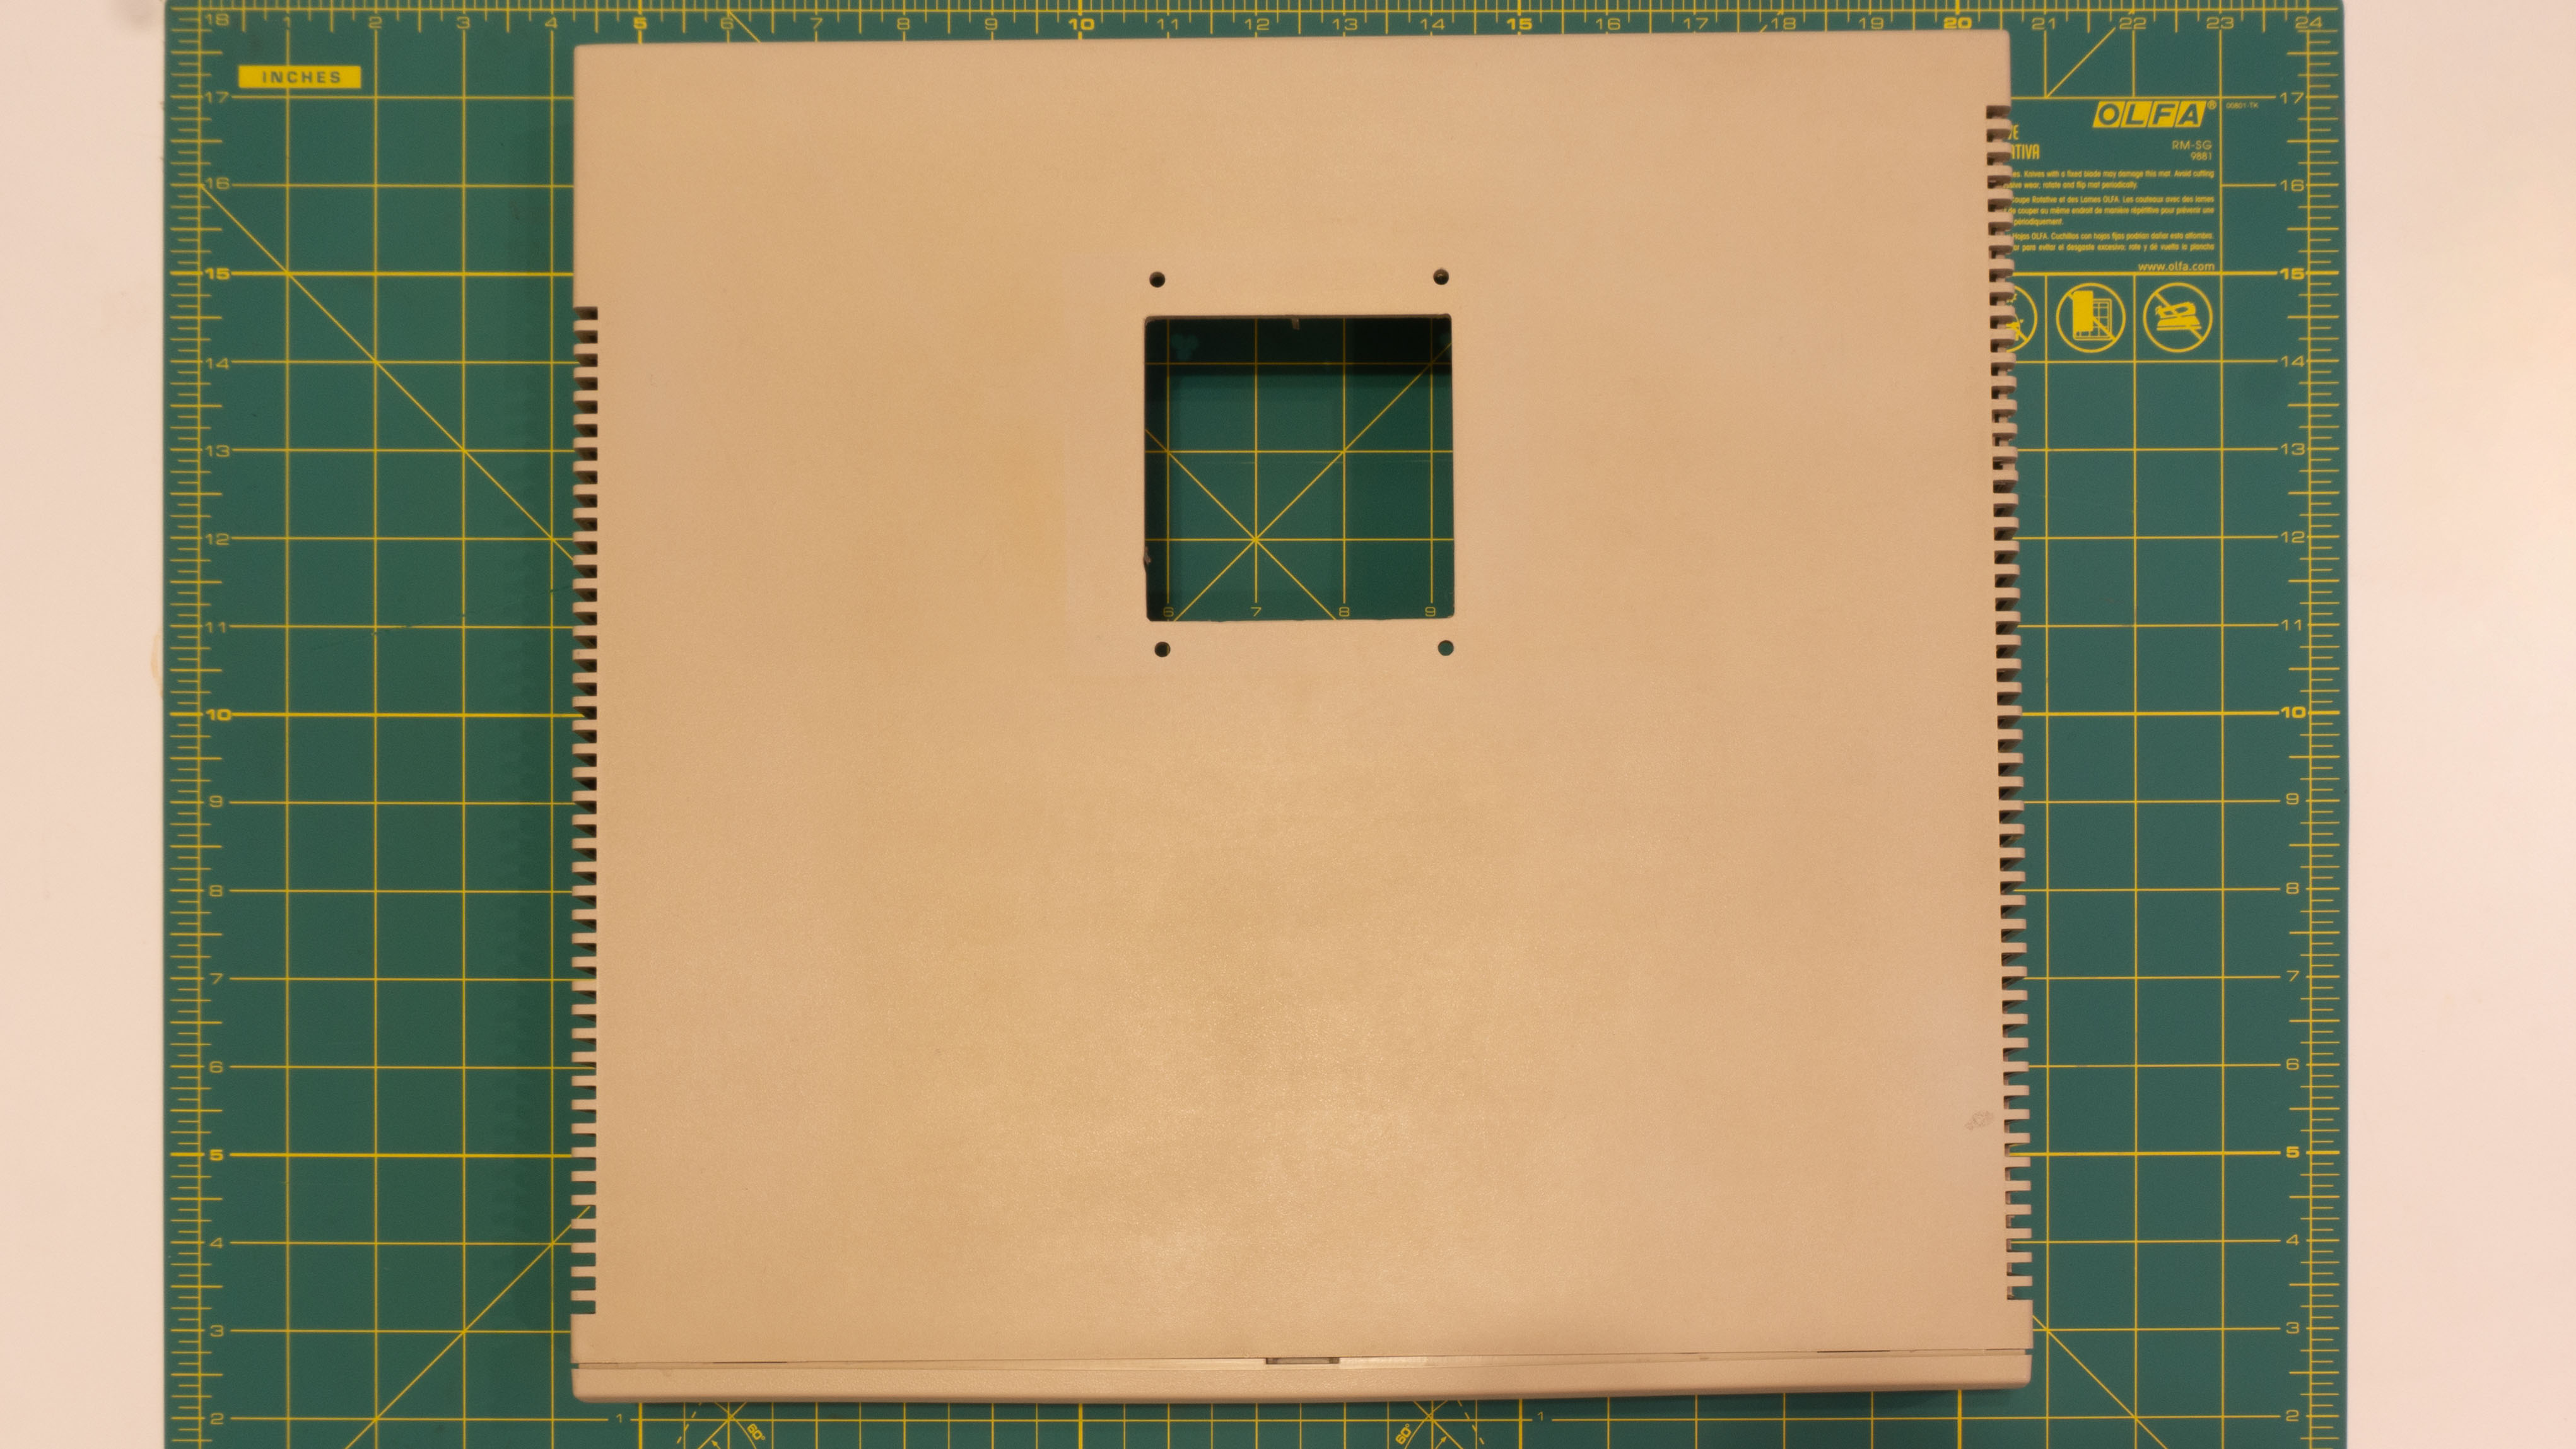
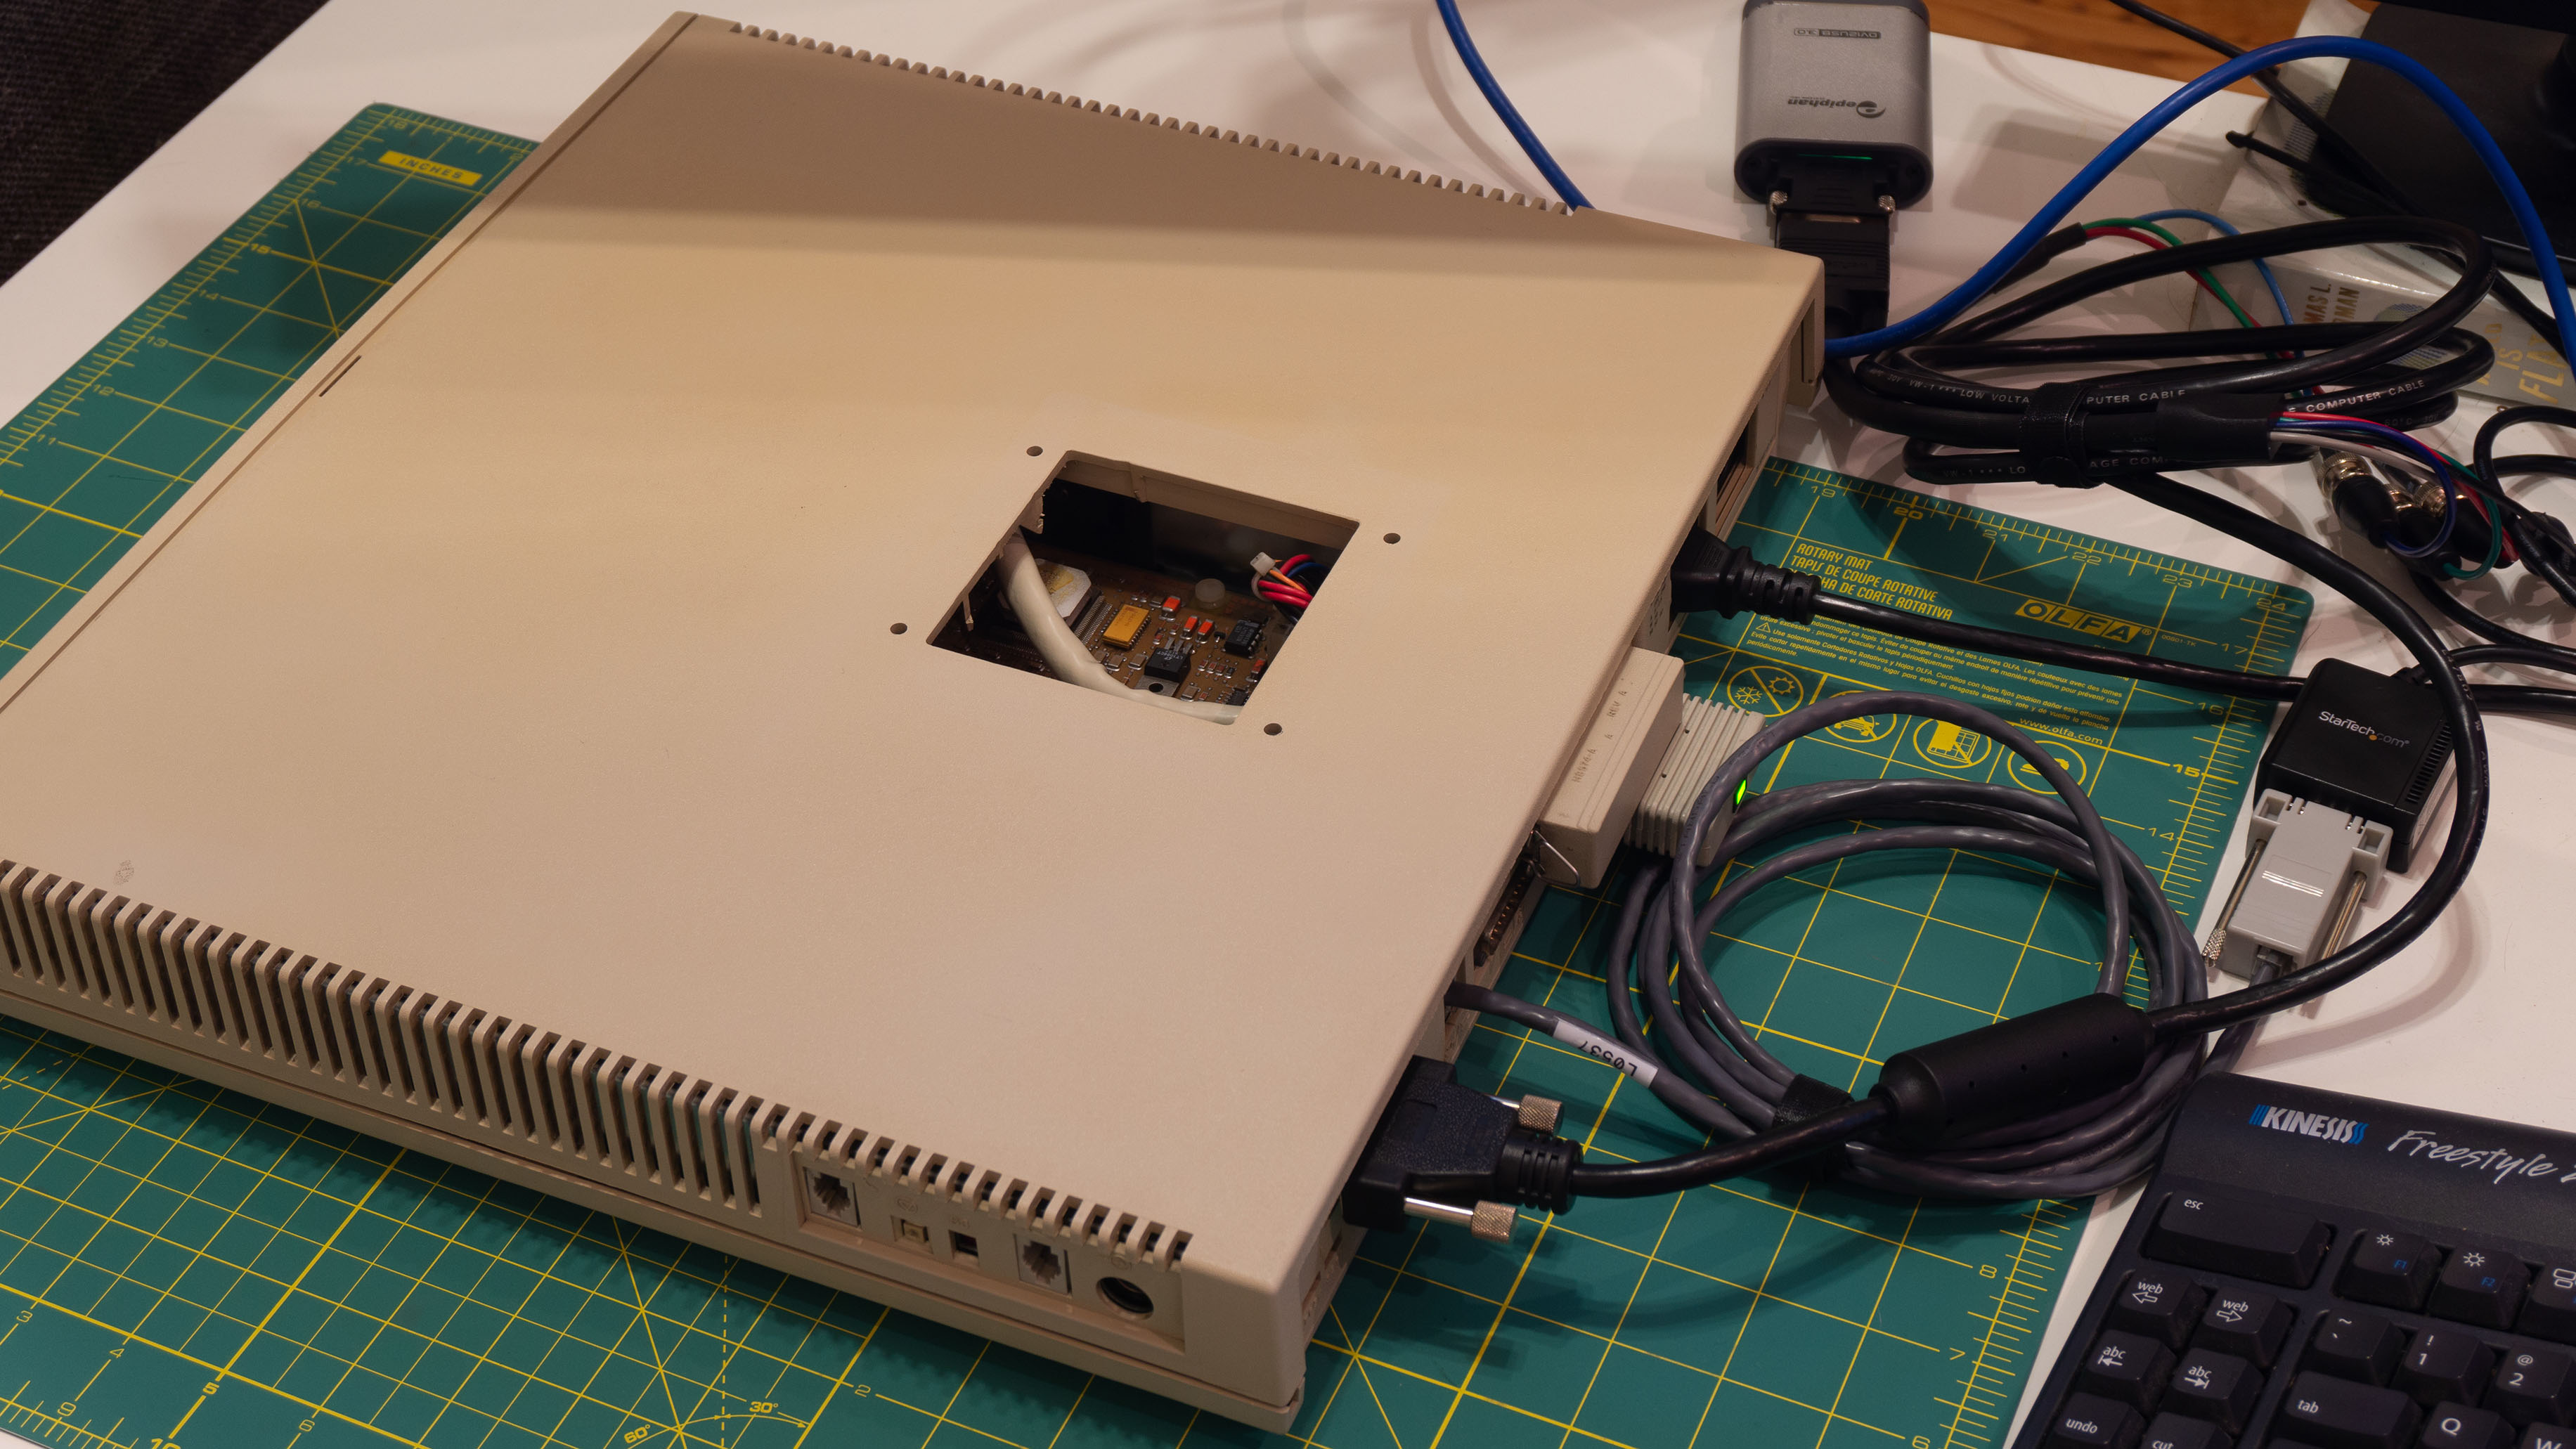
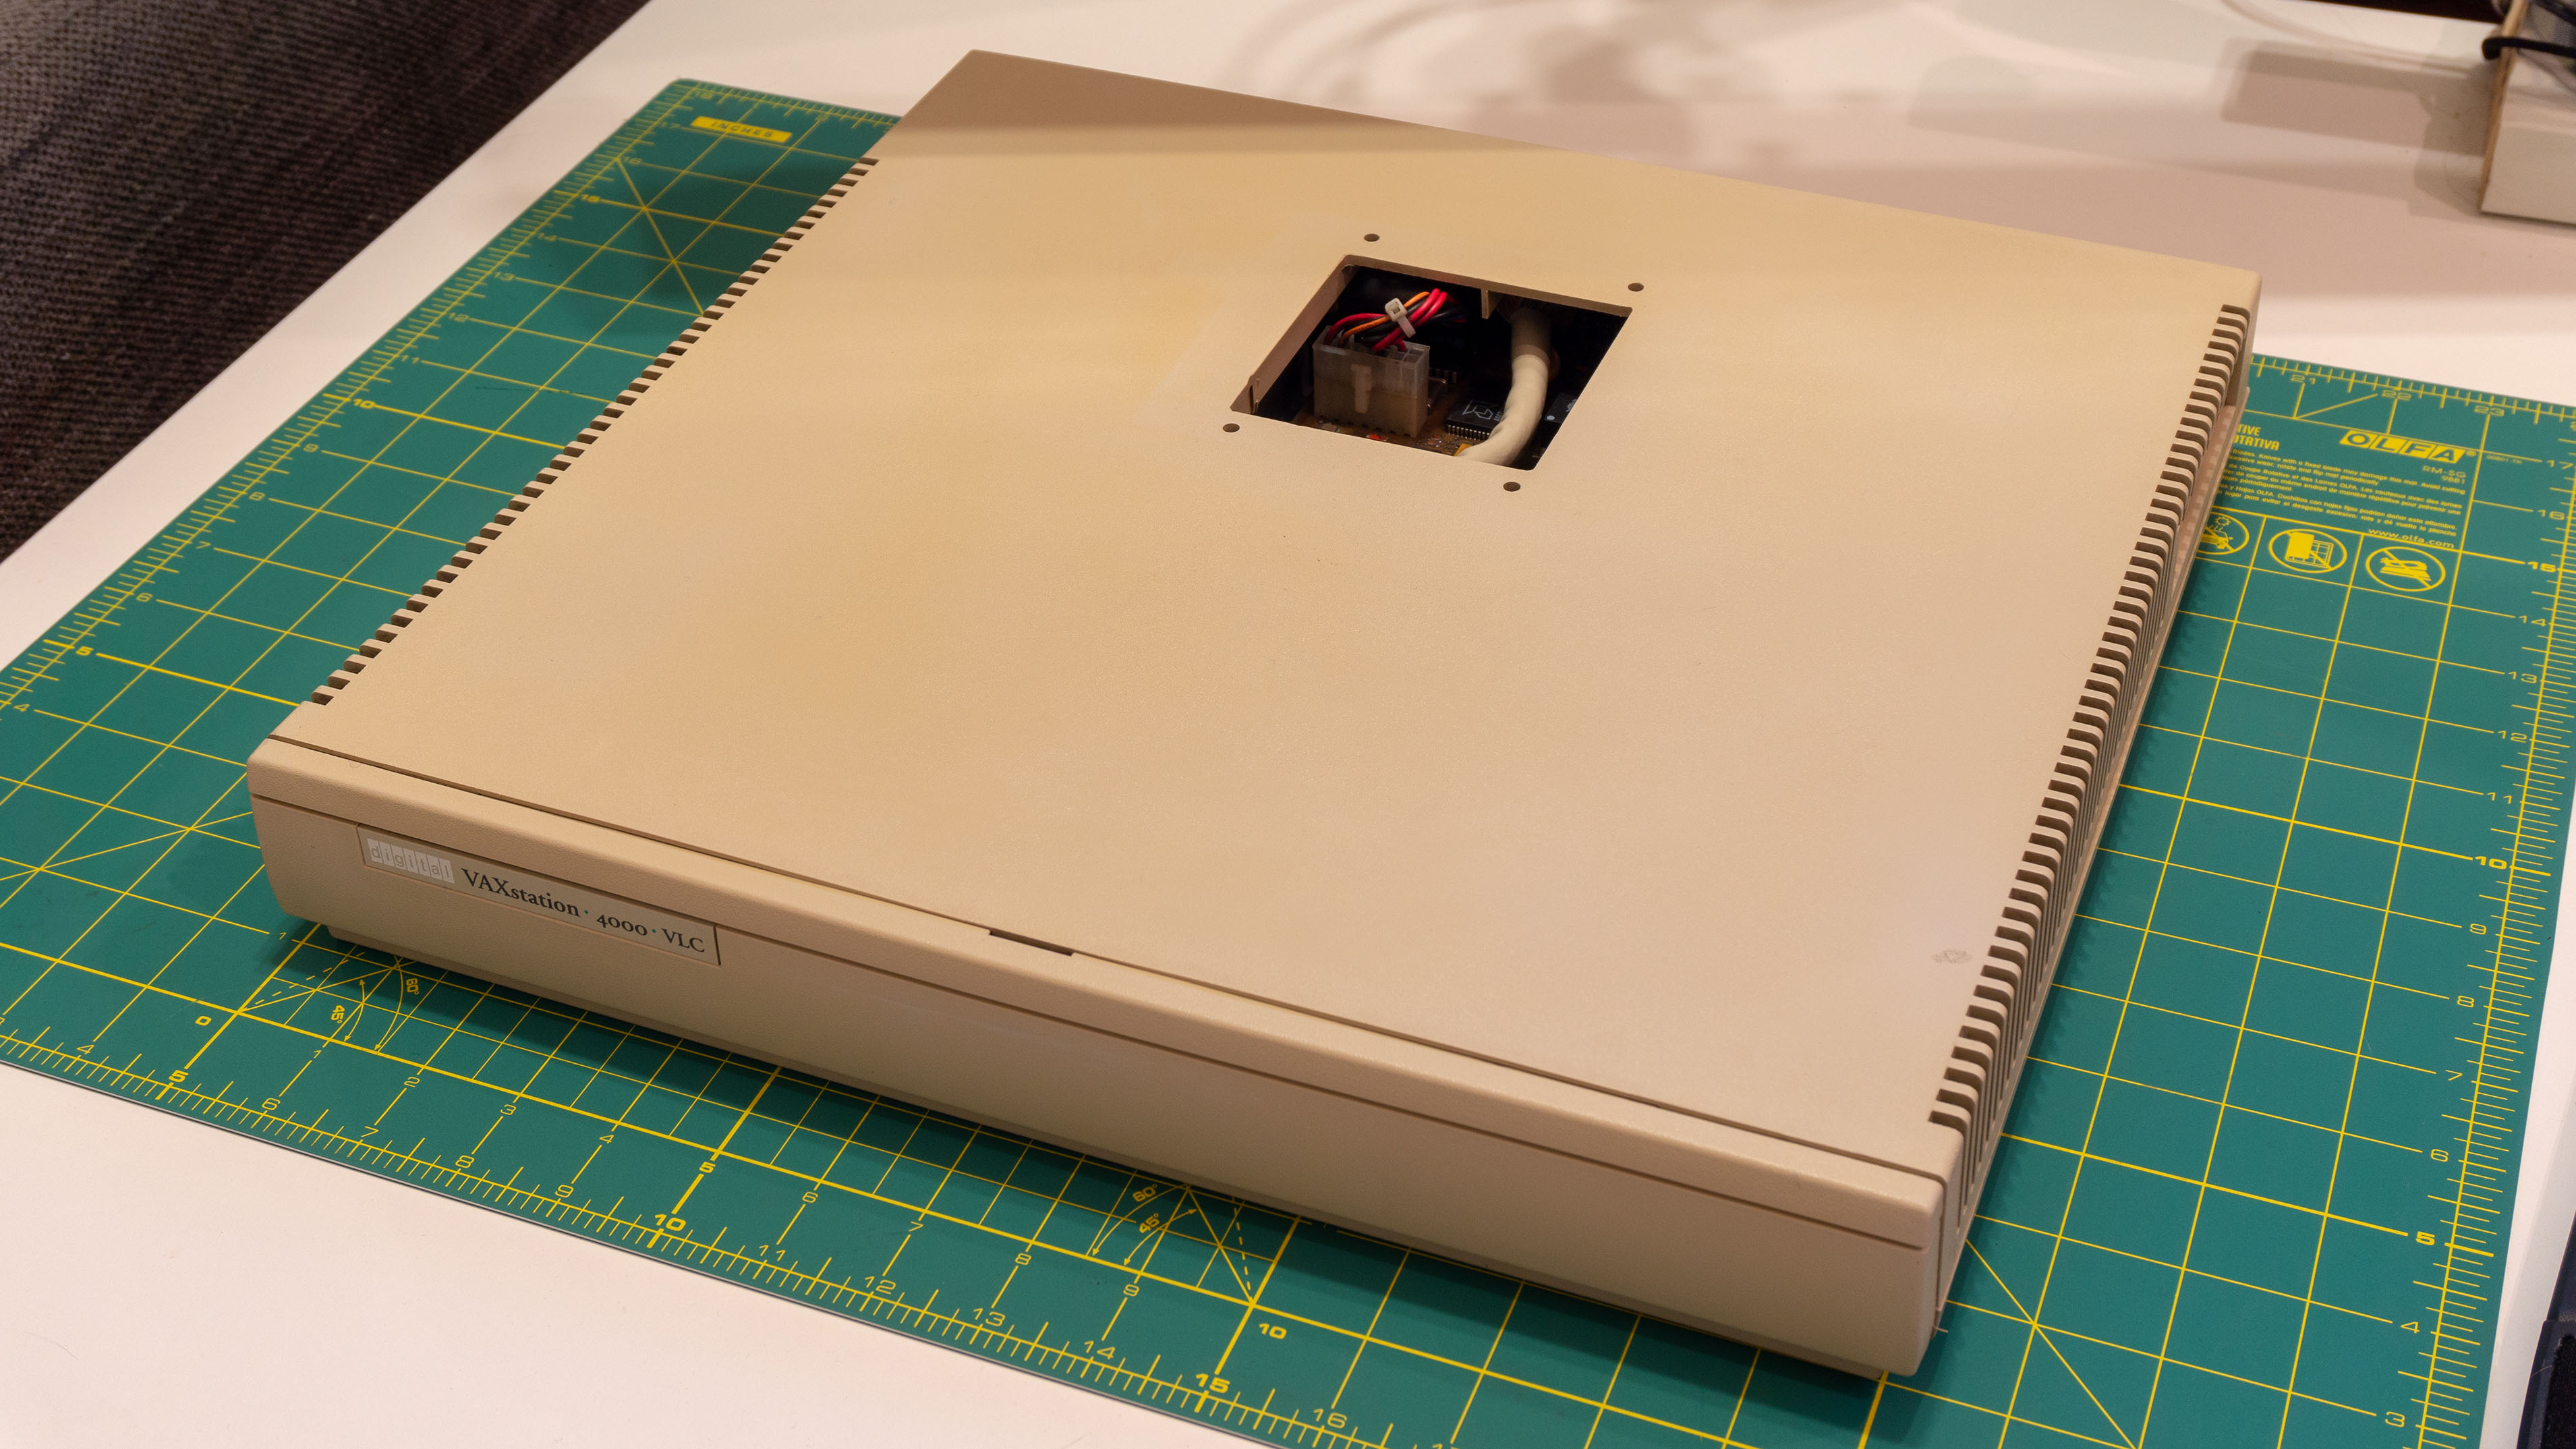
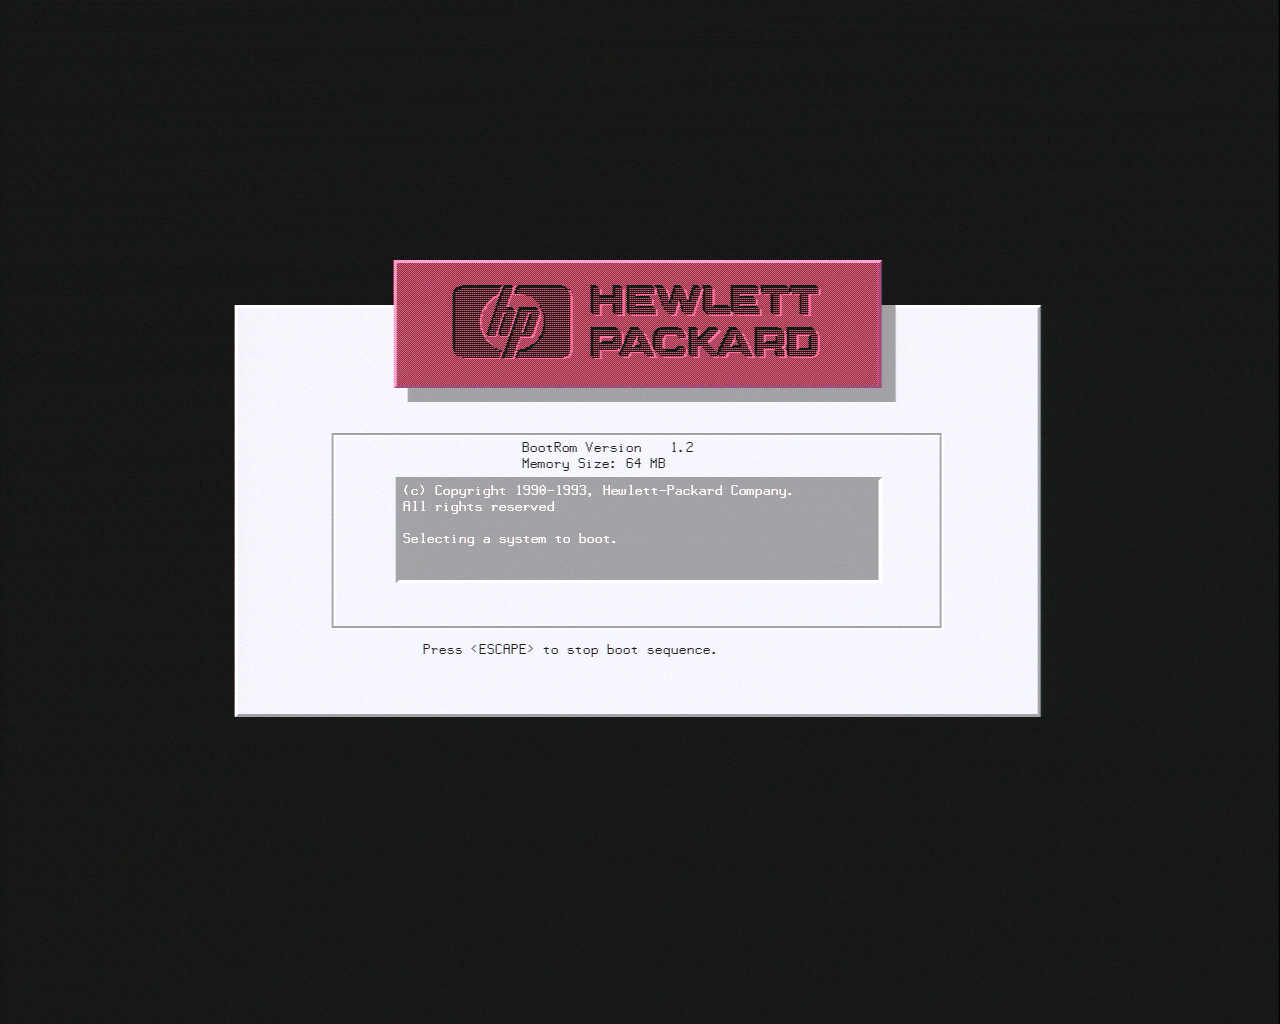
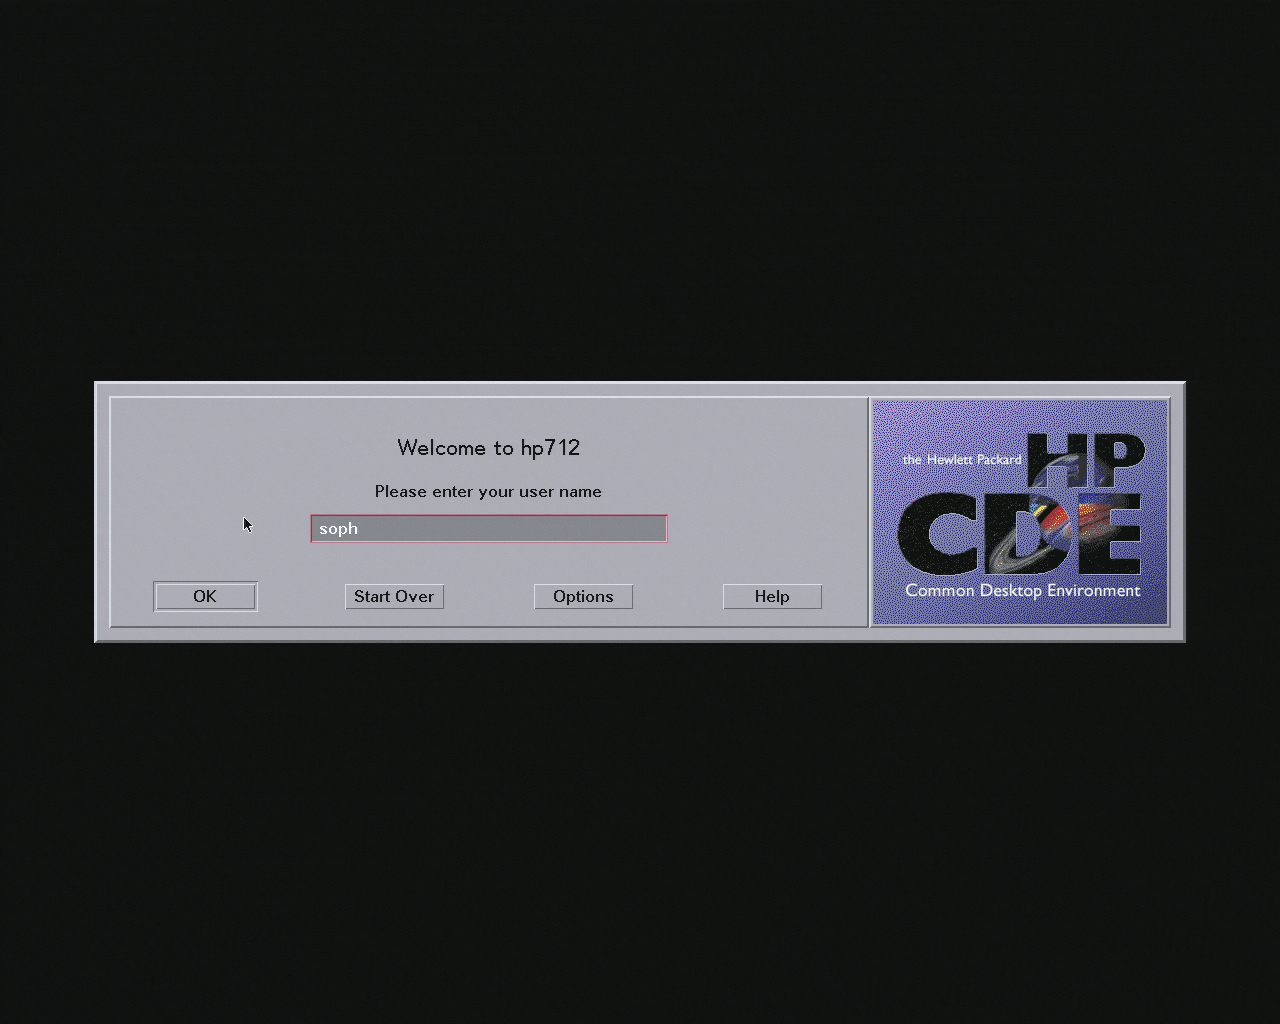

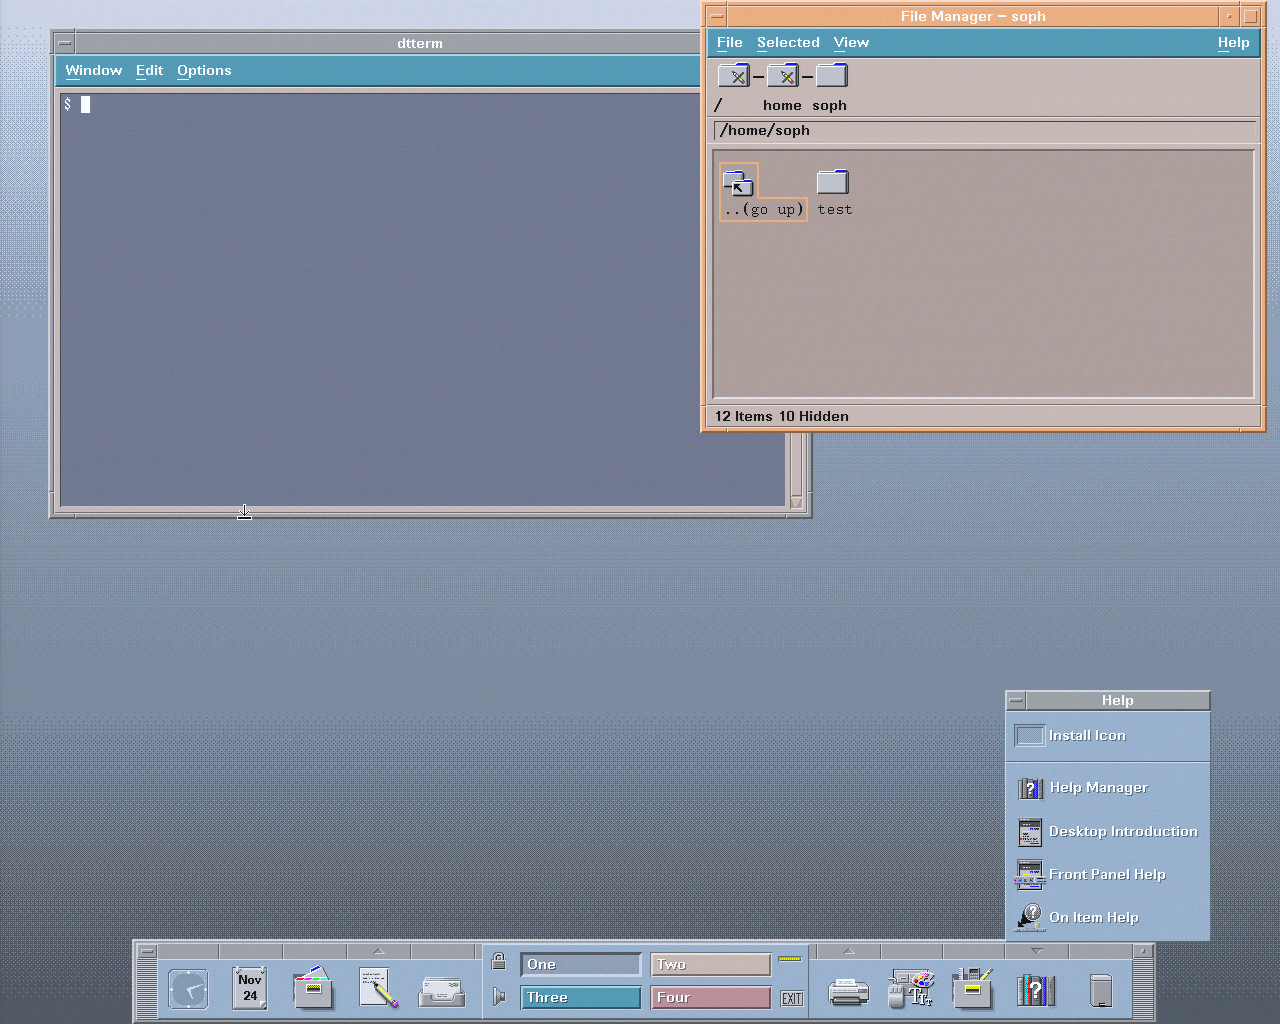
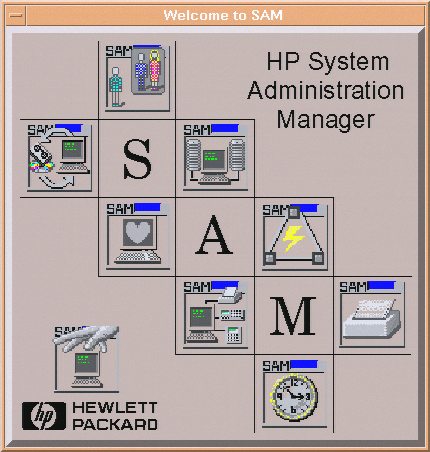
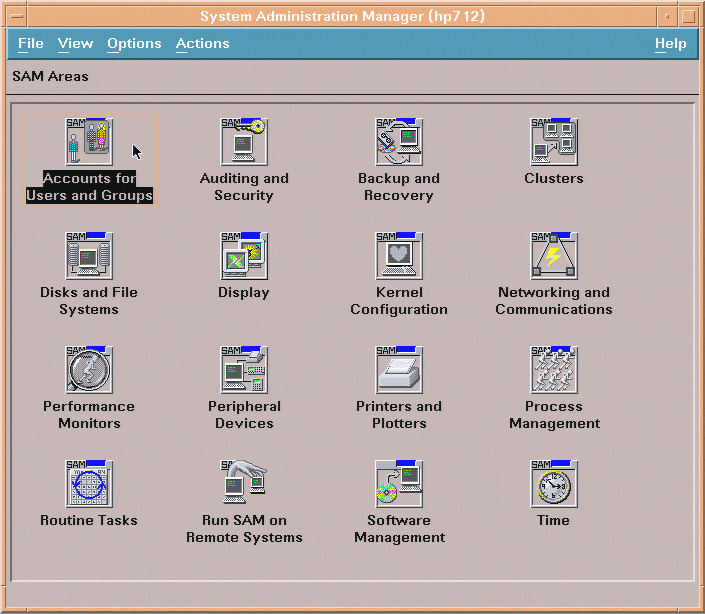
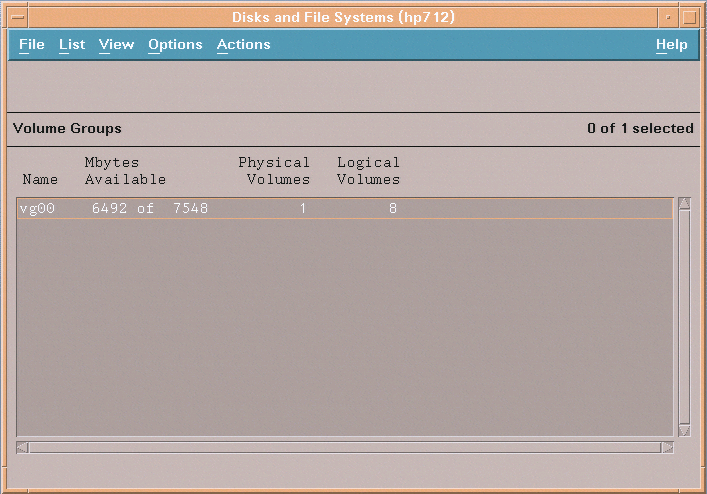
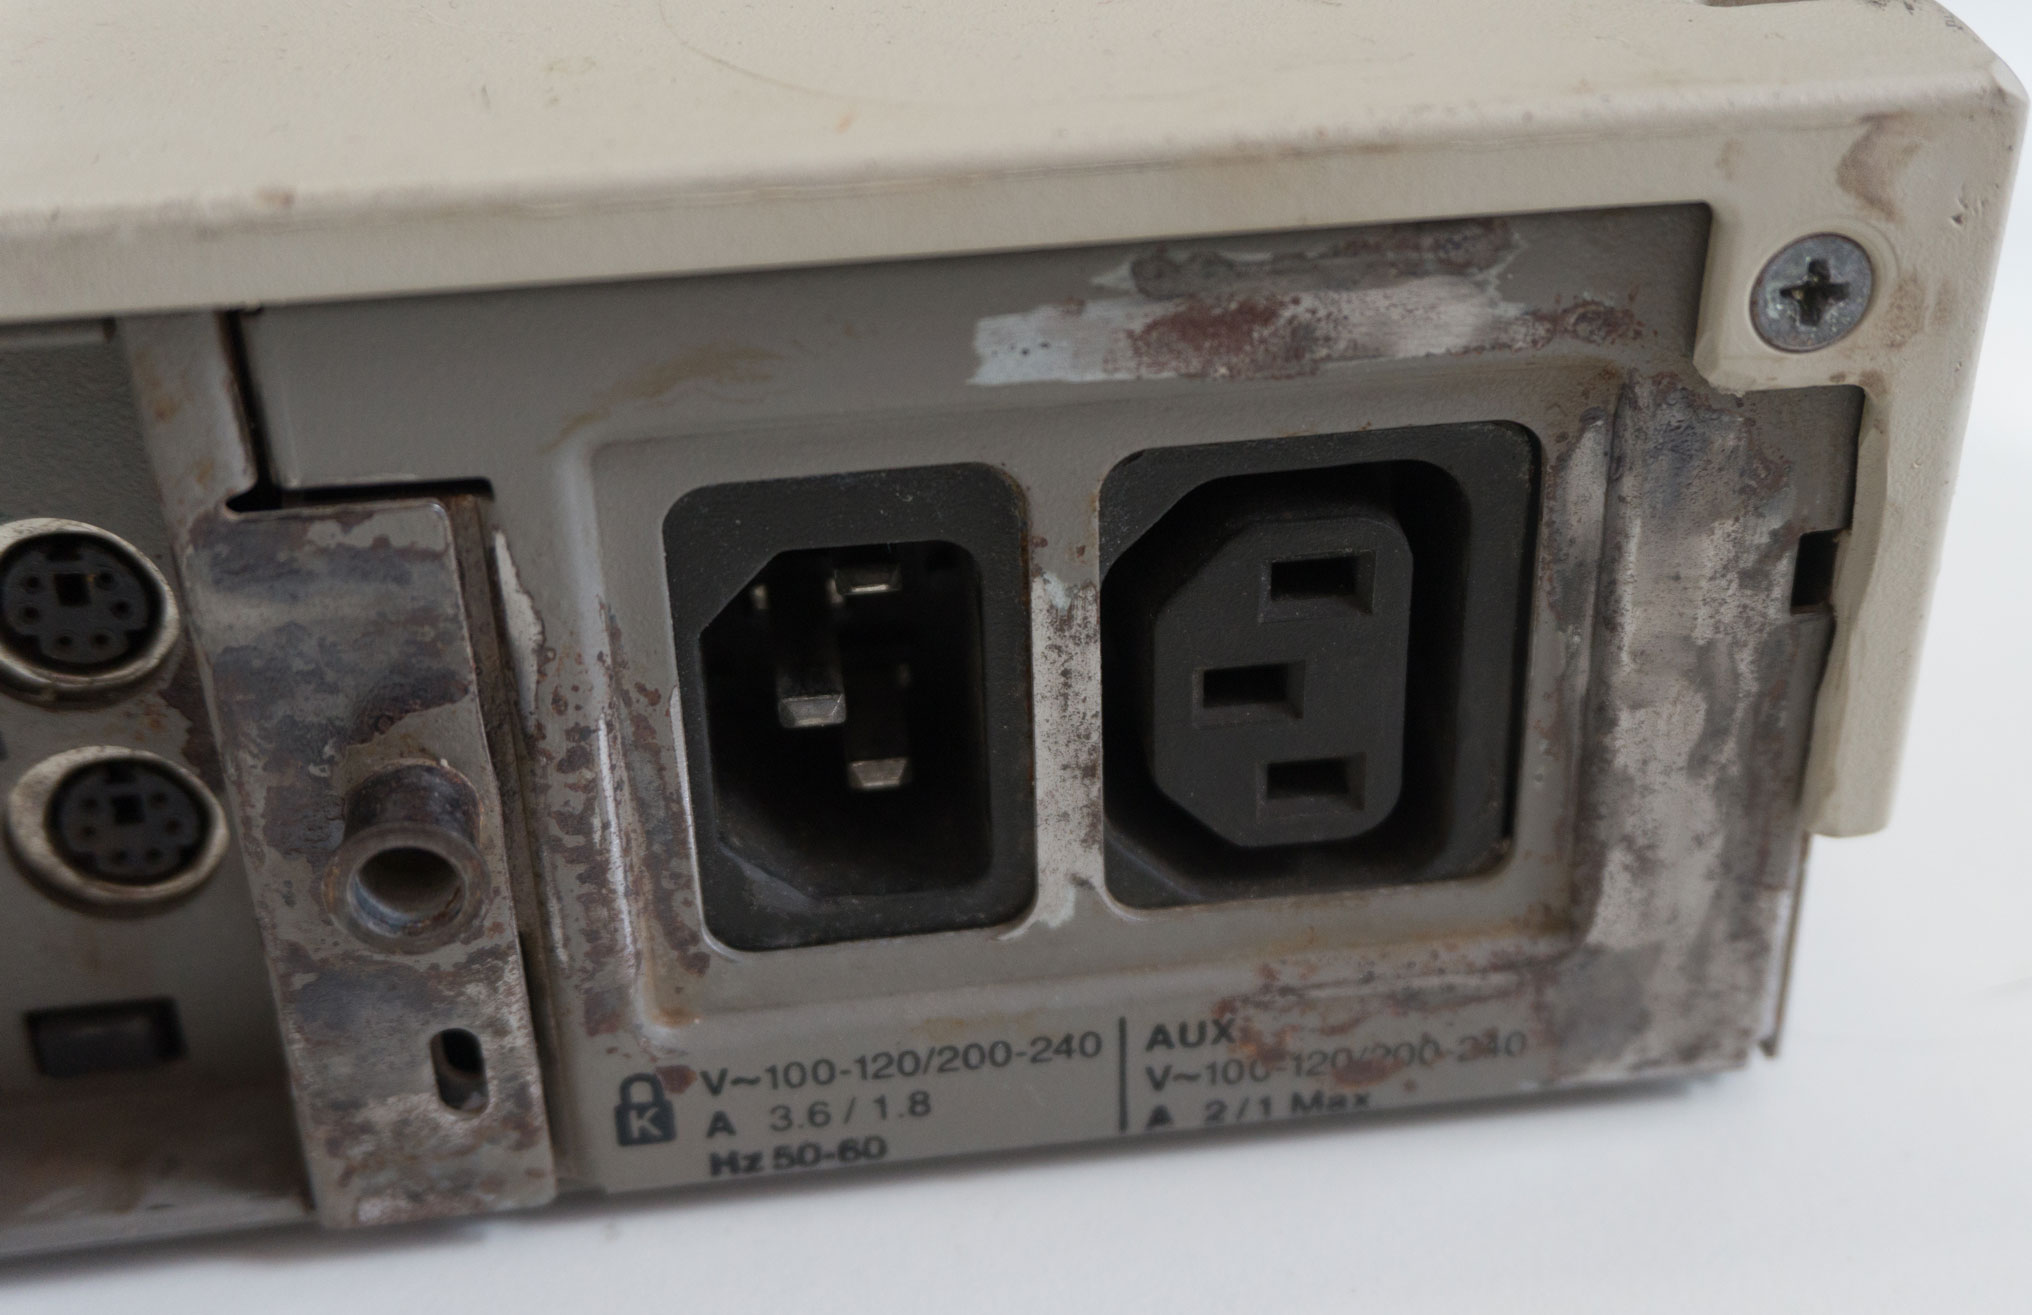
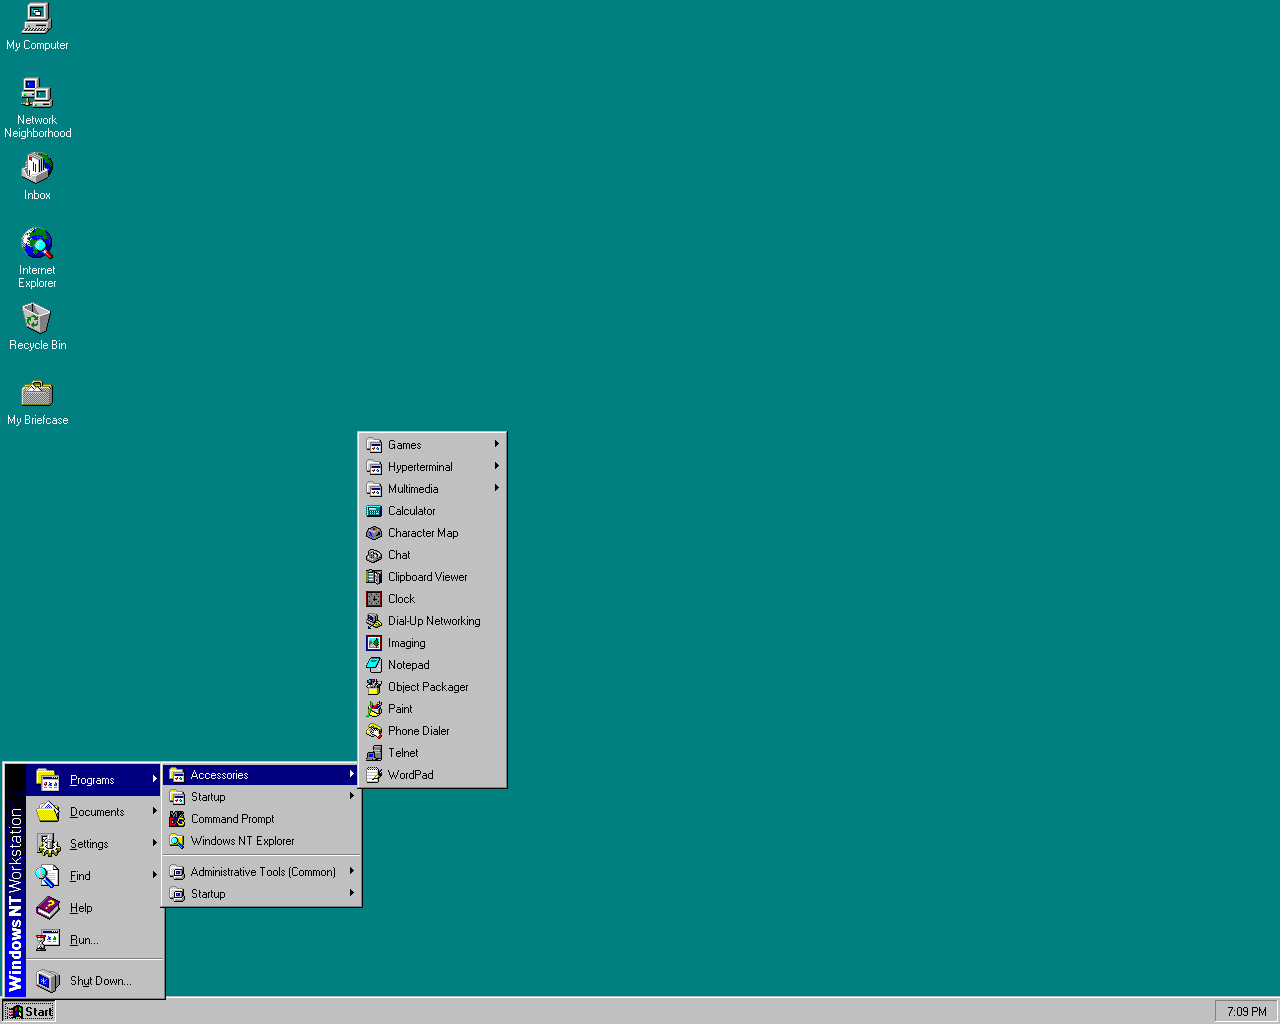

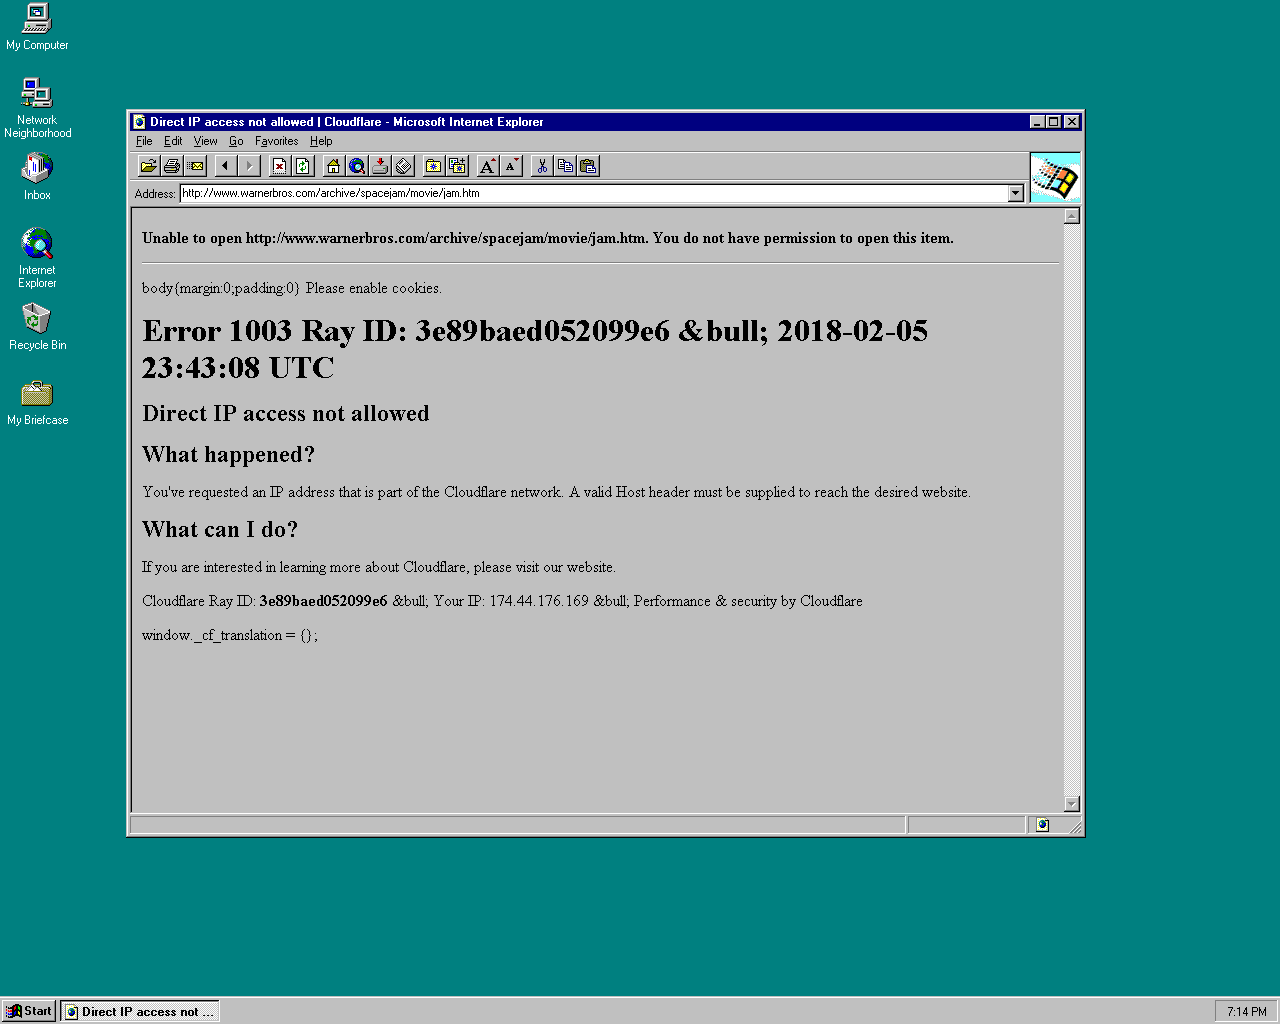
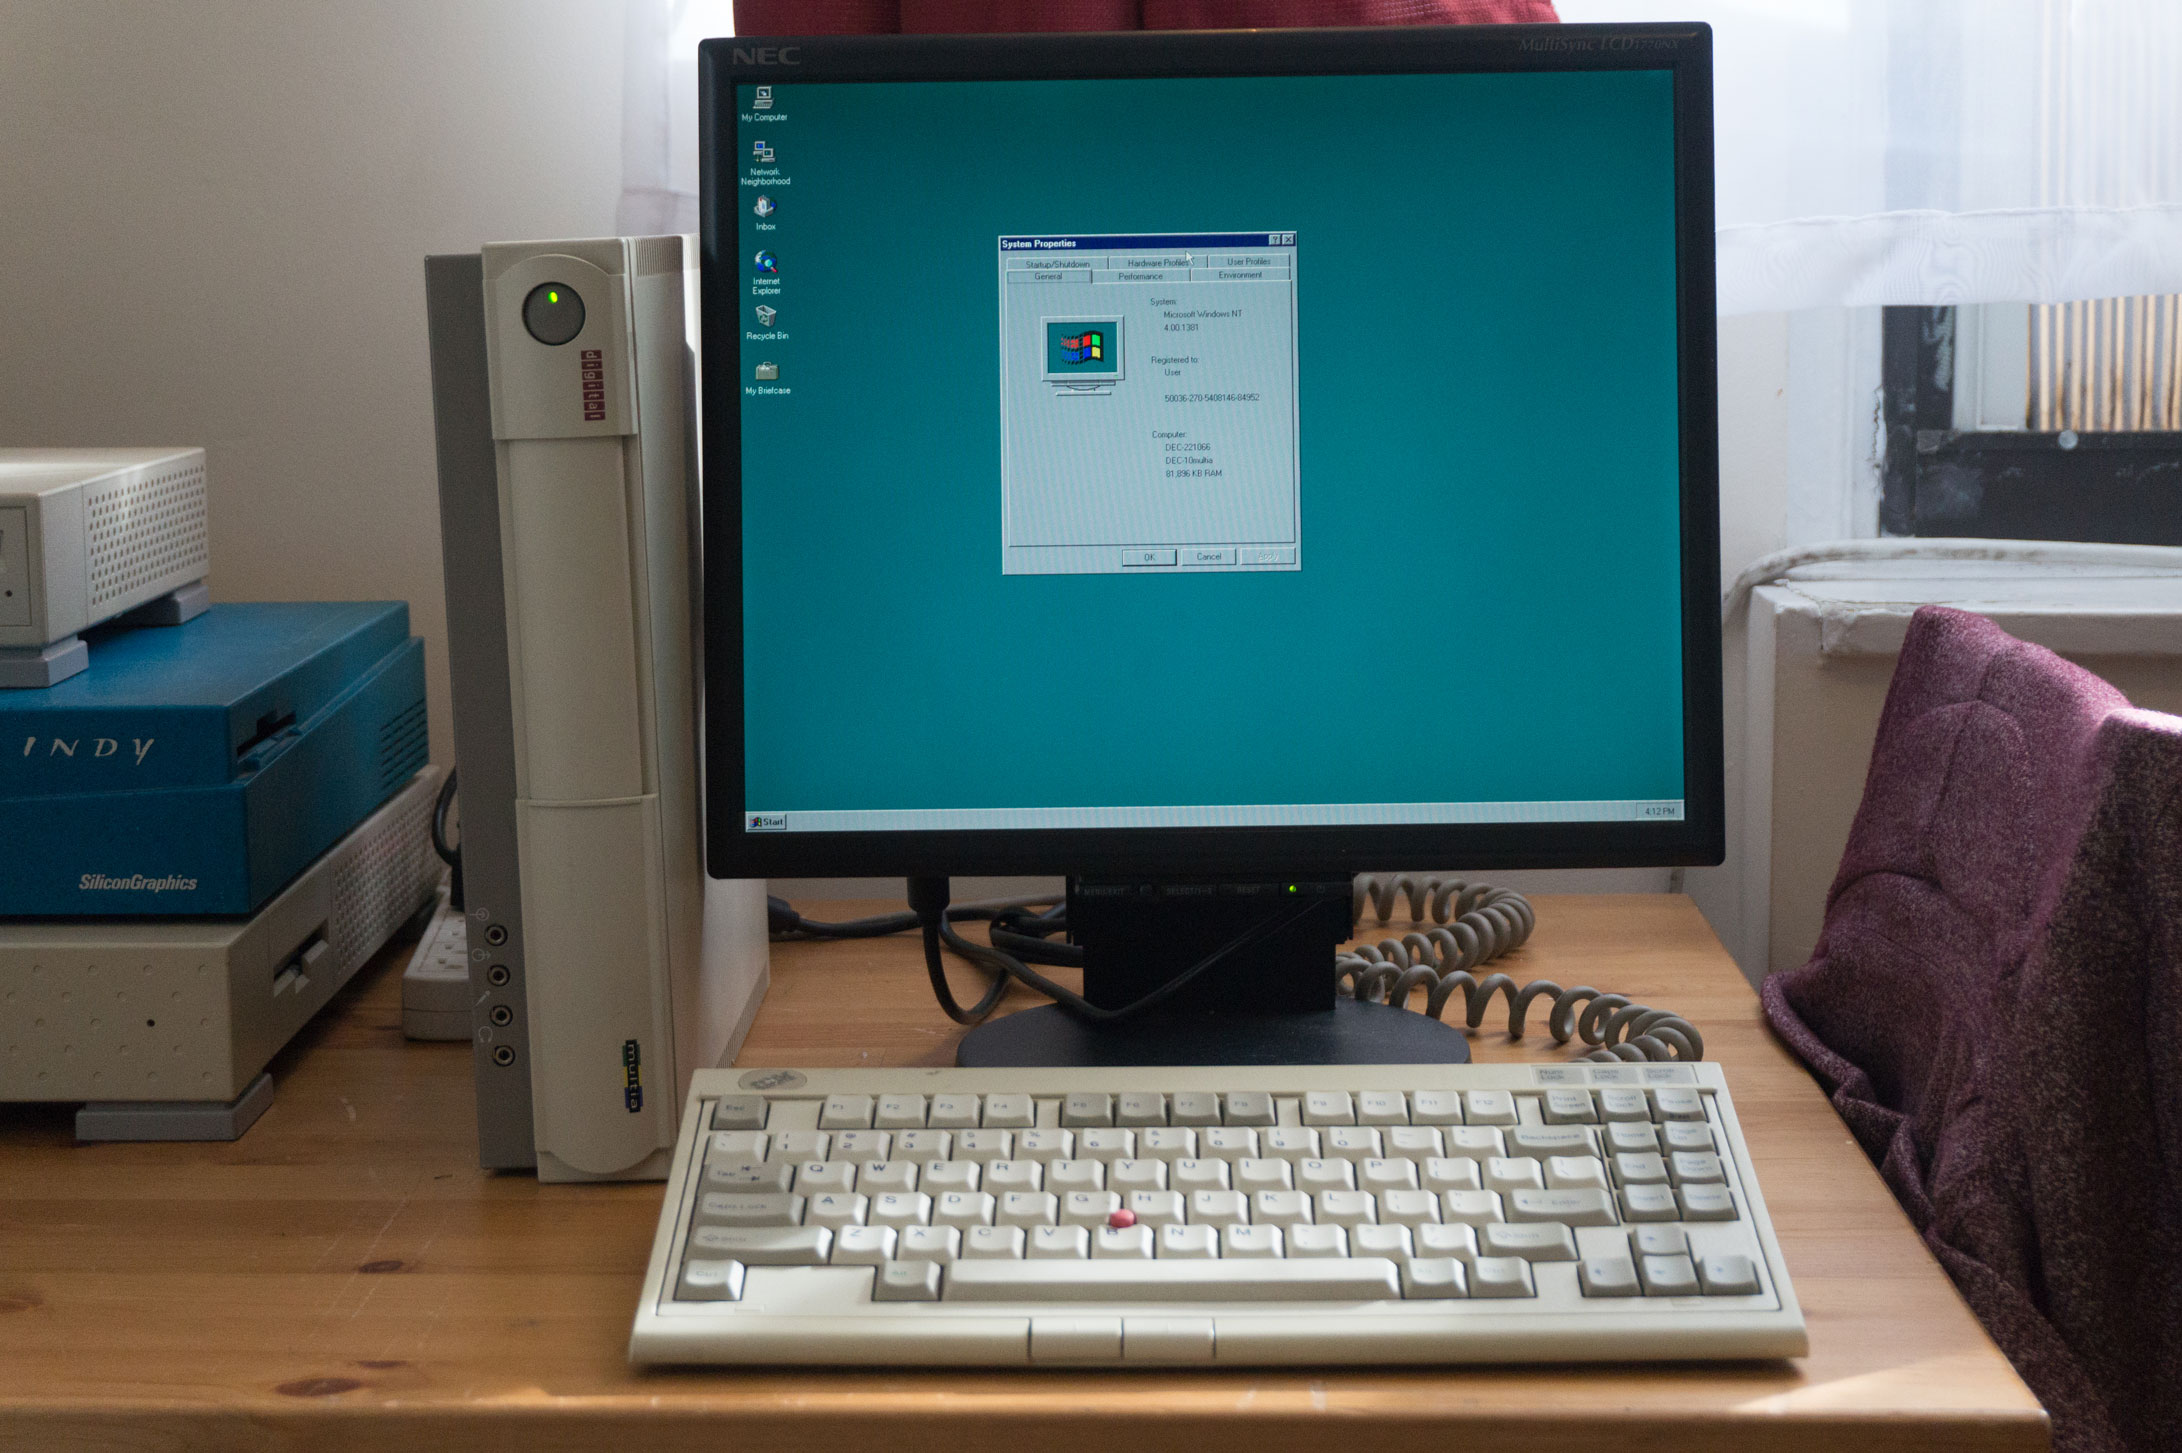
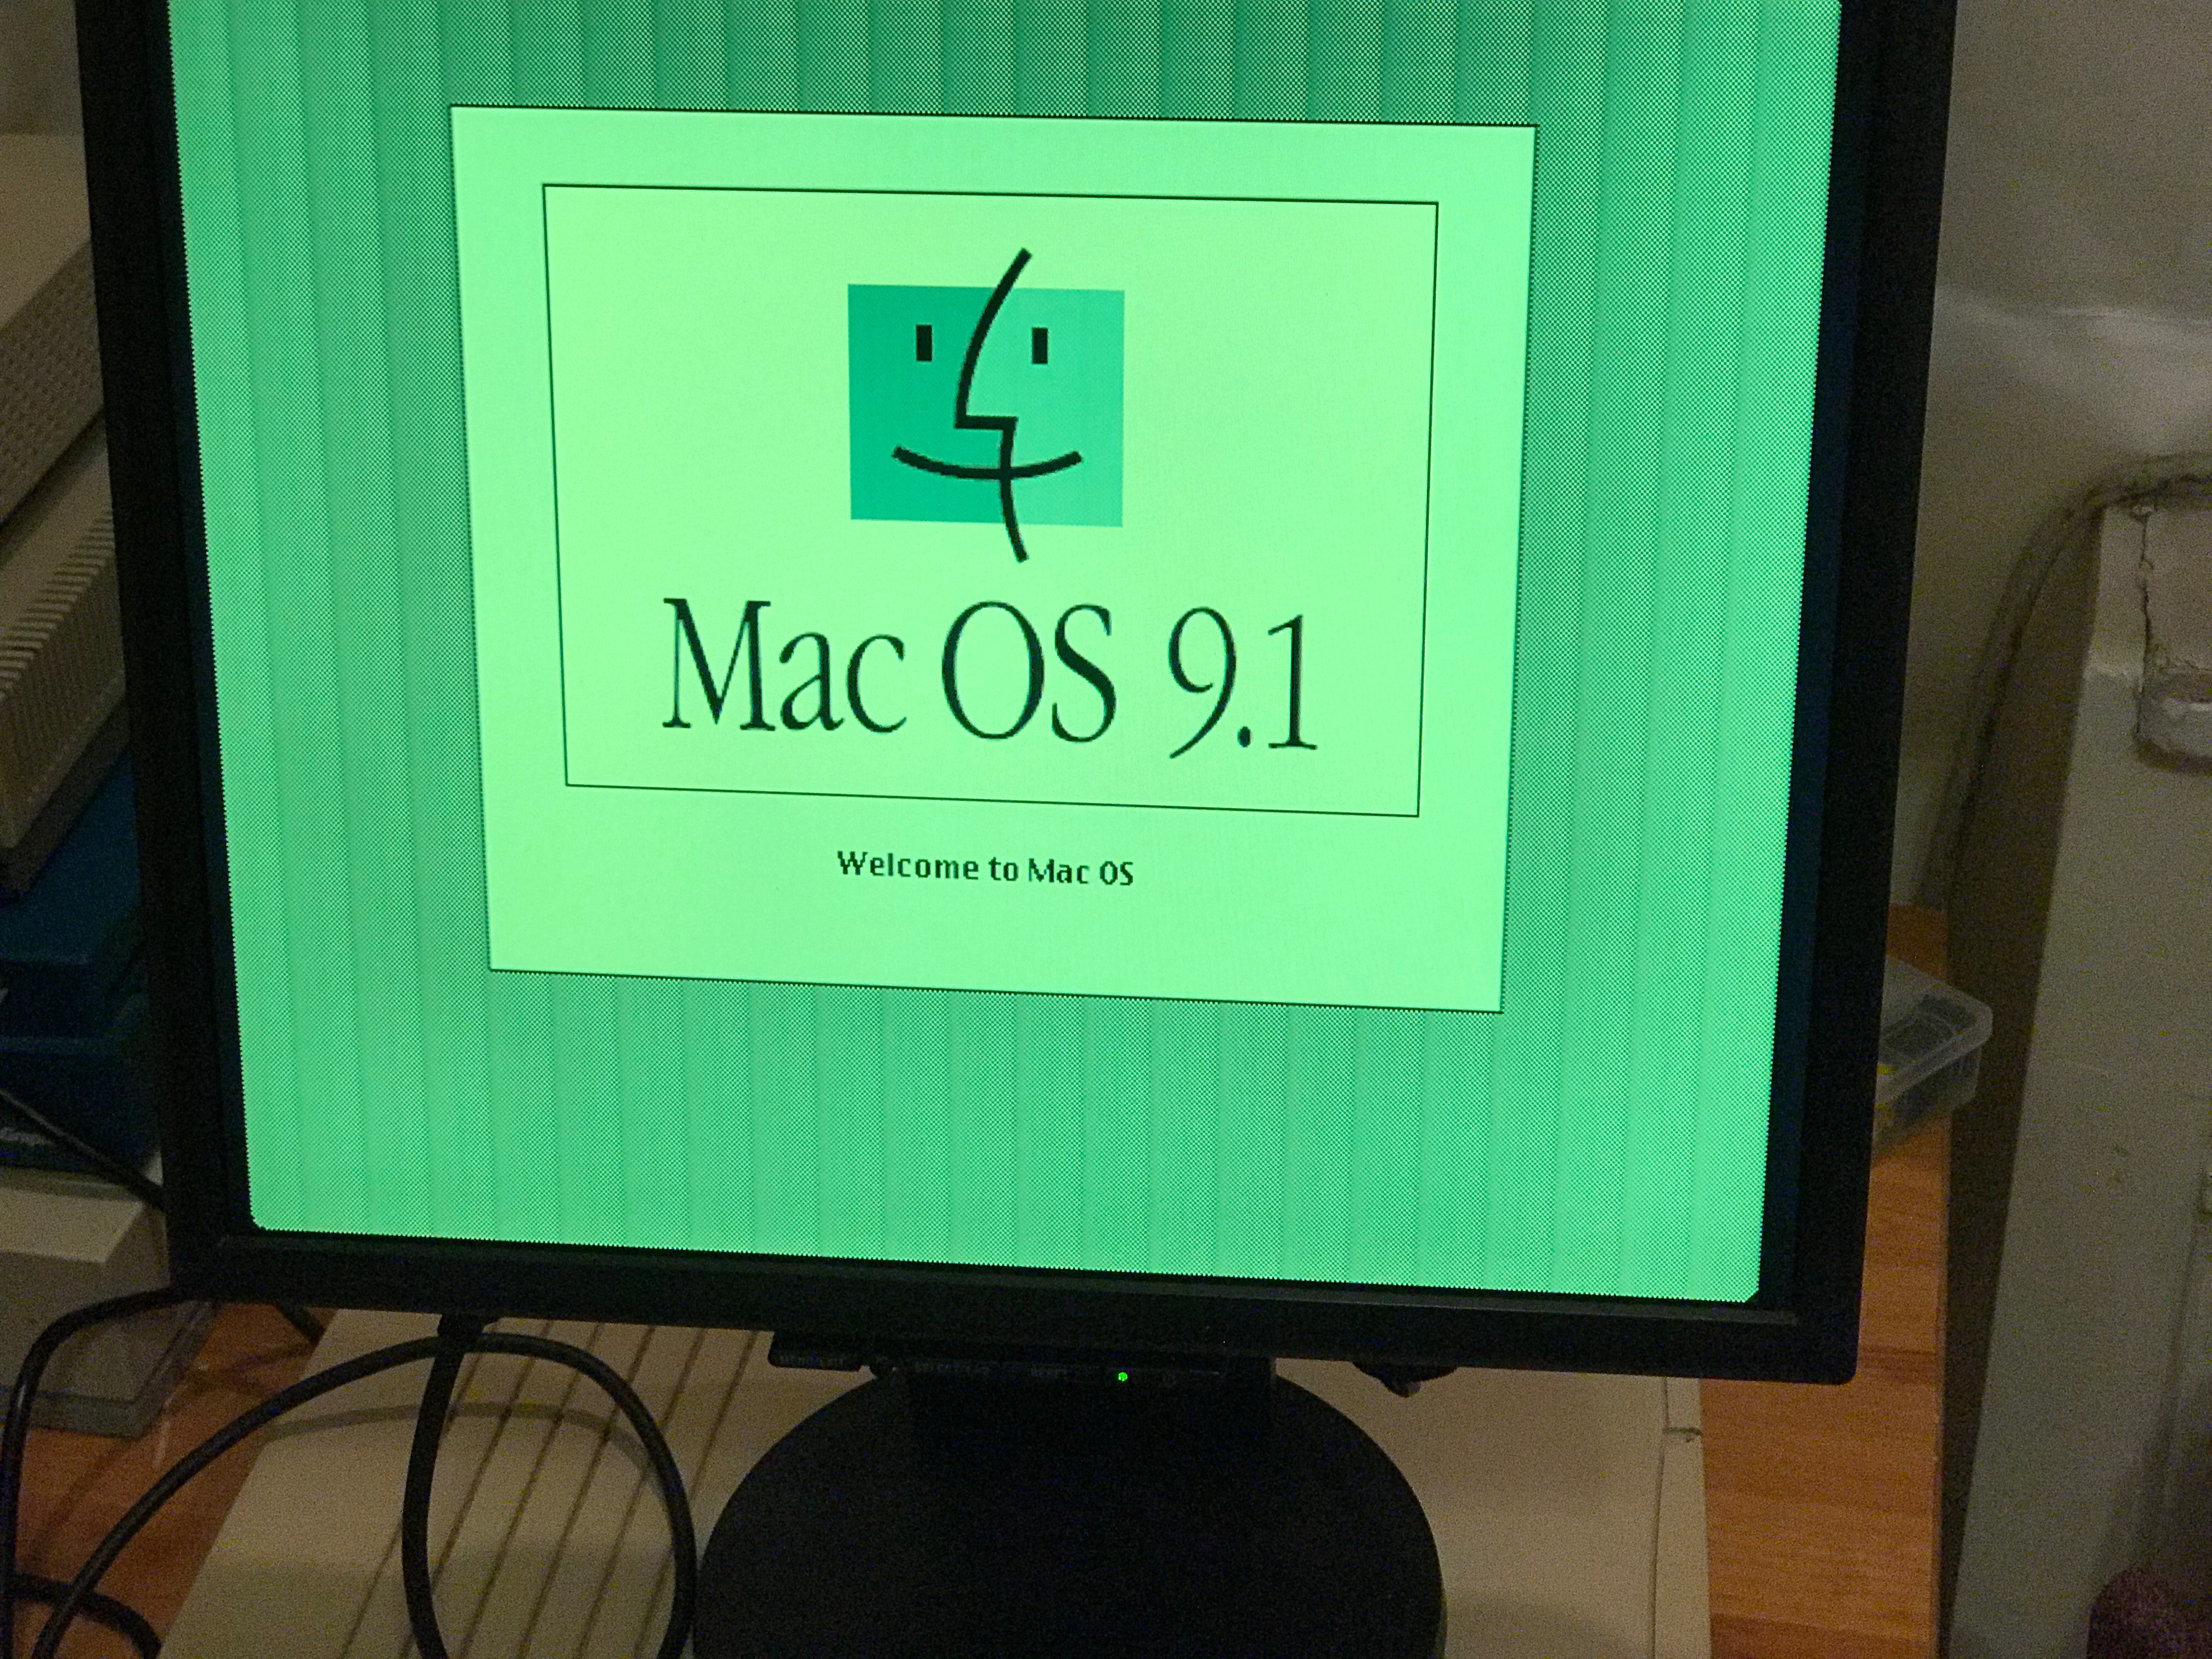
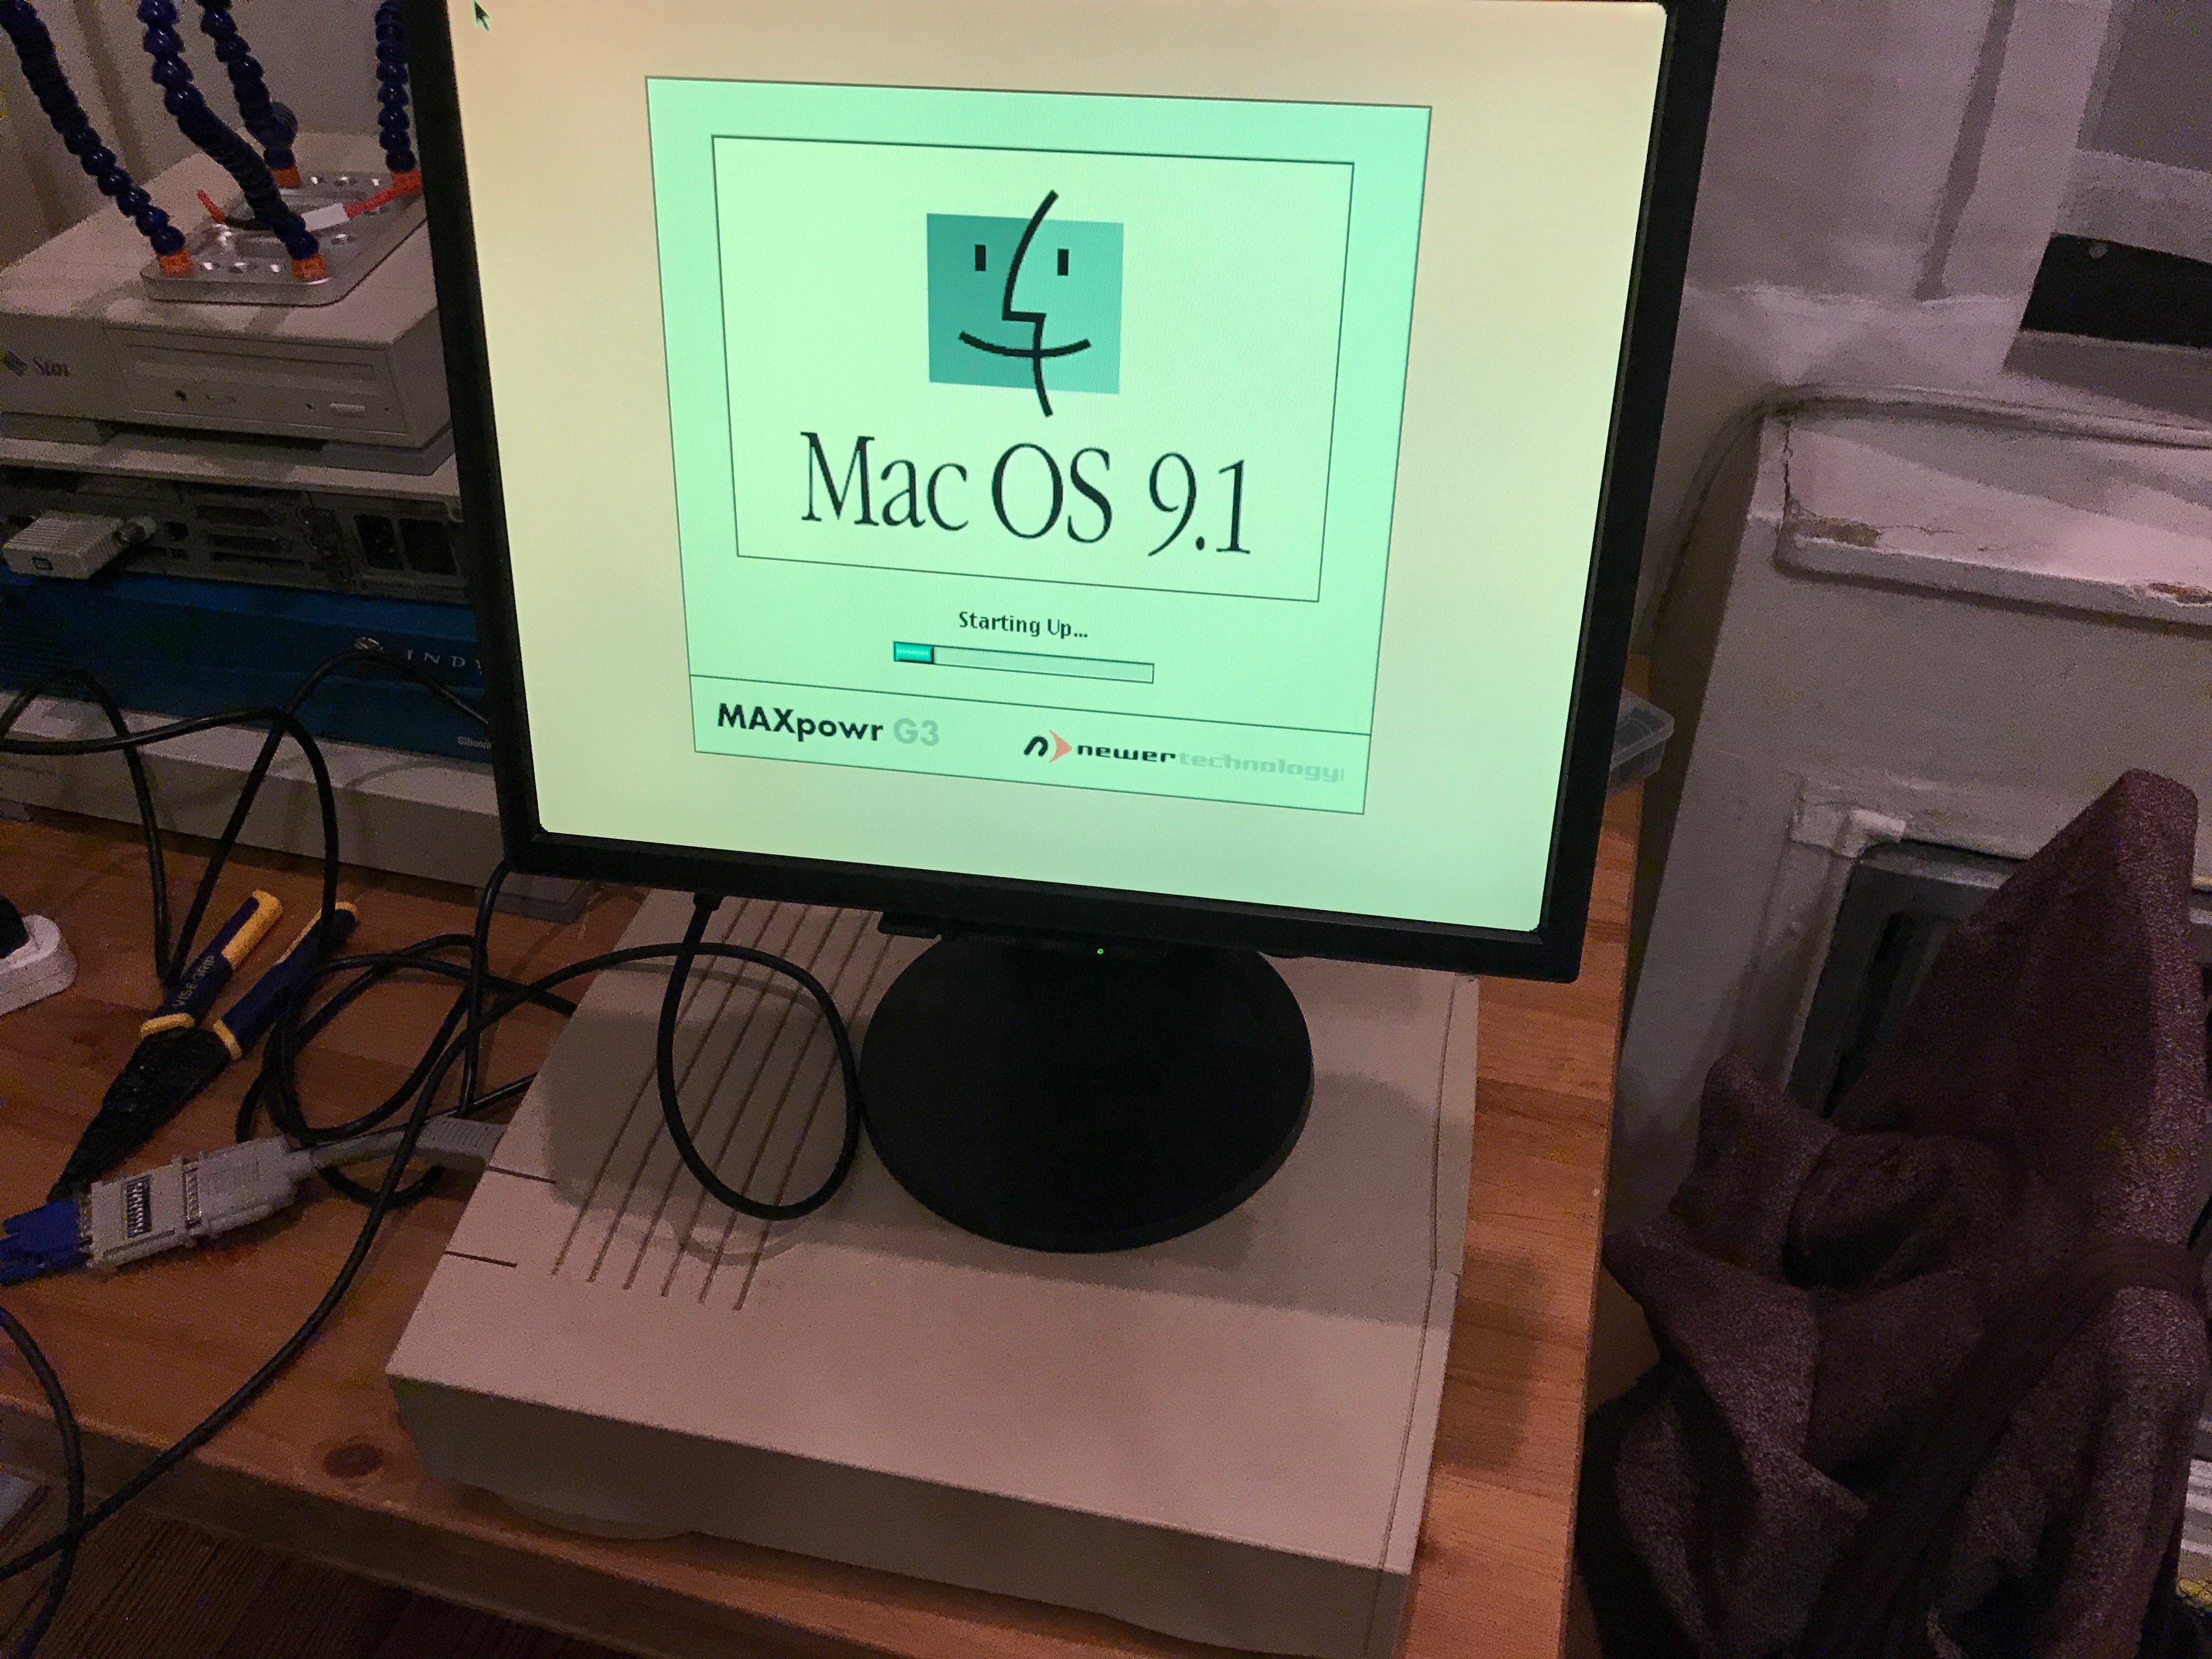
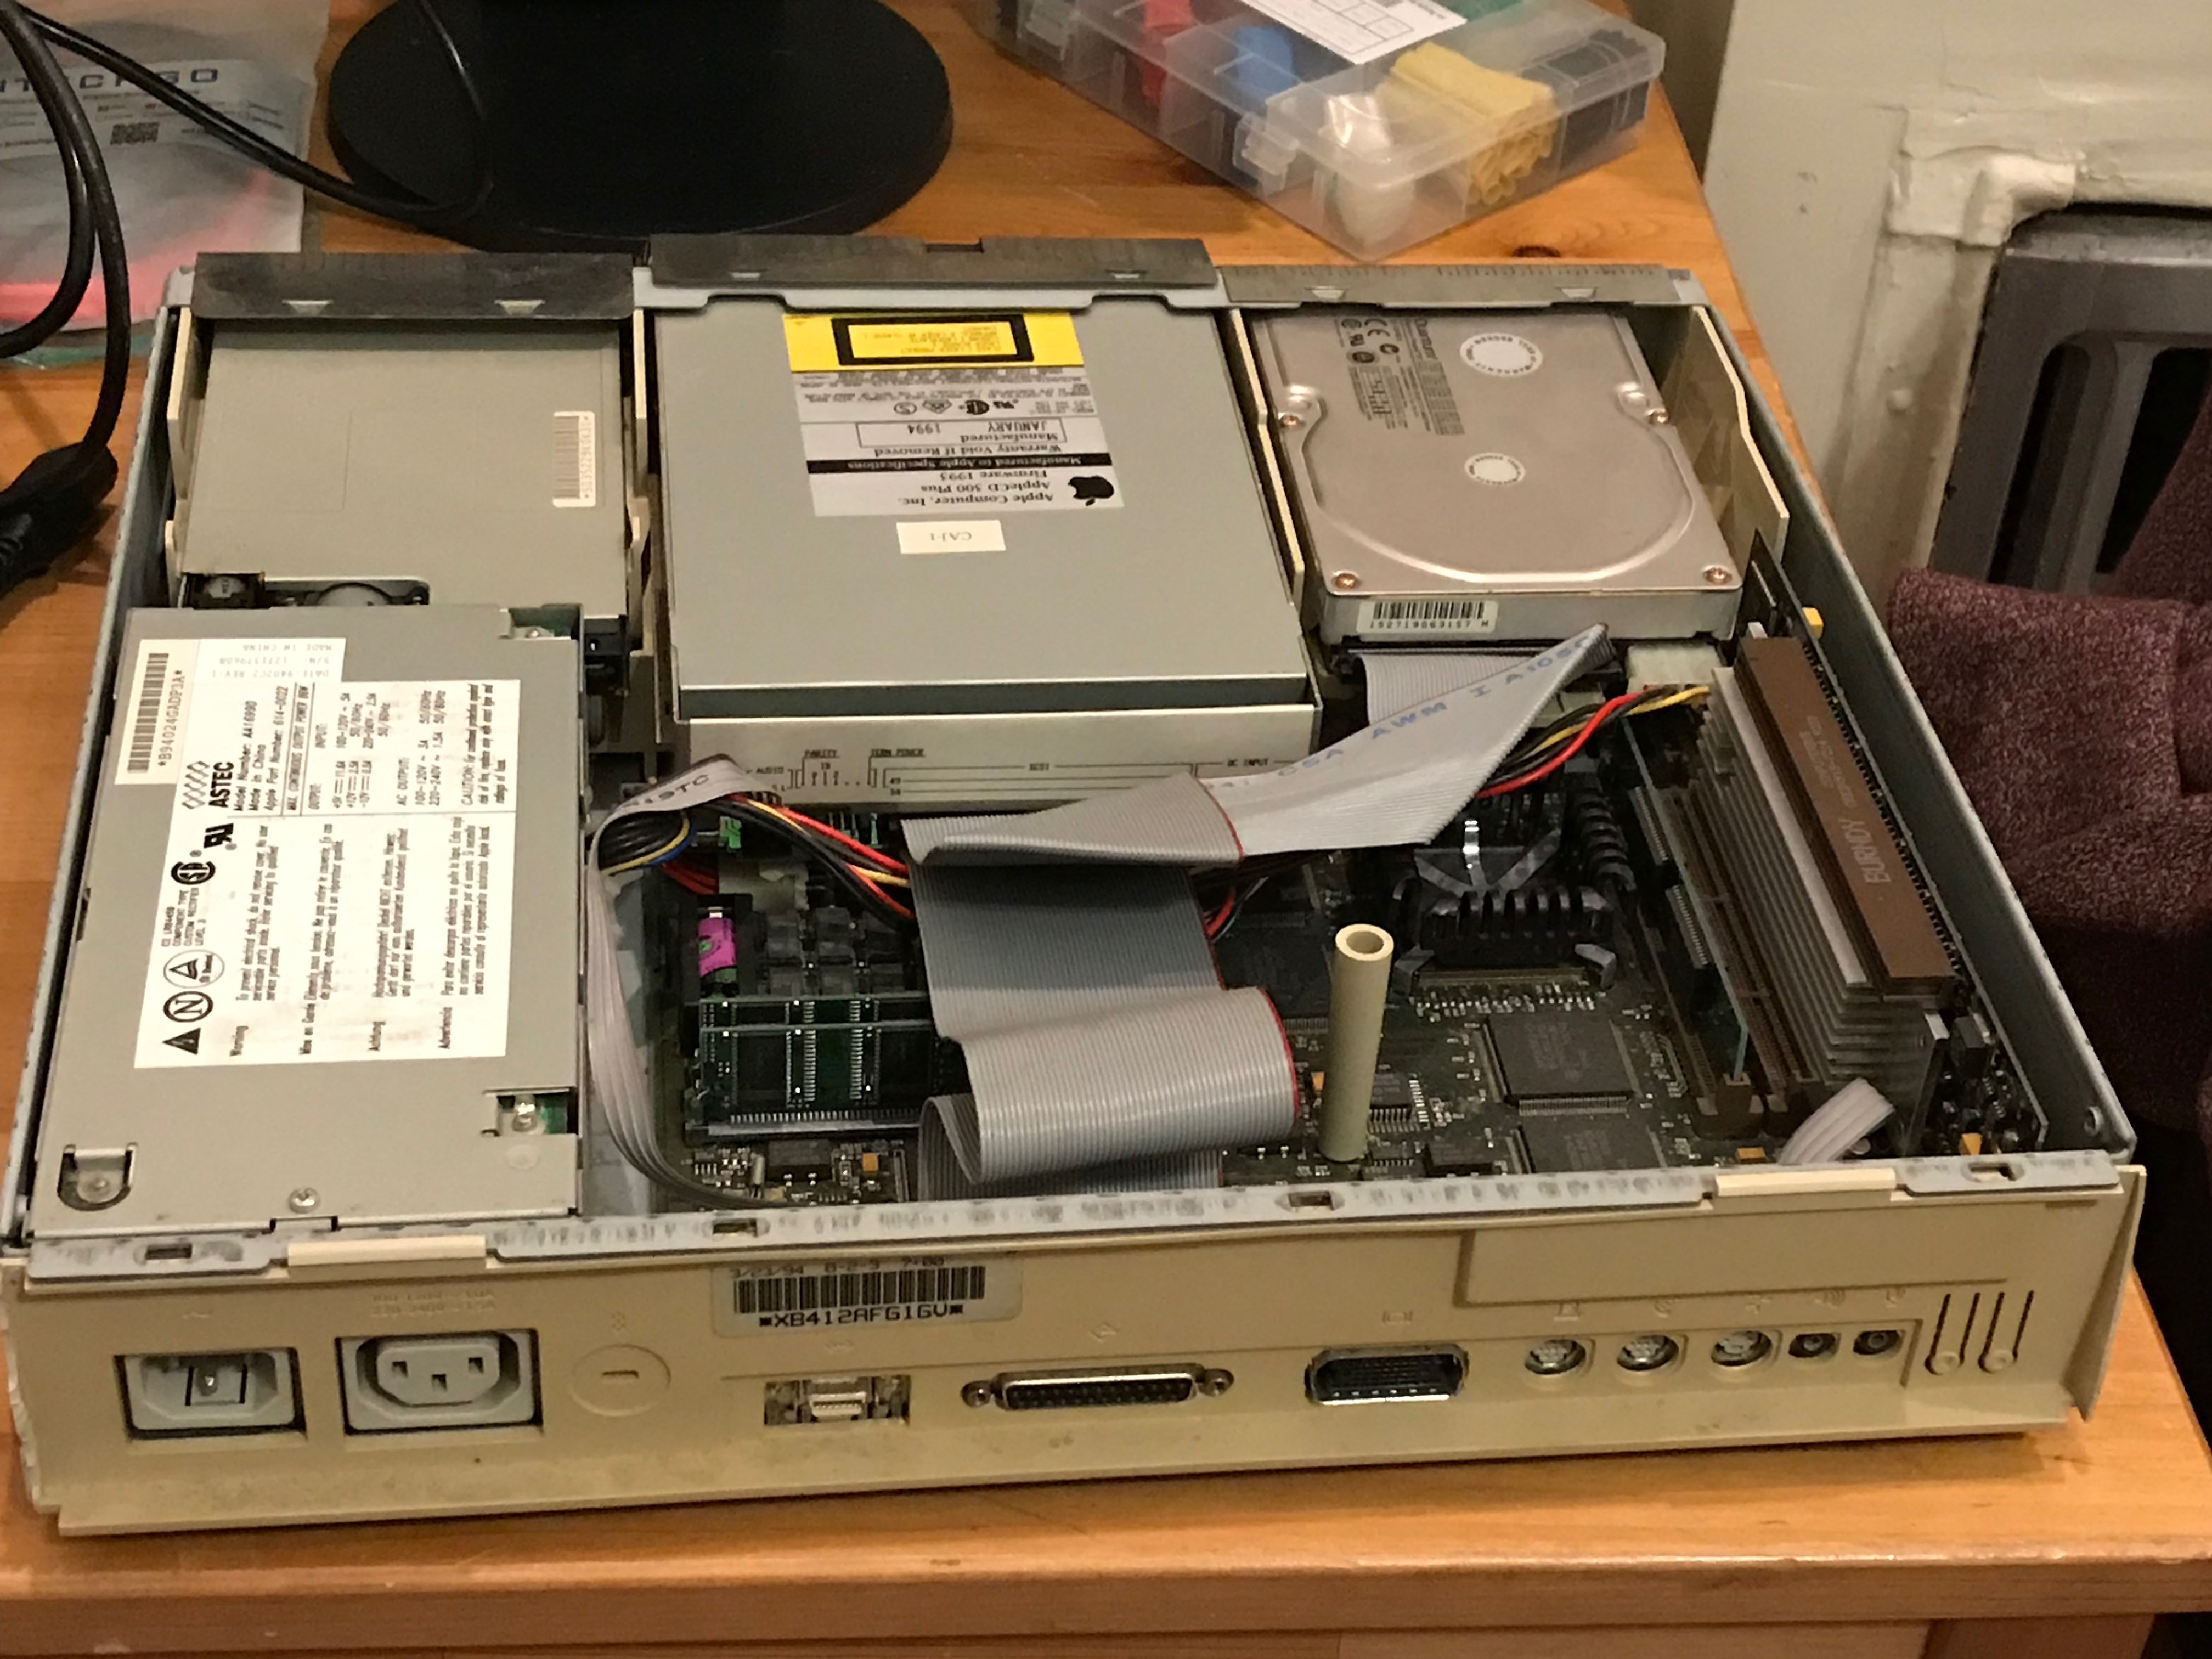

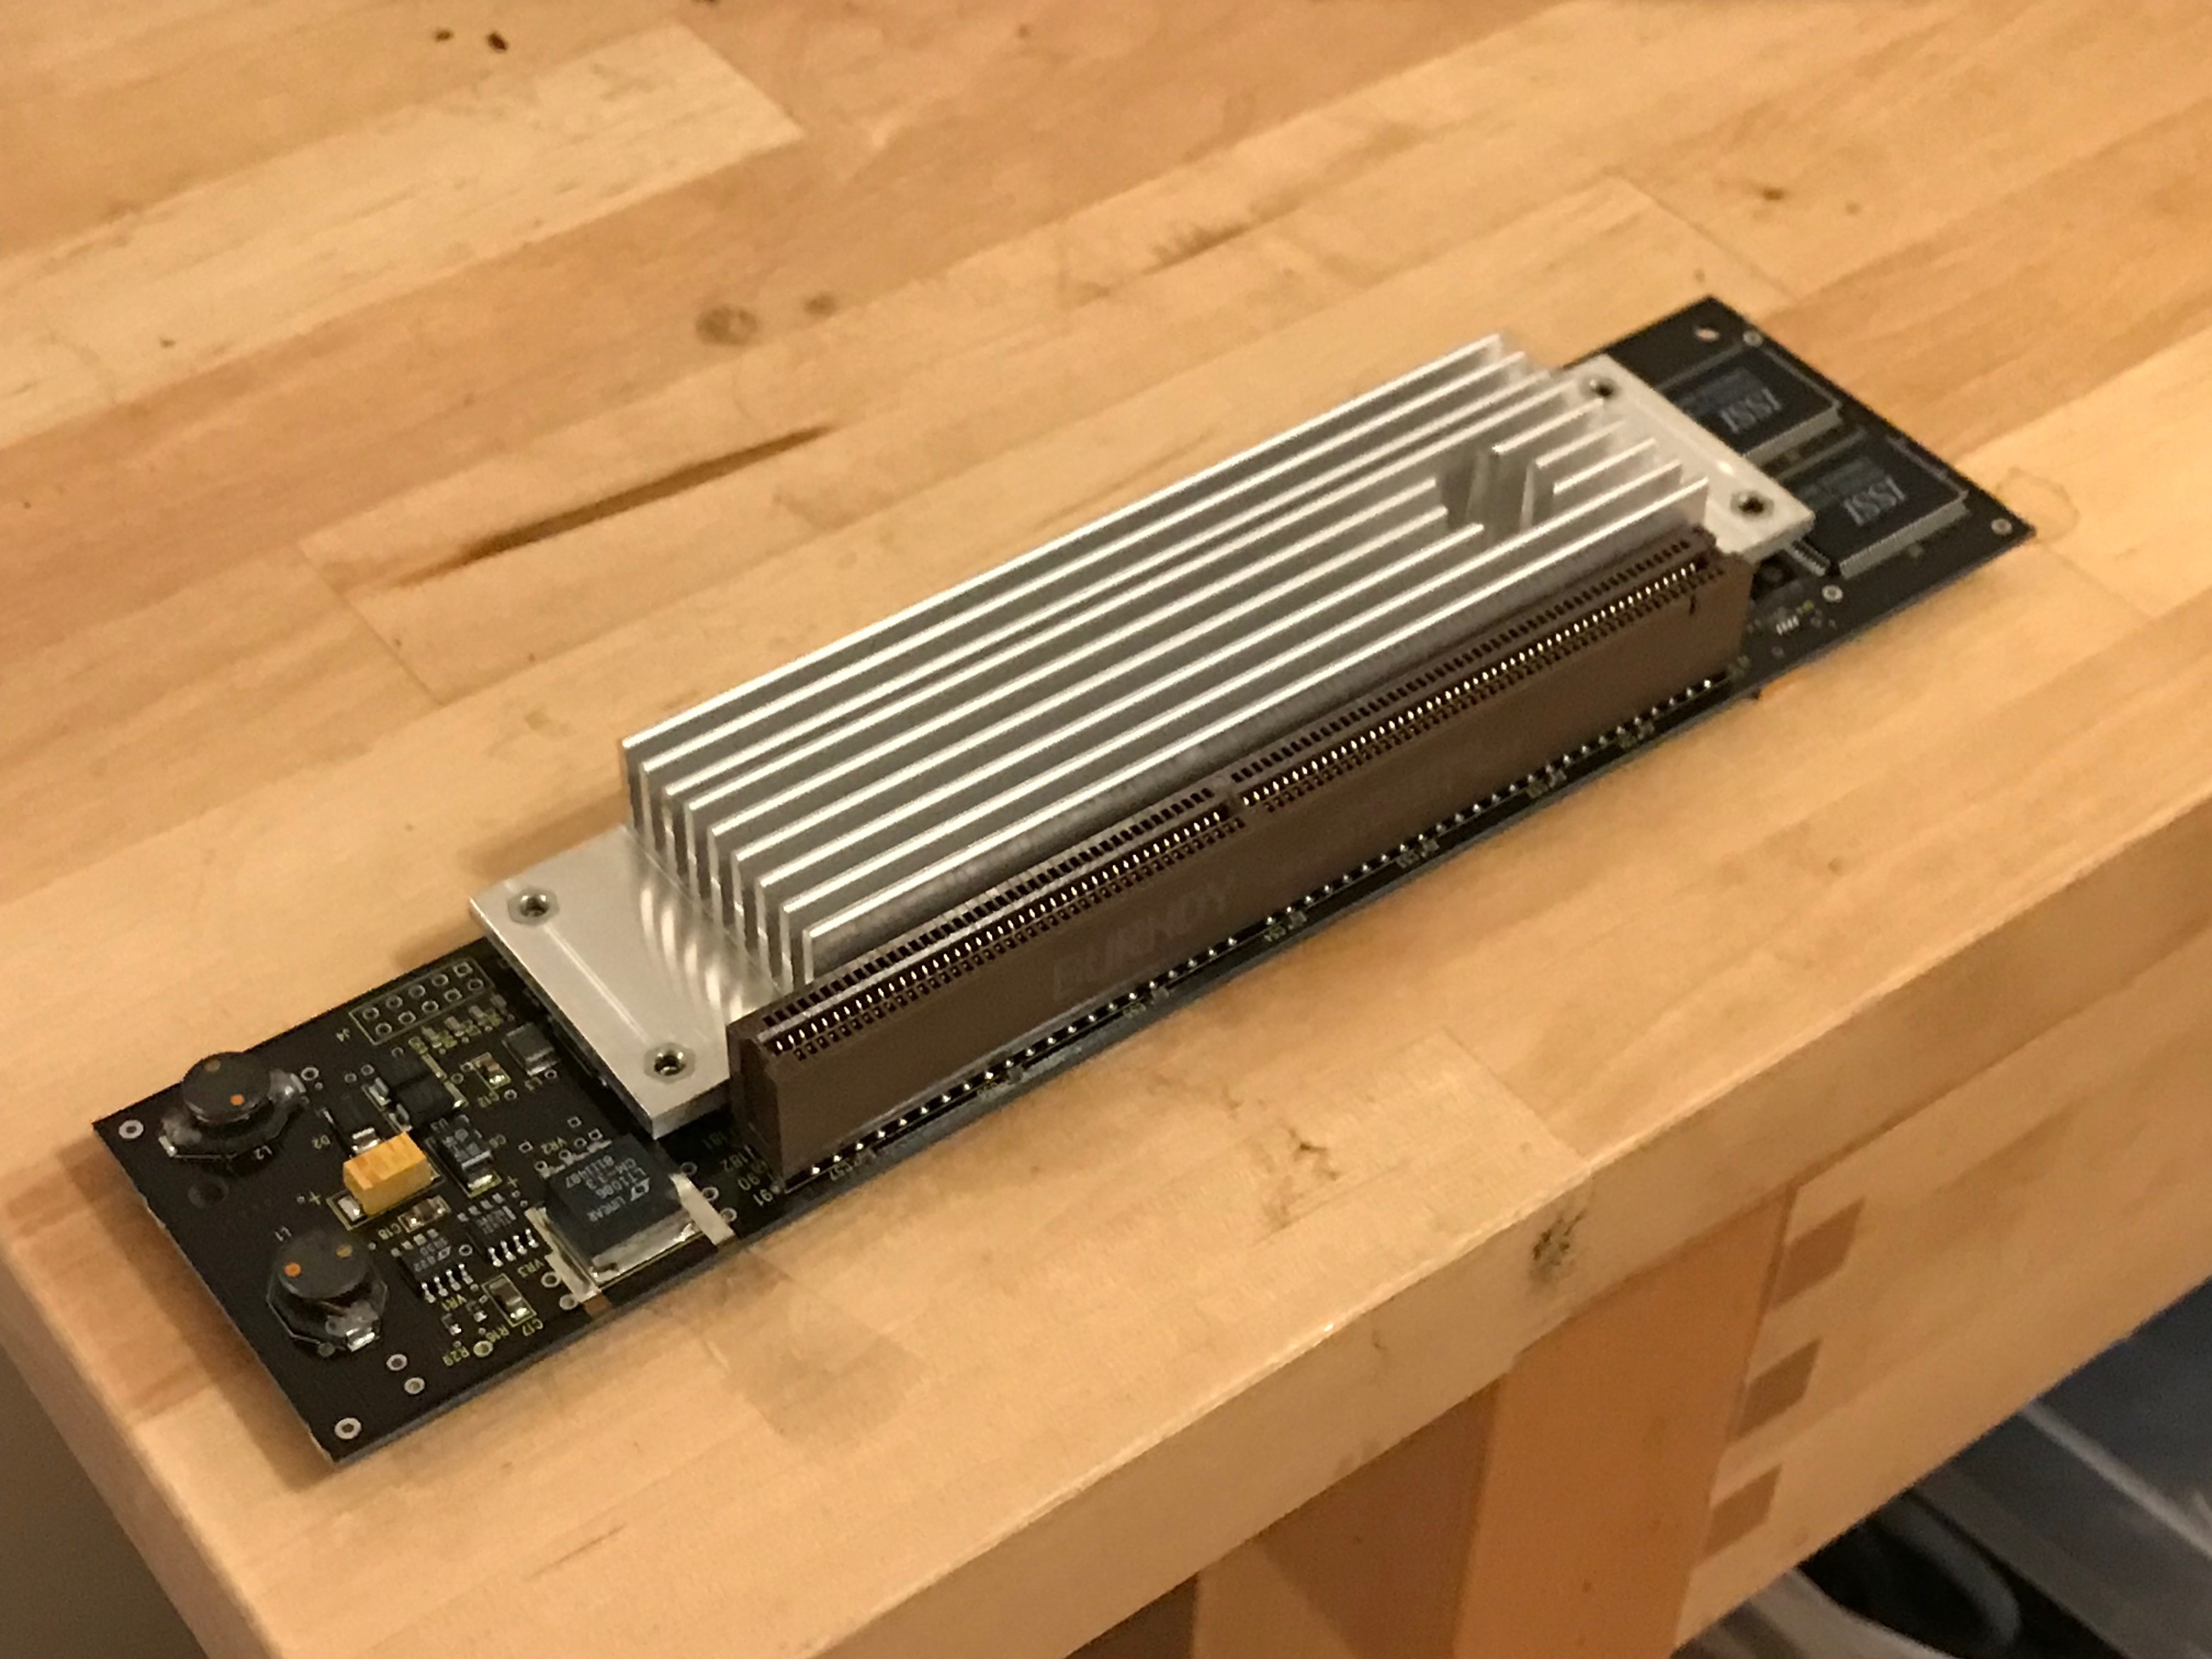
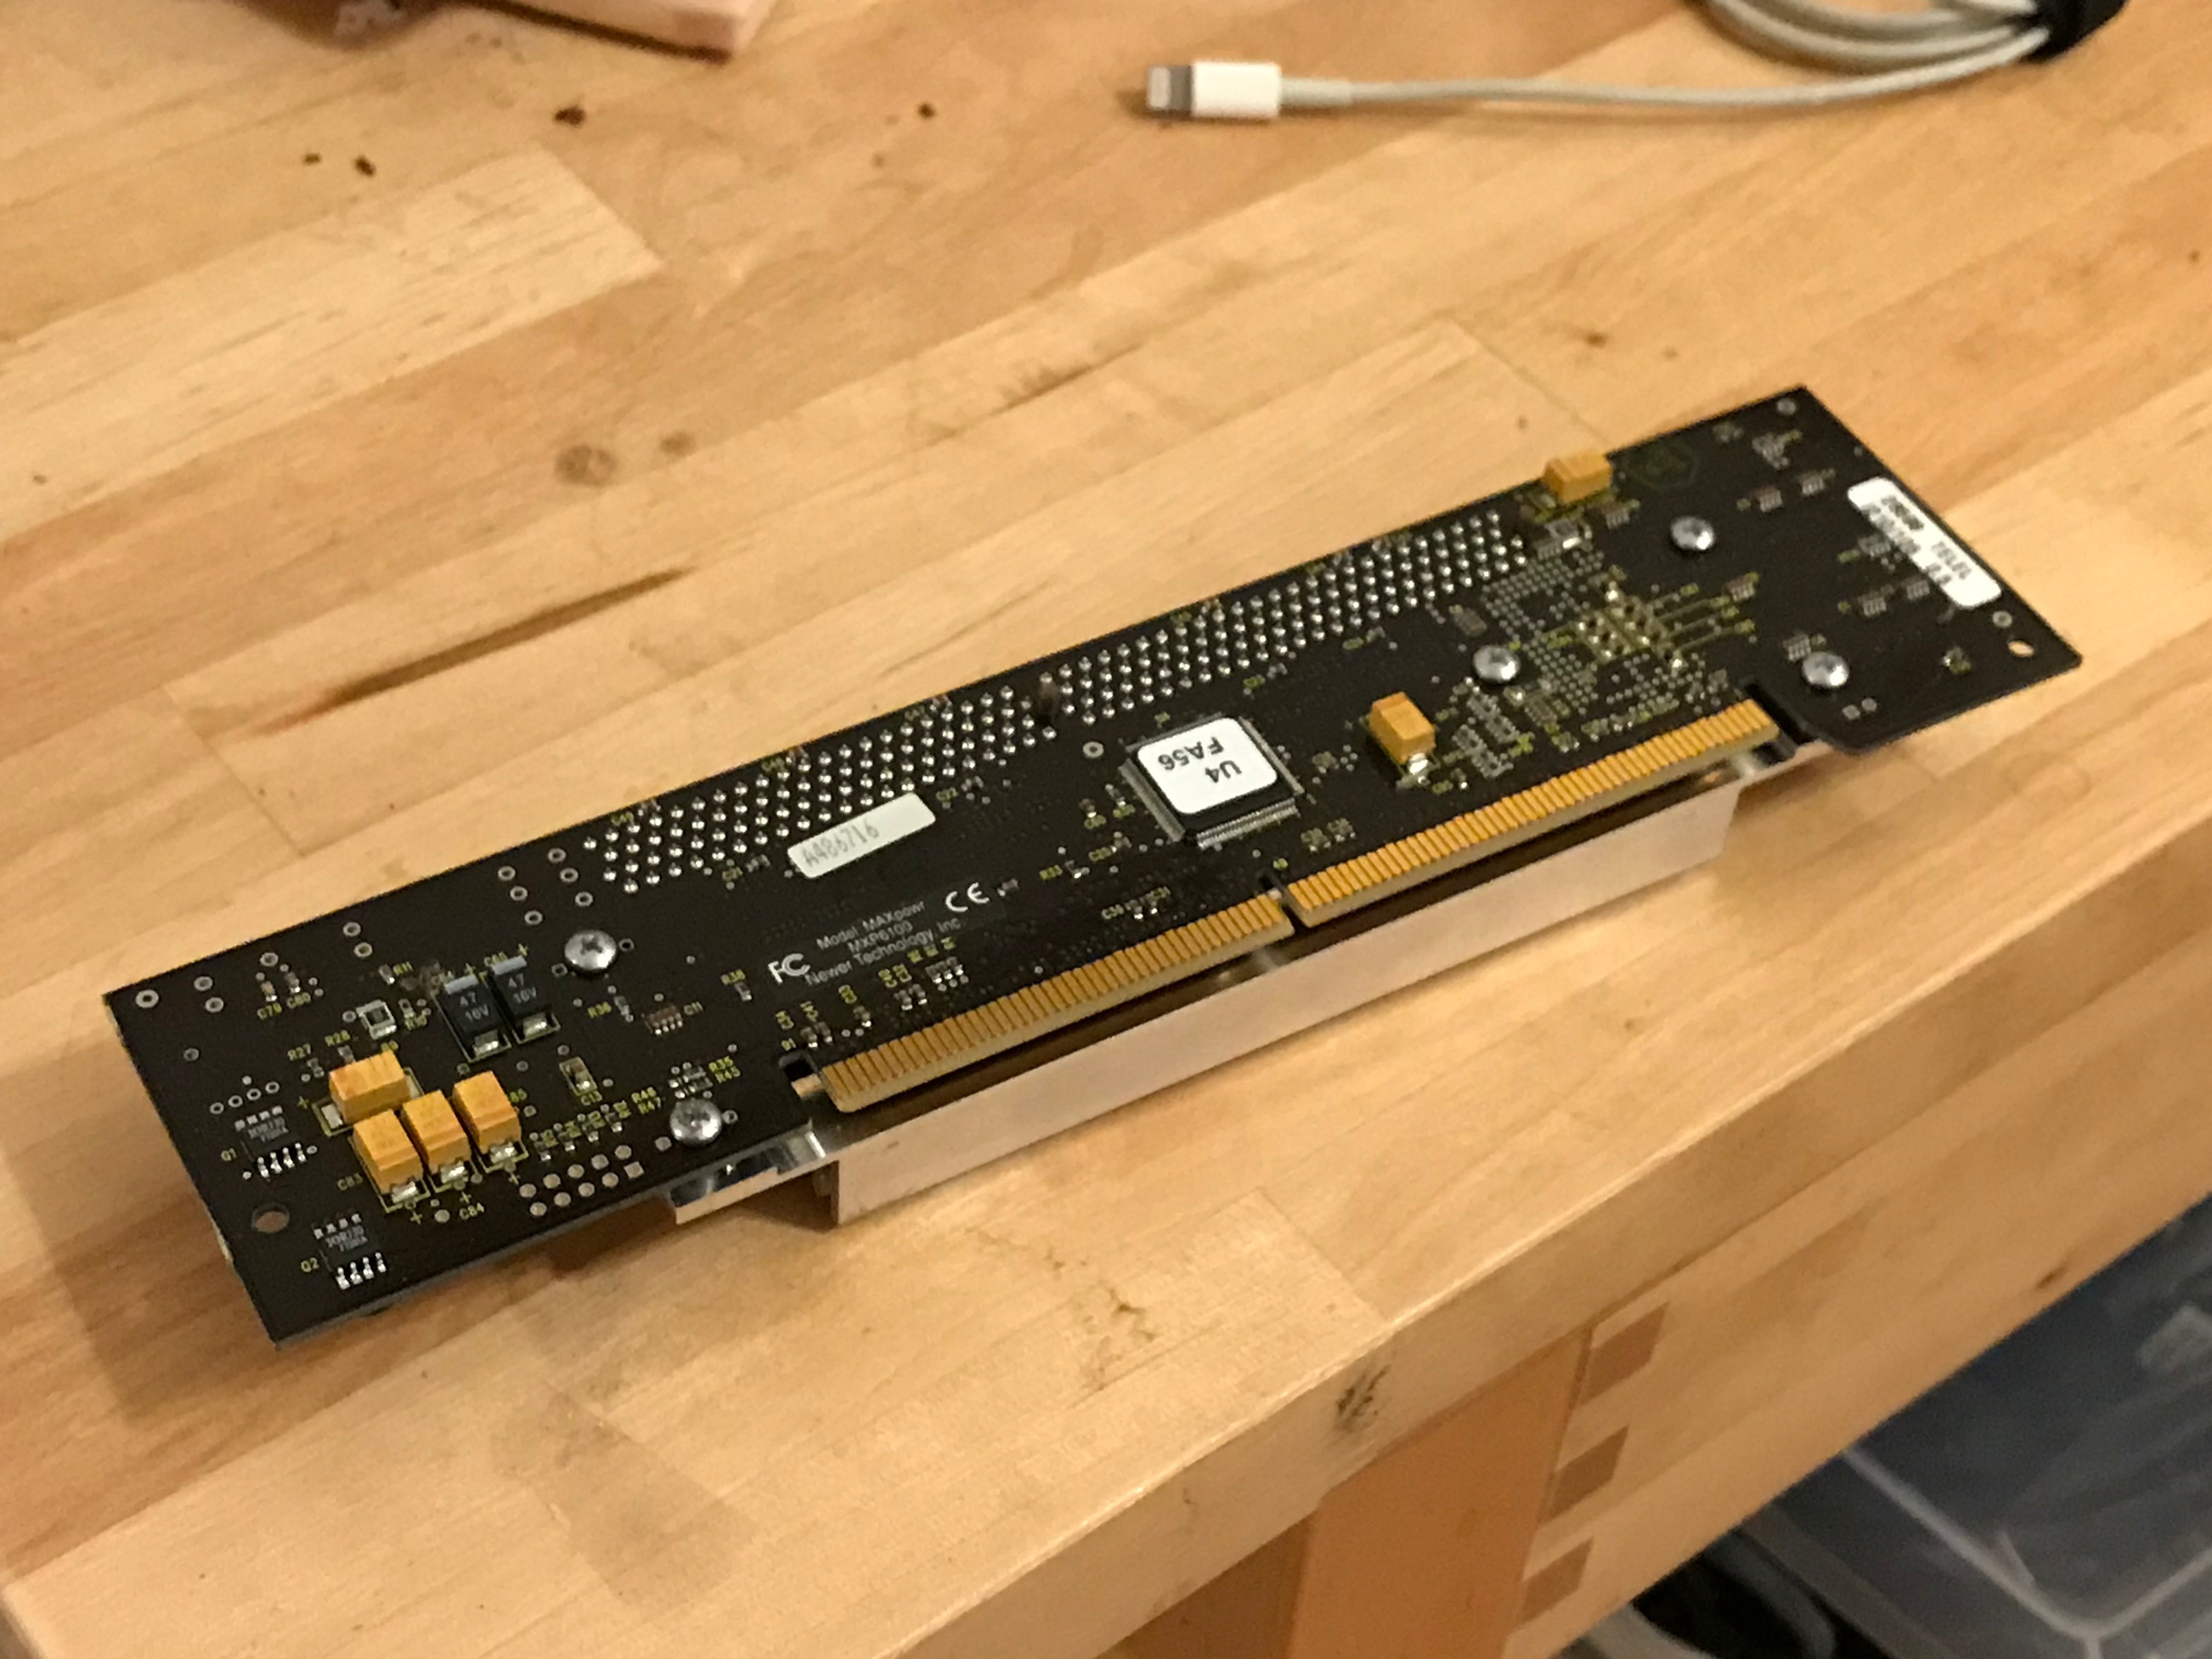
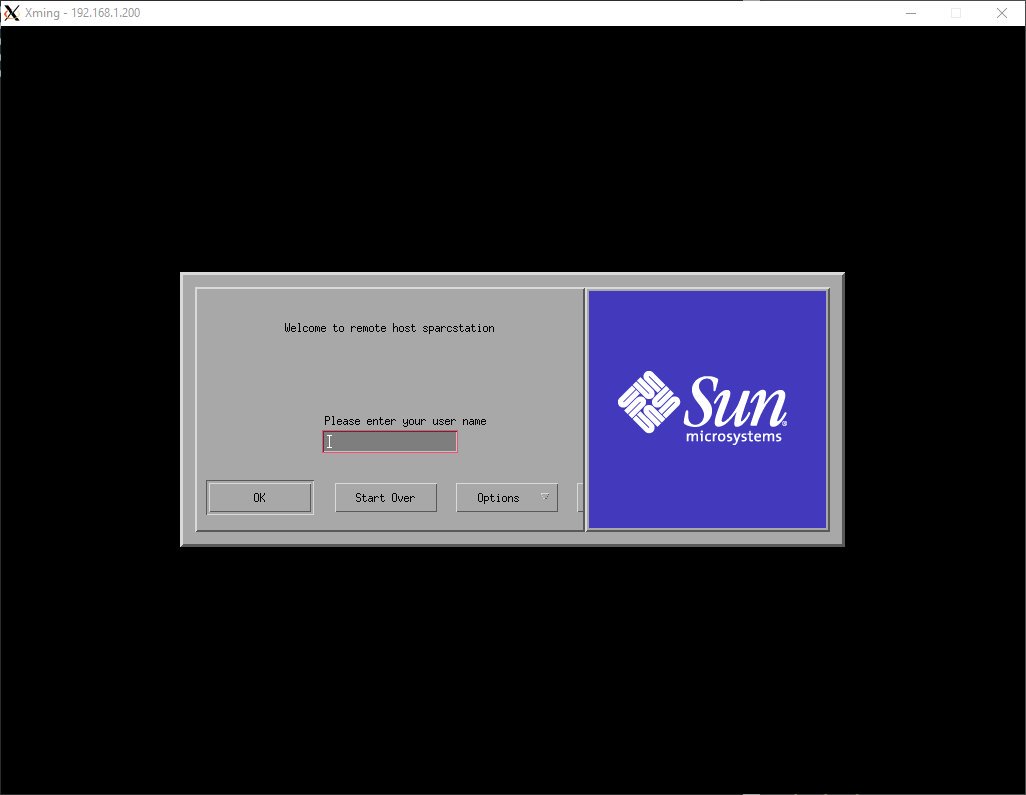
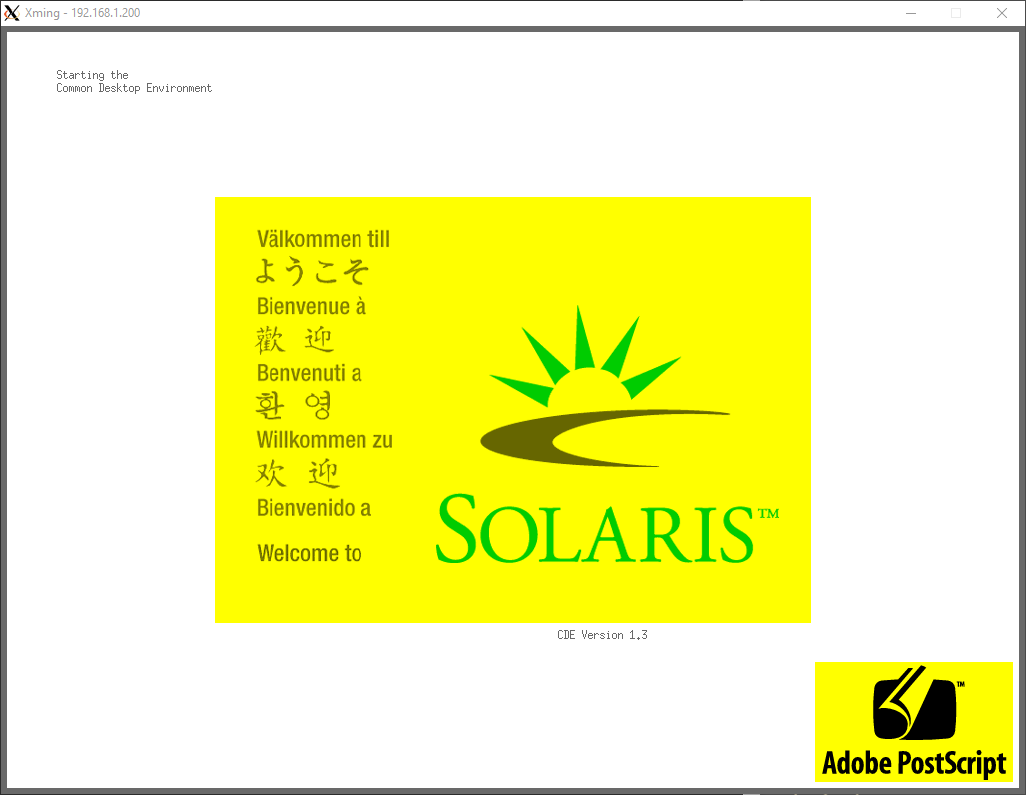
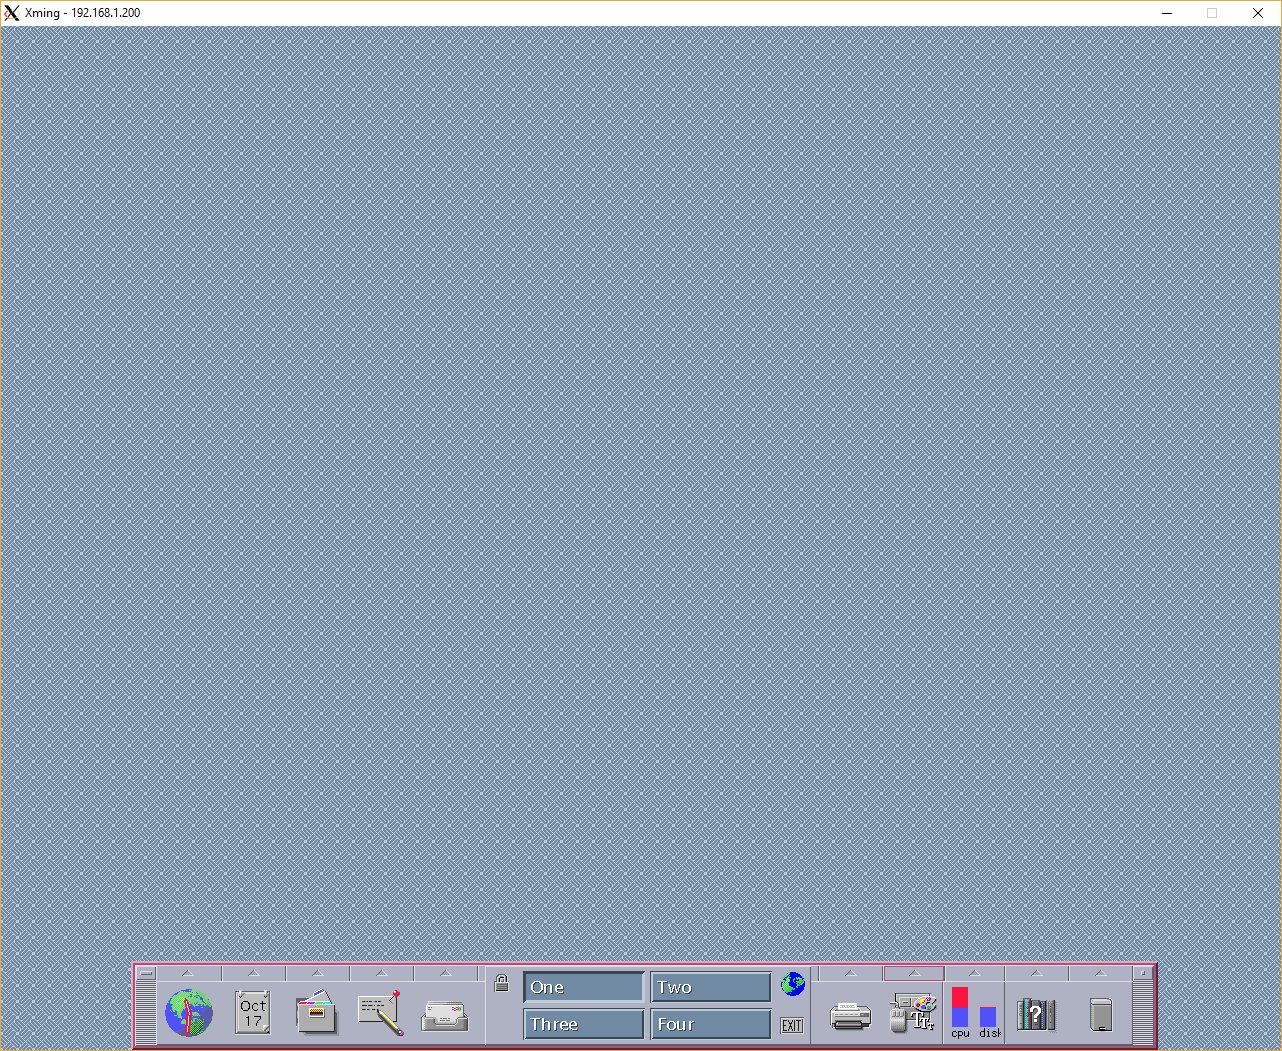

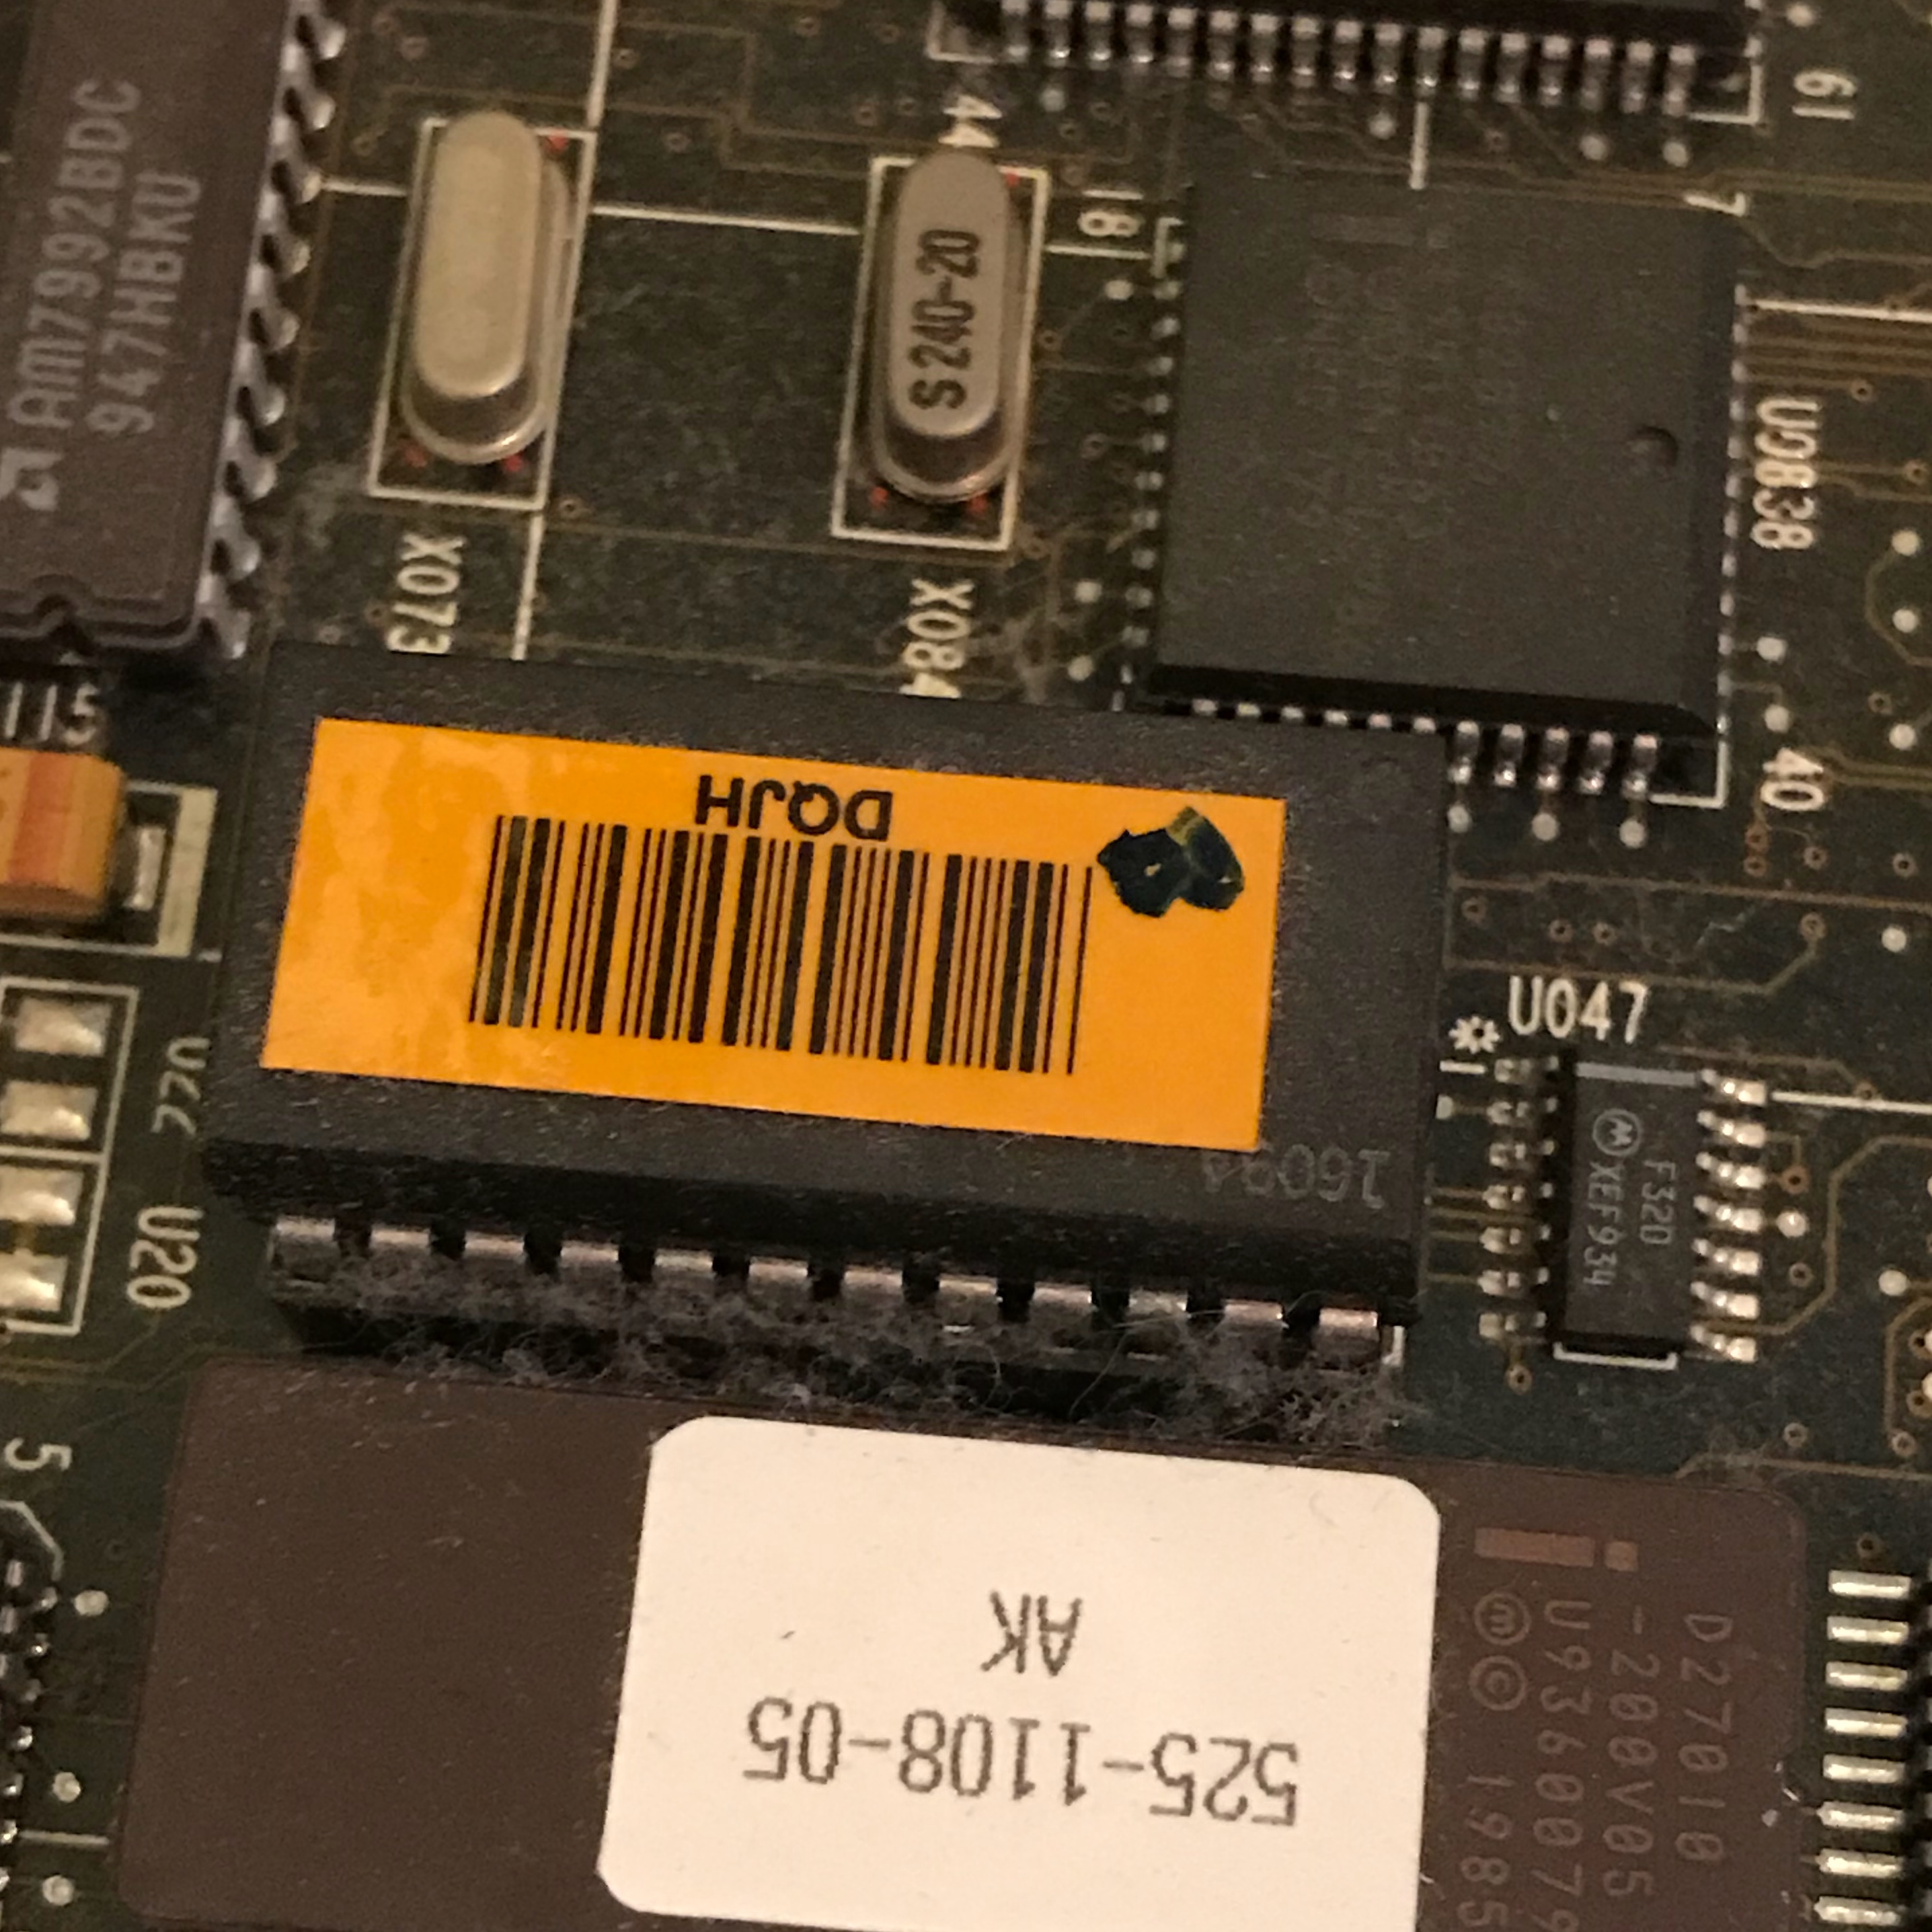
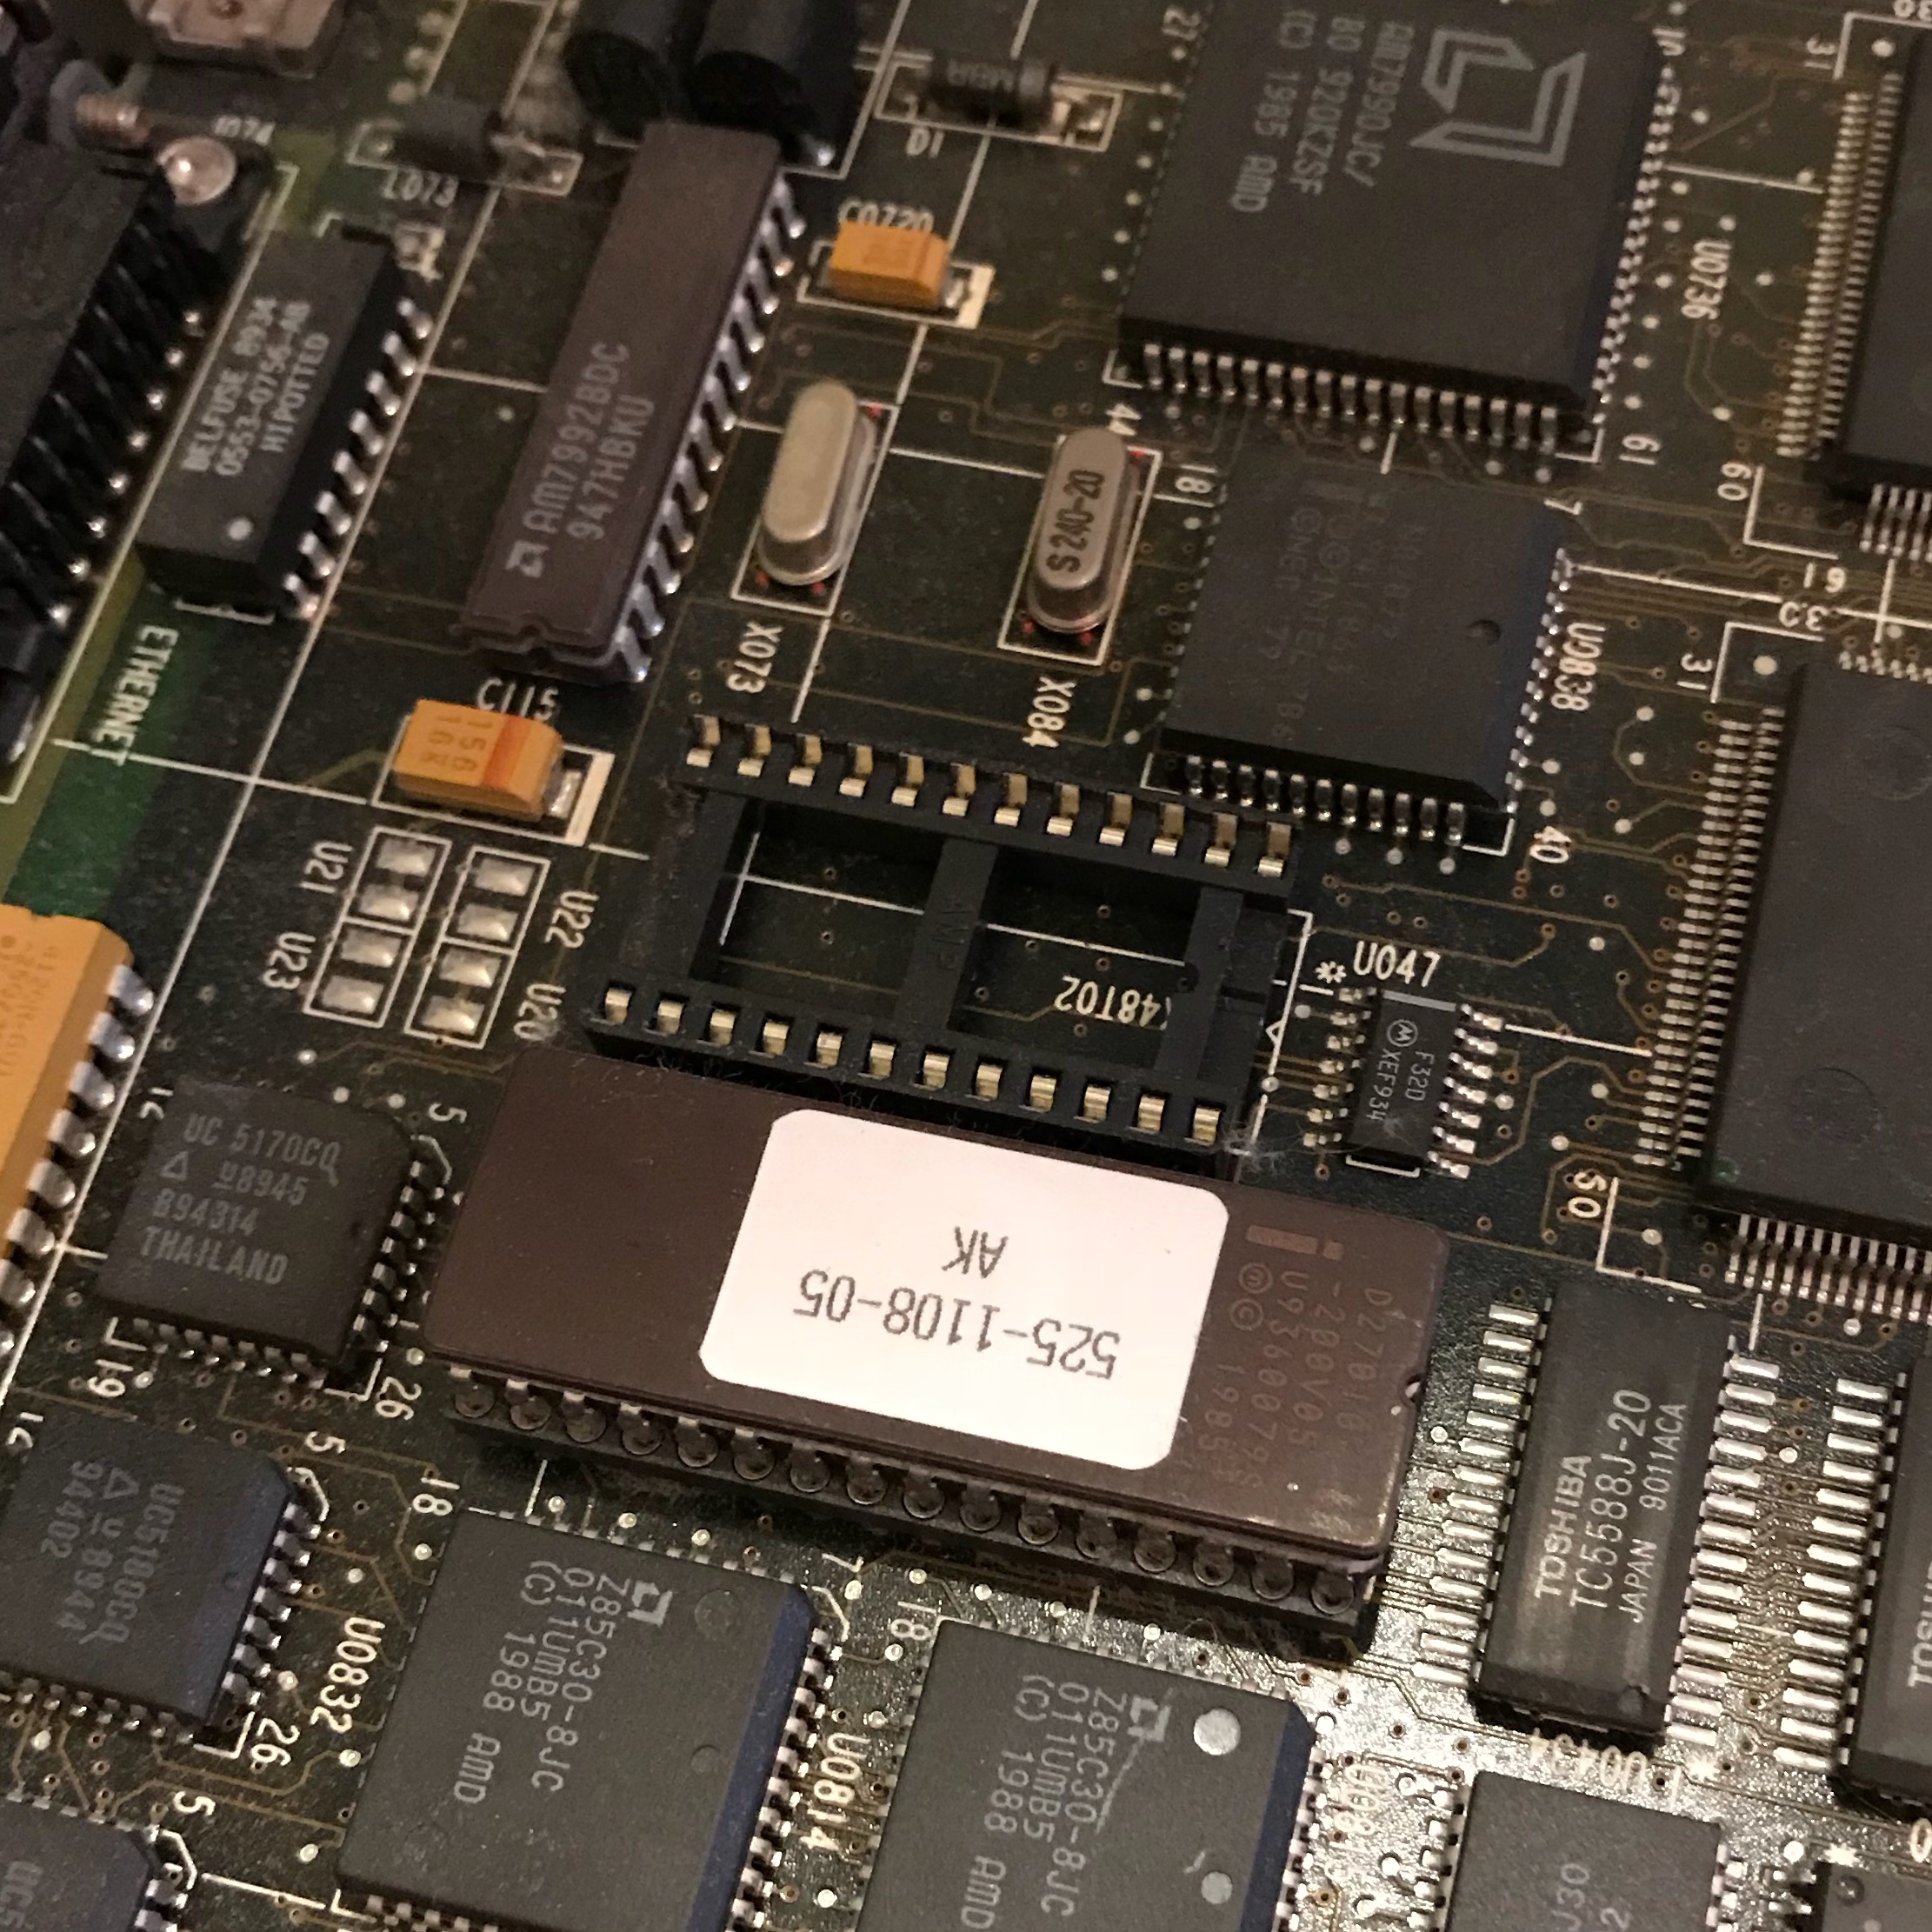
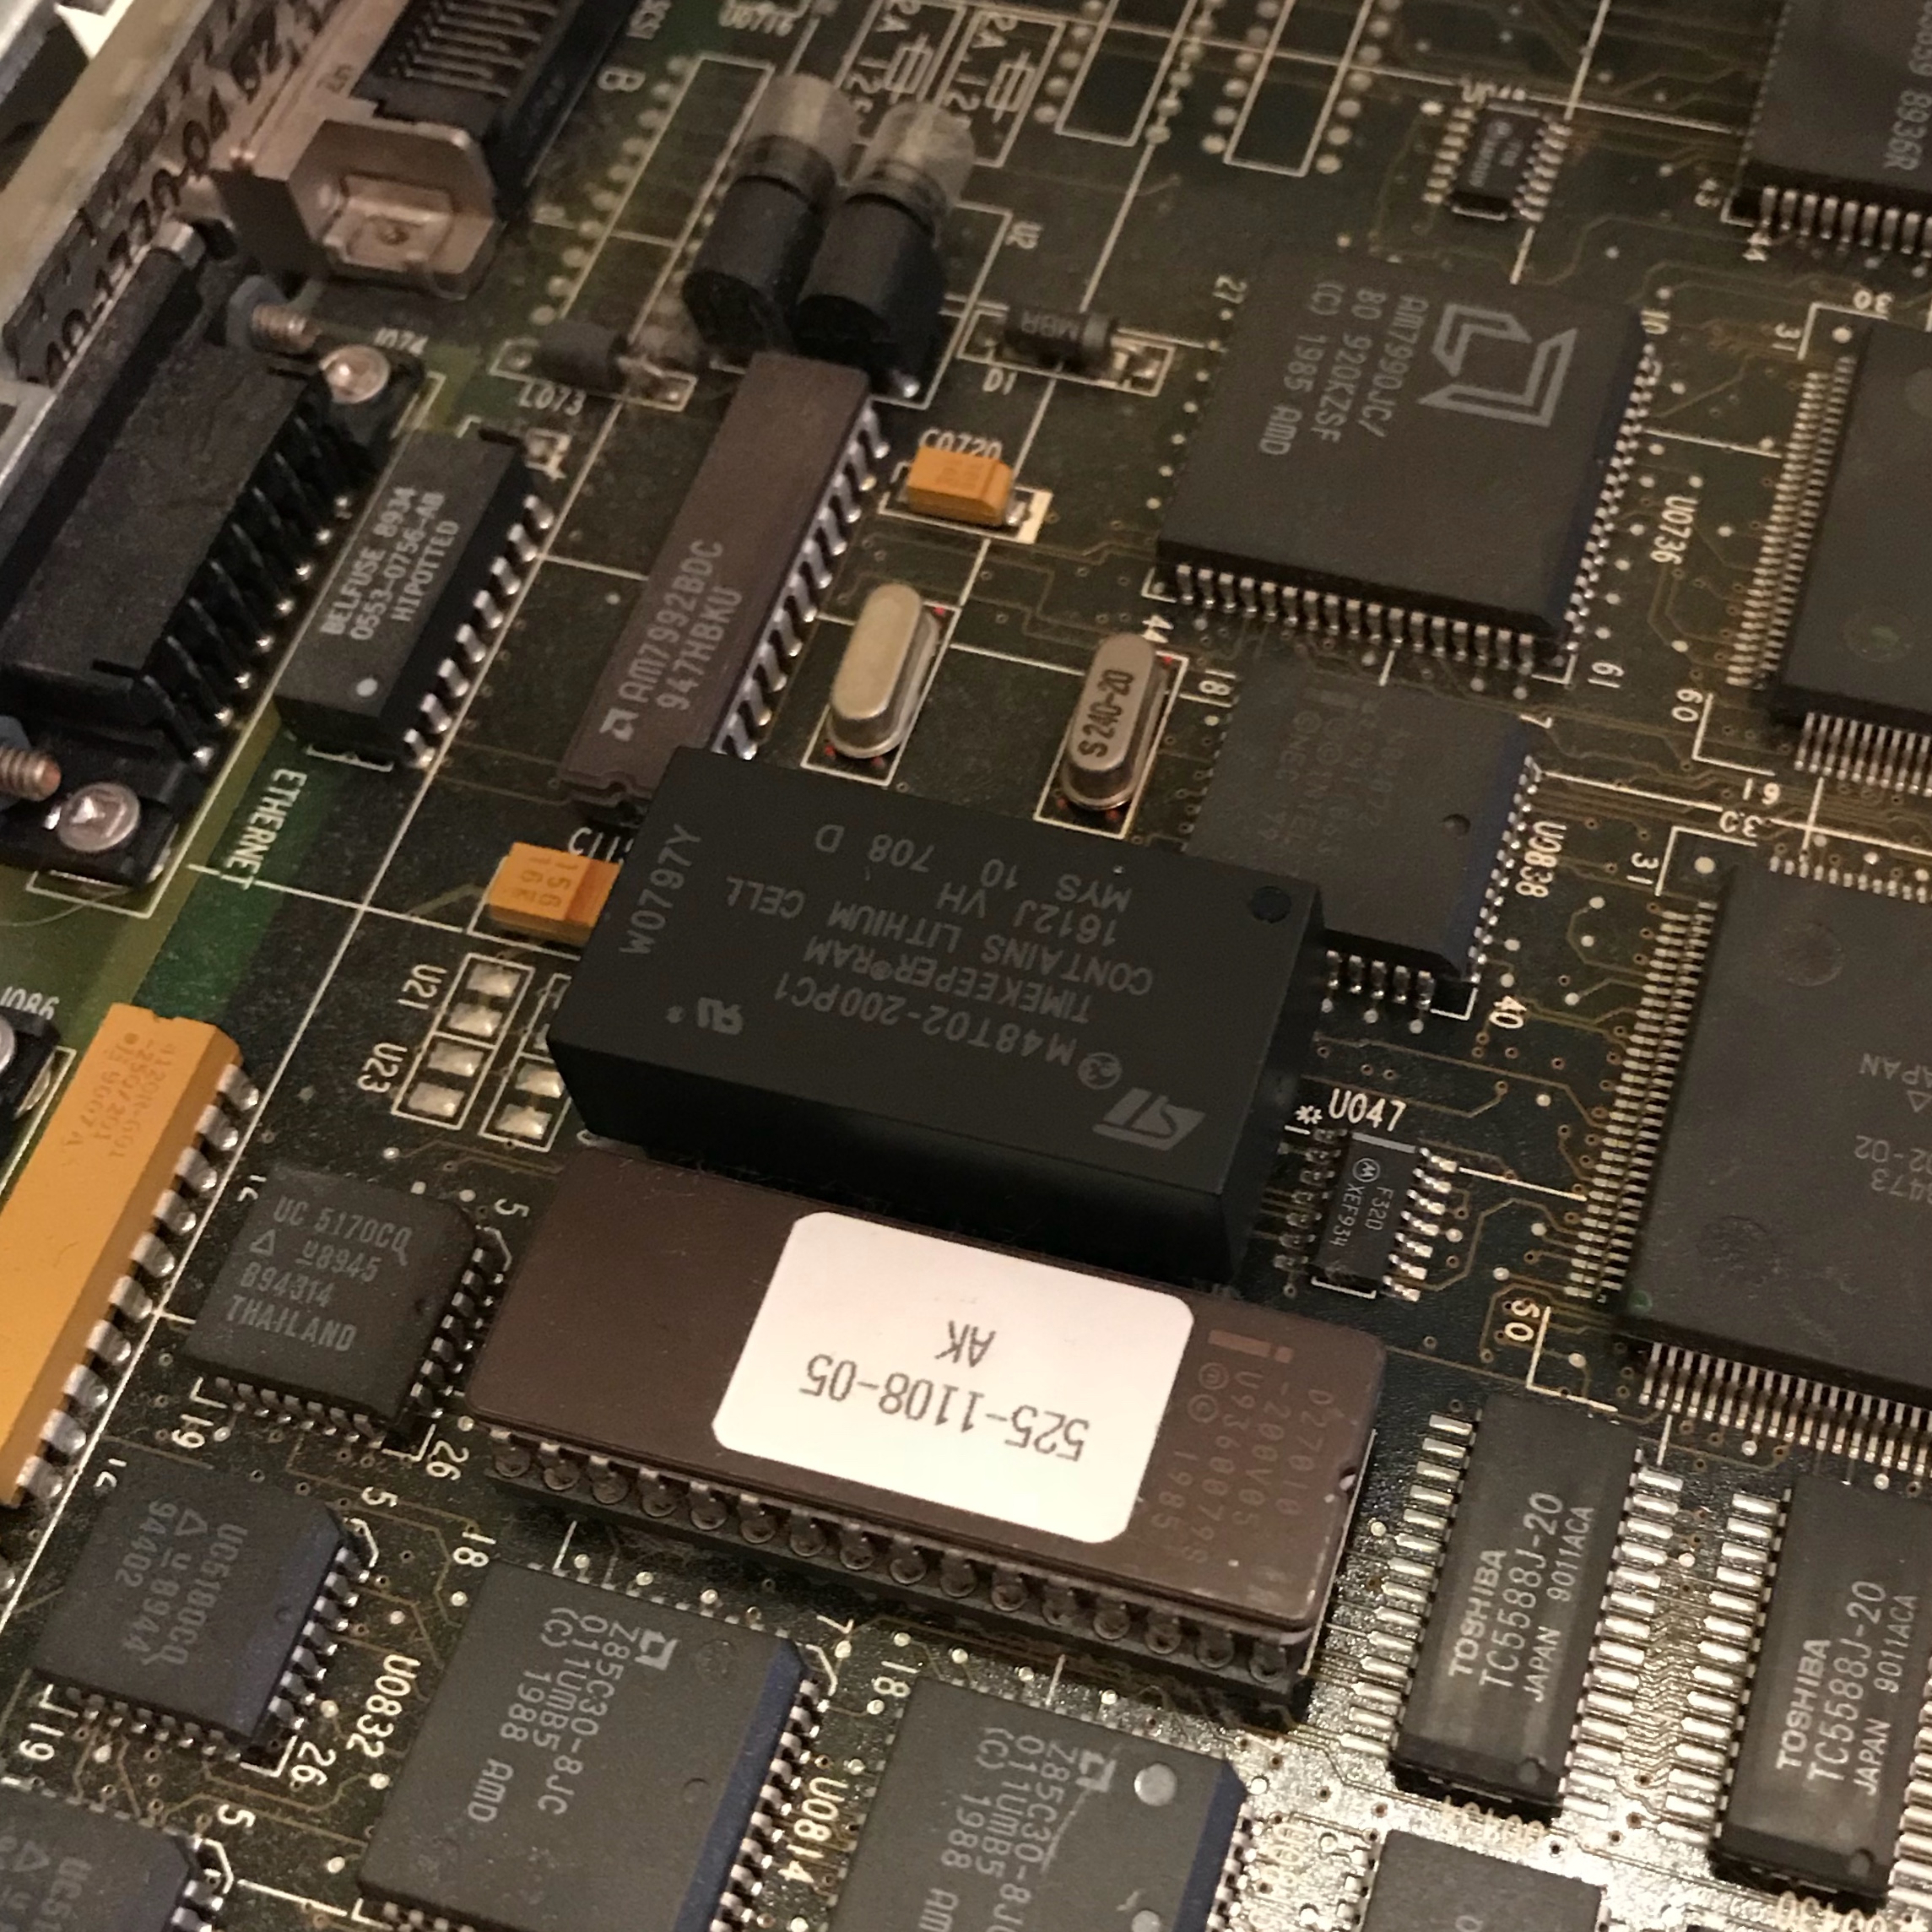
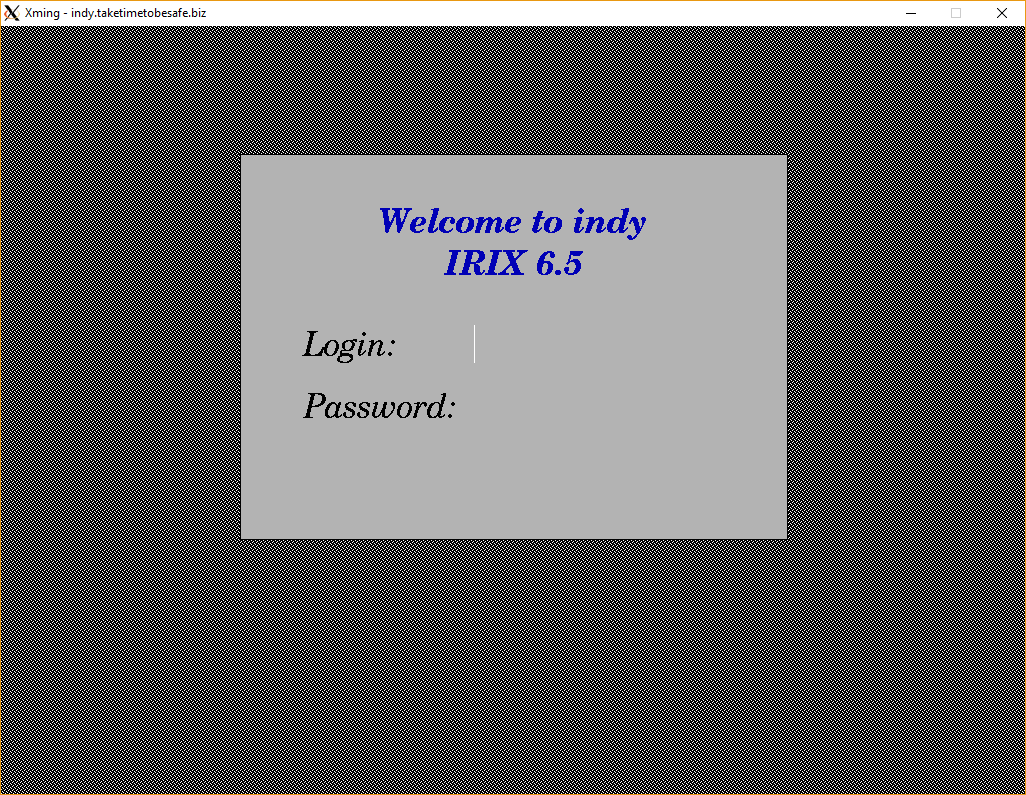
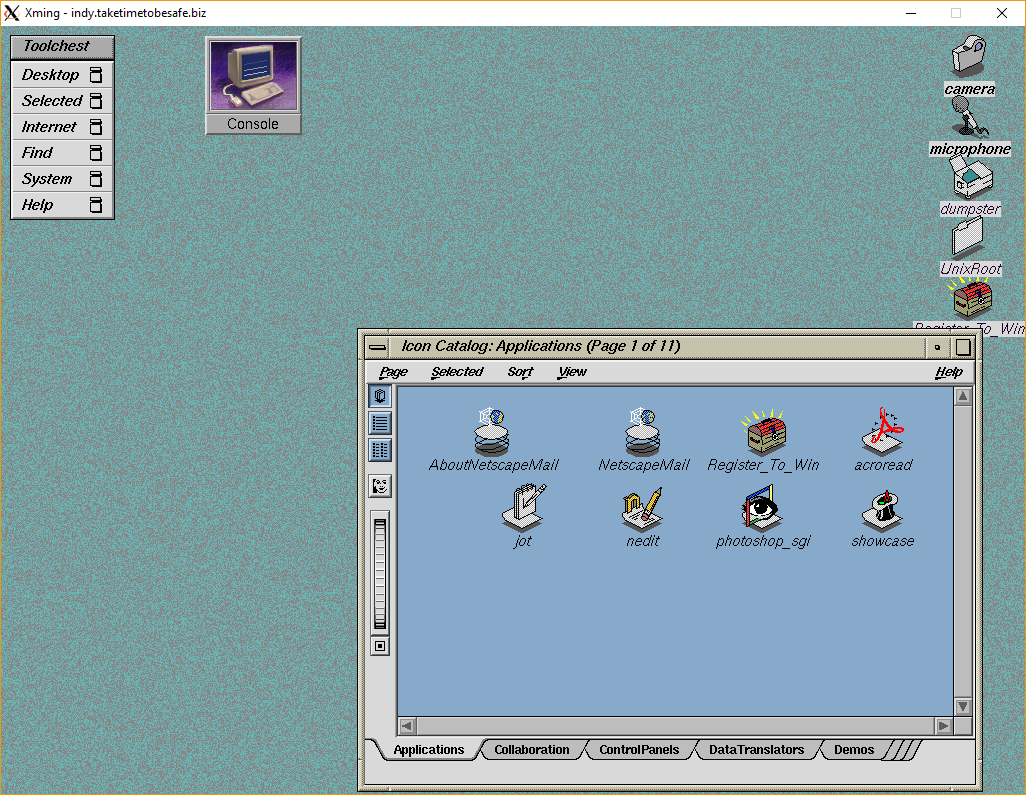
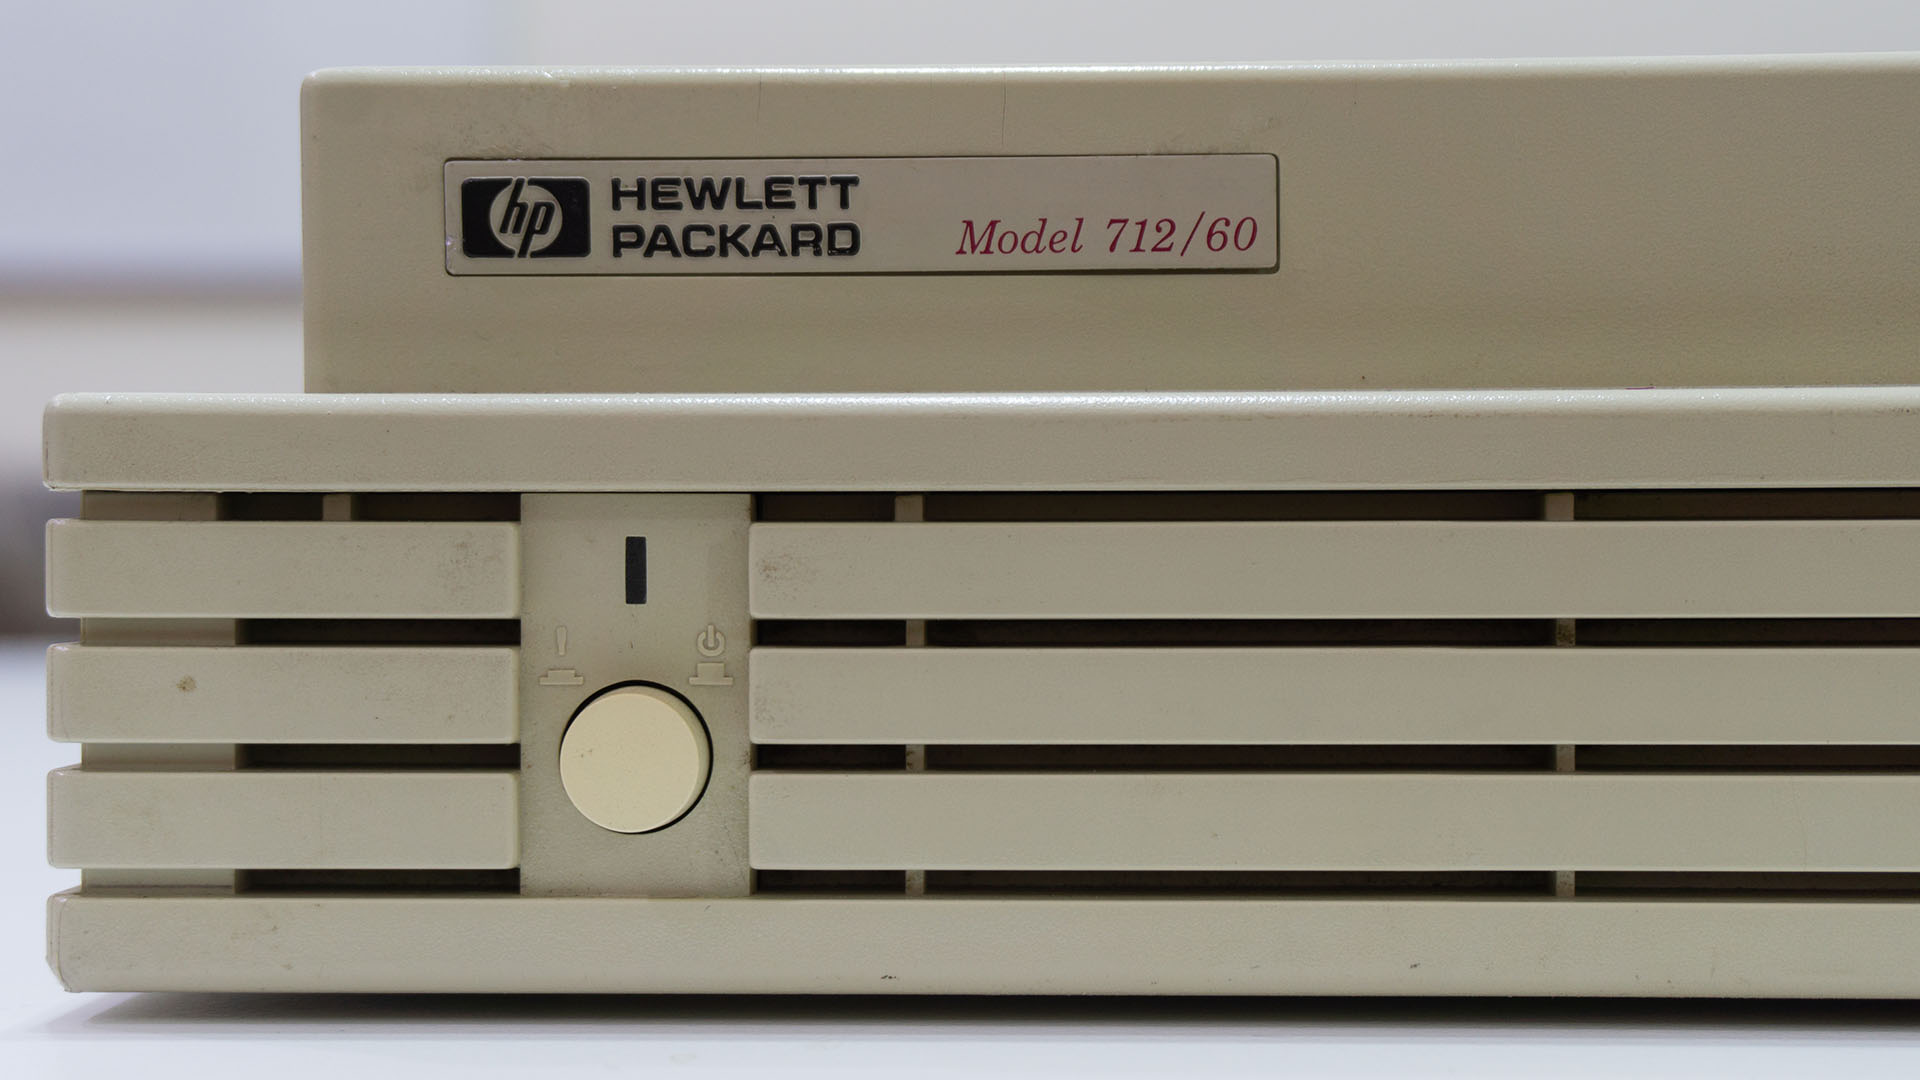